| The Subdivide tool splits a face into quads (four-sided faces) or tris (three-sided faces). This tool provides a quick way to add detail to your surface in the form of additional faces. These faces should not, however, be confused with subdivision surfaces (covered in Chapter 9). In the next task, you'll combine the Subdivide and Extrude Face tools to create a door. To subdivide a polygon face: 1. | Choose Create > Polygon Primitives > Cube.
| 2. | Scale the cube to the shape of a door ( Figure 8.86 ).>
Figure 8.86. The cube is scaled to the shape of a door. 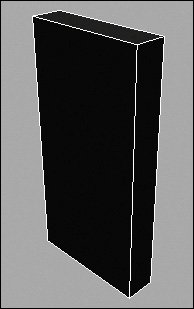
| 3. | Right-click the cube, and select Face from the marking menu.
| 4. | Select the face on the front of the cube.
| 5. | Choose Edit Polygons > Subdivide.
The face splits into four faces ( Figure 8.87 ).
Figure 8.87. The face is subdivided into four smaller faces. To subdivide a face into more faces, select Edit Polygons > Subdivide > Options, and adjust the Subdivision Levels setting. 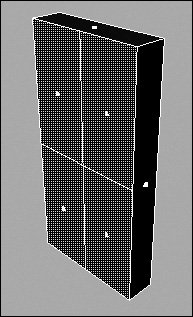
| 6. | Choose Edit Polygons > Extrude Face.
The manipulator and new faces appear.
| 7. | Scale the faces down a little using the Manipulator tool ( Figure 8.88 ).
Figure 8.88. The extruded faces are scaled down relative to their centers. 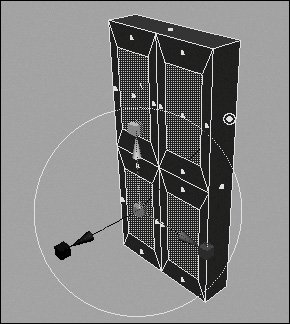
| 8. | Choose Edit Polygons > Extrude Face again.
The manipulator and new faces appear.
| 9. | Scale the new faces down a little, and move them in toward the middle of the object, which should now look like a door with four panels ( Figure 8.89 ).
Figure 8.89. A completed four-panel door. If you selected the face on the opposite side of the door before performing the Subdivide function, the same steps would model the back side of the door simultaneously. 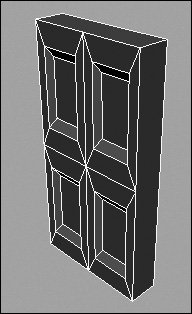
|
The Poke Faces tool is similar to Subdivide in that it cuts the selected face into new faces. However, unlike the Subdivide tool, which cuts quad faces into quads, the Poke Faces tool subdivides quad faces into tris. This is useful in low poly modeling when you wish to round off a face a bit or create tris instead of quads. To poke the face of a polygon using the Poke Faces tool: 1. | Create a primitive polygon cube.
| 2. | Right-click the cube's surface, and select Face from the marking menu.
| 3. | Select one or more faces to poke ( Figure 8.90).
Figure 8.90. The selected face is the face that will be split with the Poke Faces command. 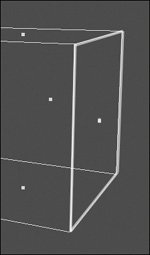
| 4. | Choose Edit Polygons > Poke Faces.
Each selected face is split into four faces ( Figure 8.91 ).
Figure 8.91. Each selected face is split into four faces, each one a perfect triangle. 
| 5. | Select the manipulator, and move it away from the surface.
A pyramid-like shape appears as the manipulator is pulled away from the surface ( Figure 8.92 ).
Figure 8.92. The Poke Faces tool creates a manipulator at the center point of the poked face, which is used to push the new geometry into, or pull it away from, the surface. 
|
When you build a polygonal model one face at a time, you need to connect those faces by merging two vertices or edges into one. However, the polygon tools only work on components in the same mesh, so you must first combine the separate faces into one mesh. To combine two poly objects: - With both objects selected, select Polygons > Combine. The surfaces are highlighted in one color, indicating that they're one mesh.
To merge vertices: 1. | Select the surfaces ( Figure 8.93 ), and choose Polygons > Combine.
Figure 8.93. Select two separate polygon meshes. 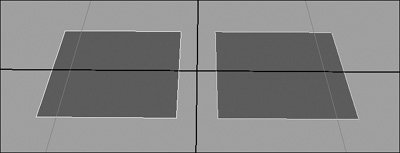
| 2. | Right-click the surface, and select Vertex from the marking menu.
| 3. | Select the vertices you wish to merge ( Figure 8.94 ).
Figure 8.94. Select two vertices to merge using the Merge Vertices tool. 
| 4. | Choose Edit Polygons > Merge Vertices.
The Merge Vertex Options dialog box opens ( Figure 8.95 ).
Figure 8.95. Set the Distance to 1 in the Merge Vertex Options dialog box. 
| 5. | In the Merge Vertex Options dialog box, adjust the Distance slider so that it spans the space between the selected vertices (in this case, a value of 1).
| 6. | Click Apply.
The two vertices merge ( Figure 8.96 ).
Figure 8.96. The result of merging two vertices. 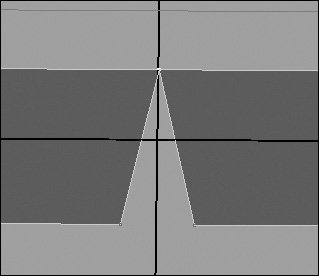
|
 Tip Tip
When you're merging multiple vertices, don't set the distance too high. Your points will merge if the distance between them is smaller than the distance set by the slider. To ensure this doesn't happen in unwanted areas, make sure the vertices you're joining are positioned close together and that the Distance slider is set as low as possible.
To merge edges: 1. | Select the surfaces, and choose Polygons > Combine.
The surfaces are highlighted in one color, indicating that they're one mesh.
| 2. | Choose Edit Polygons > Merge Edges Tool.
The cursor changes to an arrowhead ( Figure 8.97 ).
Figure 8.97. The cursor changes to an arrowhead when you select the Merge Edges tool. 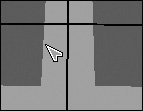
| | | 3. | Click a border edge of one of the faces.
The selected edge turns tan, and violet arrow shapes appear on all the edges that are available for merging ( Figure 8.98 ).
Figure 8.98. The potential target edges have arrows assigned to them. 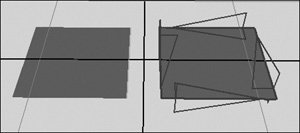
| 4. | Click one of the available edges, and press  . .
The two edges merge, if they're close enough ( Figure 8.99 ).
Figure 8.99. The result of merging edges. 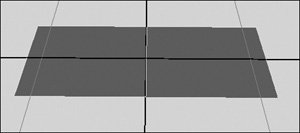
|
Tips - When you're merging vertices, you can accidentally create faces on the inside of your model (merging the vertices surrounding the faces of two cubes, for instance). Doing so creates geometry that can't be converted, among other things. To avoid this situation, use Merge Edges as much as possible, and keep alert when using Merge Vertices. Look at things in wireframe to ensure no internal geometry.
When you're editing a mesh, you may wish to remove a face without deleting it. You can select and delete most component types of a polygonal mesh, but deleting a face usually leaves a hole. However, the Merge to Center tool combines Delete Face and Merge Vertices into one command. This tool removes the selected faces or edges and then draws the surrounding vertices into a point without leaving a hole. The Merge to Center tool is very useful in low poly modeling. To merge the faces of a cube: 1. | Create > Polygon Primitives > Cube.
| 2. | Right-click the cube, and select Face from the marking menu.
| 3. | Select a single face on the cube ( Figure 8.100 ).
Figure 8.100. Select a face to merge. 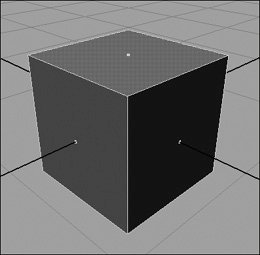
| 4. | Select Edit Polygons > Merge to Center.
The selected face is removed, and the remaining vertices are drawn into a single point ( Figure 8.101 ).
Figure 8.101. The result of merging the face. 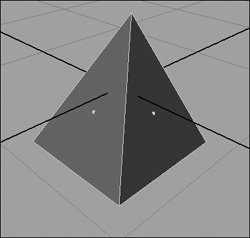
|
|