| Generating surfaces from curves is only one way to create the shape you want. There are many options for blending, joining, and matching two or more surfaces, including attaching, aligning, Booleans, and filleting. These tools let you make complicated shapes that would not be achievable from a single NURBS surface. Boolean operations take two objects and create a new object based on the intersection of those objects. There are three type of Booleans: Intersection, Union, and Subtraction. To create a Boolean surface: 1. | Create two overlapping NURBS objects.
In this example, we've created a primitive sphere and cylinder (Figure 7.99).
Figure 7.99. Boolean objects must intersect, because the operation is based on the overlapping areas. 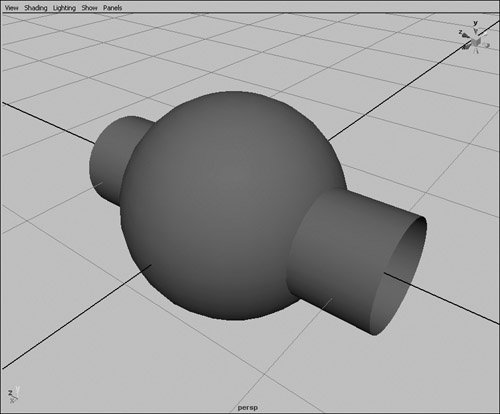
| 2. | Choose Edit NURBS > Booleans > Subtract tool.
| 3. | Click the sphere, and press  . .
The sphere is now your base object, and Maya prompts you (Figure 7.100) to select a second object.
Figure 7.100. The helpline prompts you with instructions for multi-part tools. 
Sculpt Geometry Tool Maya has a Sculpt Geometry tool for all three geometry types (polygons, NURBS, and subdivision surfaces). This tool lets you "paint" on your surface, pushing and pulling like a sculptor. Sculpting geometry can be much more intuitive than building something piece by piece, and you can quickly use it to rough out an organic shape, or add details to an existing model. Keep in mind that your surface geometry must be very dense for this tool to work correctly. |
| | | 4. | Click the cylinder, and press .
The area where the cylinder overlapped the sphere is subtracted from the sphere (Figure 7.101).
Figure 7.101. The area outside the sphere has been trimmed from the cylinder, and the area inside the cylinder has been trimmed from the sphere. 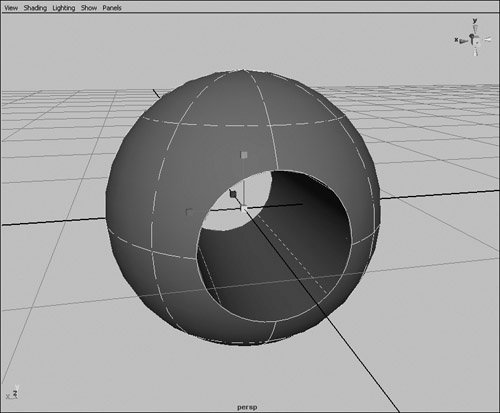
Selecting one of the other operations, such as Union or Intersection, results in different geometry outputs (Figure 7.102).
Figure 7.102. From left to right: Subtraction, Union, Intersection. 
|
 Tips Tips
Joining together or aligning two surfaces is important in maintaining an object that doesn't appear to have seams or creases. The surface direction and number of isoparms can affect how surfaces attach or align. Objects can be difficult to stitch together if they have different numbers of isoparms or surface directions that aren't the same (Figure 7.103). Rebuilding a surface can help match surfaces in surface direction, in the number of isoparms they contain, or both. Figure 7.103. The mismatched isoparms in these planes create a mesh that is too dense when attached. 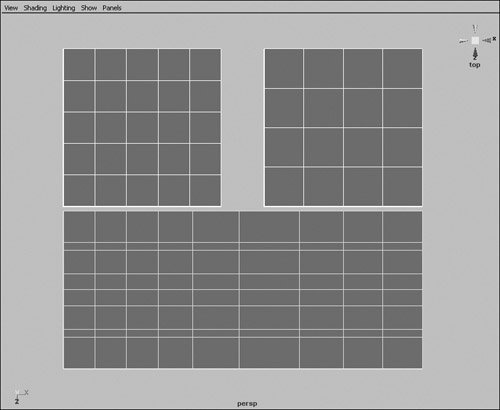
To rebuild a surface for stitching: 1. | Select an open NURBS surface you wish to rebuild.
For this example, the surface is a plane, and the target surface to match is an additional plane with five spans per side.
| 2. | From the Edit NURBS menu, select the box next to Rebuild Surfaces.
The Rebuild Surface Options dialog box appears (Figure 7.104).
Figure 7.104. The Rebuild Surface tool is a powerful option for matching and adjusting surfaces. 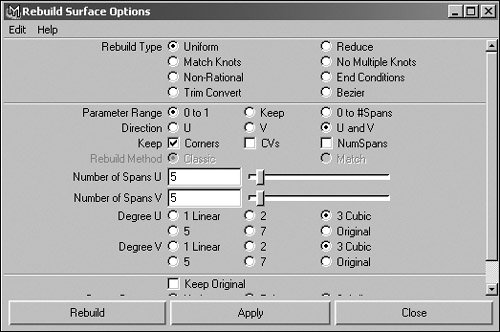
| | | 3. | Enter 5 in both the Number of Spans U and Number of Spans V input fields, and click Rebuild.
The surface (see Figure 7.102) now matches the other plane (Figure 7.105).
Figure 7.105. The right-hand plane now matches the left-hand plane, and will attach efficiently. 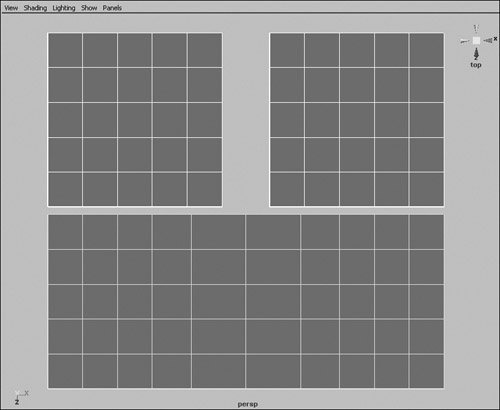
|
To attach two surfaces: 1. | Select two NURBS surfaces you want to attach (Figure 7.106).
Figure 7.106. Select two NURBS surfaces you want to connect. 
Your selection order determines which surfaces will be moved or altered during the attachment process.
| 2. | From the Edit NURBS menu, select the box next to Attach Surfaces.
The Attach Surface Options dialog box appears.
| 3. | Deselect Keep Originals, and click Attach.
The two surfaces are blended into one surface (Figure 7.107).
Figure 7.107. Two NURBS surfaces attached into one. The center isoparm is by default an even average of the two edges that were joined. 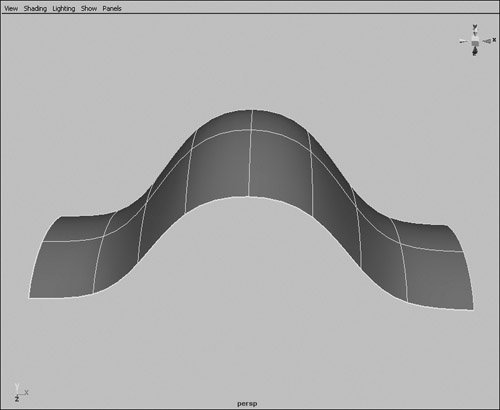
|
To fillet two surfaces: 1. | Create a primitive NURBS plane and cylinder.
| 2. | In the Channel Box, enter 5 for the Scale X and Scale Z attributes of the plane and 1 for the Translate Y attribute of the cylinder.
The cylinder now rests on the plane (Figure 7.108).
Figure 7.108. Position the objects so that they're touching. 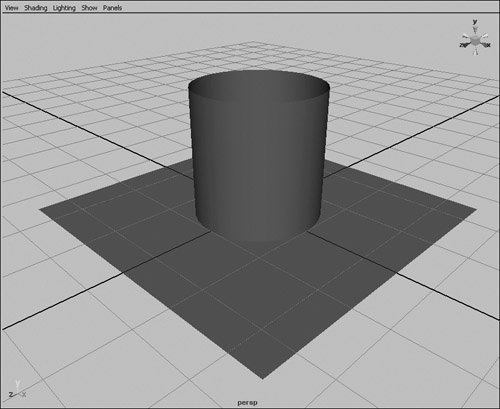
| 3. | Choose Edit NURBS > Surface Fillet > Circular Fillet.
A new surface smoothly blends between the cylinder and the plane (Figure 7.109).
Figure 7.109. Fillets blend between two surfaces and maintain tangency. 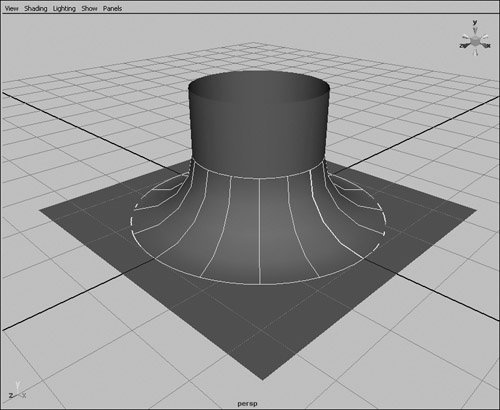
|
Tips
Duplicating surface curves Generating curves from an existing surface is a good way to place curves precisely where you need them. For example, you can loft a new surface so that it matches up with another surface you have created. Doing so effectively adds to the original object and makes the two surfaces easy to attach later if you want (Figure 7.110). Figure 7.110. The central object was lofted from curves generated from the basic cylinders. 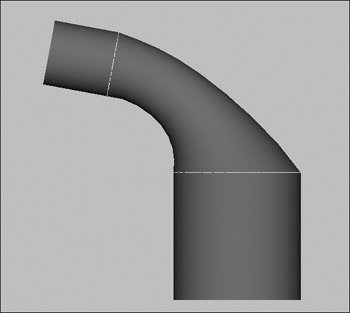
To duplicate surface curves: 1. | Create and select a primitive cylinder.
| 2. | From the Edit Curves menu, select the box next to Duplicate Surface Curves.
The Duplicate Surface Curves Options dialog box appears (Figure 7.111).
Figure 7.111. Select the U direction. This only duplicates curves that run in the U direction of the surface. 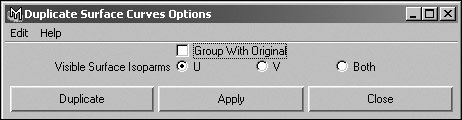
| 3. | Select the U direction, and click Duplicate.
The circular curves are duplicated (Figure 7.112) and can now be used to form surfaces (Figure 7.113).
Figure 7.112. A curve has been created for each isoparm that spanned the U direction of the surface. 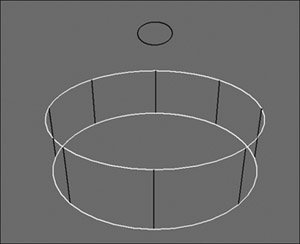
Figure 7.113. Selecting the curve at the top and lofting from it creates a surface that is exactly lined up with the original. 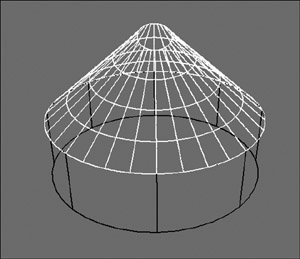
|
|