Combining Materials


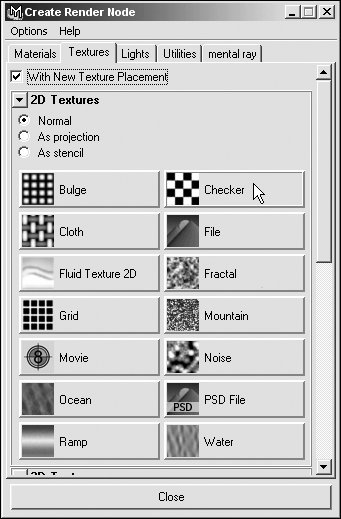
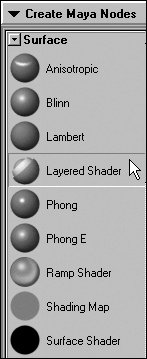
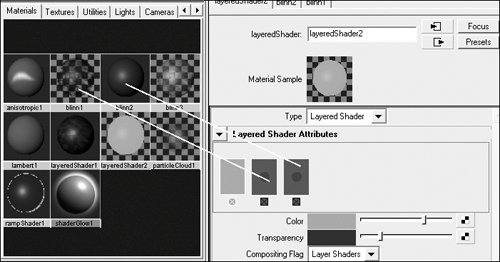
Objects in Maya can have only one material assigned to them. A layered shader is a special case that stacks other materials on top of each other, allowing for more complicated surfaces.

To create a layered shader:

1.

Choose Create > NURBS Primitives > Sphere.

2.

Create two blinn materials; color one red and one blue.

3.

Open the Hypershade, and double-click the blue blinn material.

4.

Click the Map icon next to the Transparency slider.

5.

Click Checker in the Textures tab of the Create Render Node window (Figure 14.61).

Figure 14.61. You're adding a checker to the Transparency channel so that you can see your red shader through your blue shader.


6.

Under the Create Maya Nodes menu in the Hypershade, click Layered Shader in the Surface section (Figure 14.62).

Figure 14.62. You can click Layered Shader once to create a layered shader, or you can use the middle mouse button to drag the icon into the Hypershade to create it.


7.

Double-click the layered shader material in the Hypershade.

The Attribute Editor for the layered shader material appears.

8.

With the middle mouse button, drag the red and blue materials from the Hypershade into the red square under Layered Shader Attributes (Figure 14.63).

Figure 14.63. You can drag multiple shaders into your layered shader to create layered effects using the transparency of each layer.


9.

Click the x under the original green square to delete it (Figure 14.64).

Figure 14.64. The small x at the bottom of each square is used to remove shaders from your layered shader.


You should now have two blue boxes in the red square under Layered Shader Attributes.

10.

Apply the layered shader to the sphere.

11.

Click the IPR Render icon .

The sphere is now red and blue. The red can be seen through the blue because you added checker to its transparency channel (Figure 14.65).

Figure 14.65. The rendered layered shader has both red and blue coloring.


Tips

  • You must have transparency in the top shader in the layered shader if any of the bottom shader is to be visible. The first shader on the left is the top shader.

  • You can have as many layers as you need in a layered shader.

  • If you use an image map as a top layer, you can use its alpha channel for automatic transparency (Figure 14.66).


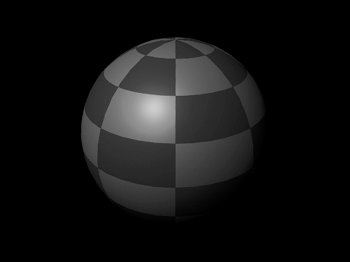
Figure 14.66. The left plane has on it an image with an alpha channel. The middle one has a checker texture. On the right, they're combined in a layered shader. The textures show through the alpha of the first image. This only works in normal application mode.


Maya 7 for Windows and Macintosh(c) Visual Quickstart Guide
Maya 7 for Windows & Macintosh
ISBN: 0321348990
EAN: 2147483647
Year: 2006
Pages: 185

flylib.com © 2008-2017.
If you may any questions please contact us: flylib@qtcs.net