| Maya offers several types of materials, including Lambert, Blinn, Phong, Layered, Ocean, Ramp, and Anisotropic. Each material type has its own options and reflects light in a unique fashion. Lambert, for example, has no specular highlight, so it's matte, while Blinn and Phong both look shiny. Anisotropic is also shiny, but unlike Blinn and Phong, it reflects specular light unevenly (Figure 15.27). Maya also includes two specialty materialsRamp and Layeredwhich we'll cover in this chapter. And finally, the Ocean material, which relates closely to fluid dynamics, is covered in Chapter 16, "Cameras and Rendering." Figure 15.27. Each banana has a different material assigned to it (from left to right): Anisotropic, Blinn, Lambert, Phong, and Phong E. 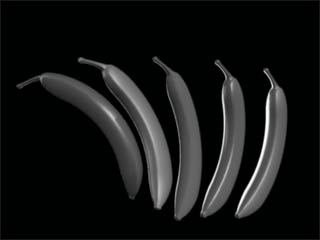
There are several controls that are common to the basic materials. They include color, transparency, ambient color, incandescence, and bump mapping. You can map images to all of these, and most of them can have a color or luminance value assigned to them as well. All are accessible from the Attribute Editor for the corresponding material (Figure 15.28). Figure 15.28. This is the Attribute Editor for a Blinn material. It holds most of the controls that determine the look of the surface. 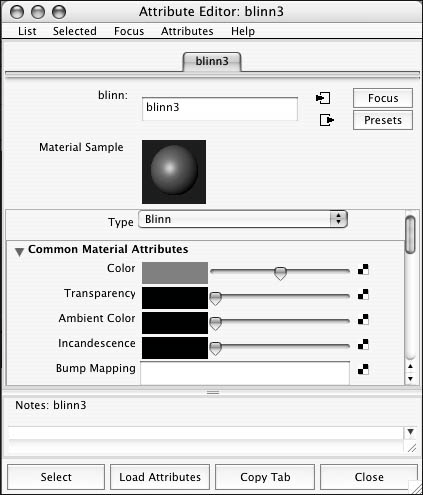
Common material attributes Color simply determines the color of an object. You can pick a color using the Color Chooser, or you can map an image to the color. Transparency allows you to make a surface see-through. You can use the slider to make the surface more or less transparent, or you can map an image to make part of the surface transparent and part of it opaque. This attribute only recognizes luminancethat is, how light or dark an image is. White is transparent; black is opaque (Figure 15.29). Figure 15.29. The node in the lower-right corner is the texture, which was mapped to the plane as a transparency map. The parts of the image that are white determine the parts of the plane that are transparent. 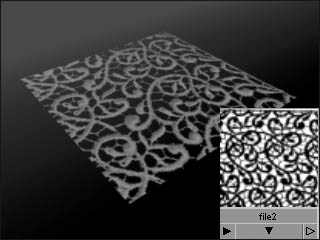
Ambient color allows you to lighten the color of the material. You can lighten the whole surface evenly by using the slider, or you can map an image to the ambient color to lighten only certain parts of a surface. Incandescence gives a material the appearance of having its own light. In general, you need to have a light in a scene for anything to render out. However, if an object has a material on it with the ambient color turned up, it will render out without any lights in the scene. Bump mapping makes a surface appear bumpy. To work, this attribute must have an image mapped to it. The whitest parts of the image will cause the tallest bumps; the black parts of the image will cause the lowest bumps; 50 percent gray will cause no bumps (Figure 15.30). Figure 15.30. The node in the lower-right corner is the texture, which was mapped to the plane as a bump map. The white areas are higher; the dark areas are lower. Render to see the results of a bump map. 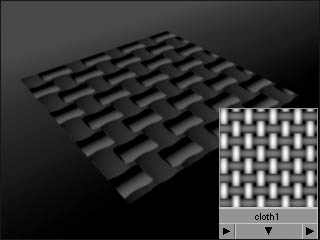
To change the color of an object: 1. | Open the Hypershade and select Create Maya Nodes (if it's not already selected) from the pull-down menu in the Create bar.
| 2. | Click Lambert in the Surface section (Figure 15.31).
Figure 15.31. This is a portion of the Hypershade. When the Lambert button is clicked, a new material node, called lambert2, appears. 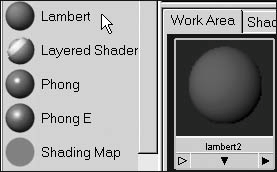
A new material appears in the work area (the lower half of the window).
| 3. | Double-click the new material.
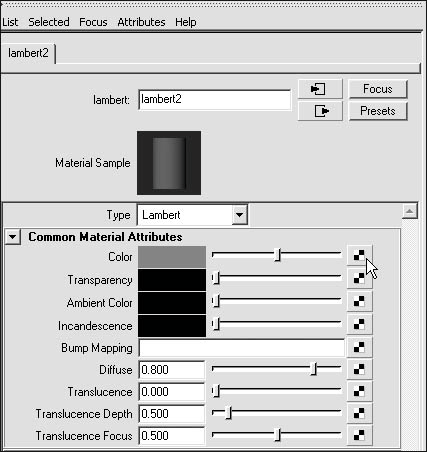
The Attribute Editor for this material appears (Figure 15.32).
Figure 15.32. This is the Attribute Editor for the material that was just created in the Hypershade. 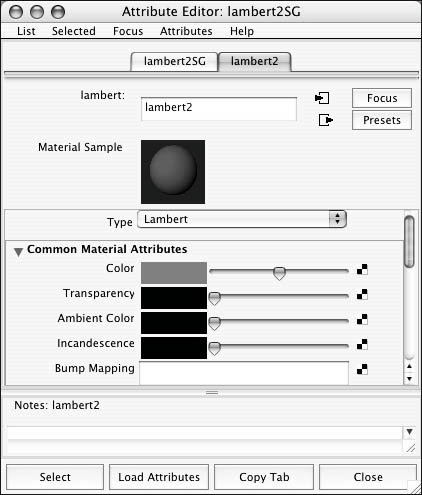
| 4. | Click the field next to Color.
The Color Chooser opens (Figure 15.33).
Figure 15.33. The Color Chooser lets you select a color from the swatches at the top or from the color wheel. 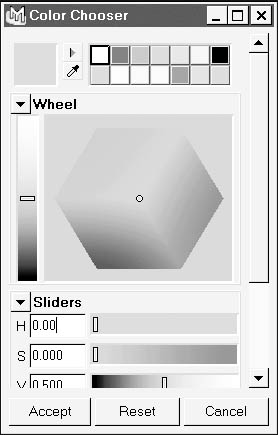
| 5. | Choose a color by clicking one of the color swatches at the top of the window or by clicking in the color wheel.
| 6. | Click Accept.
The Color Chooser window closes.
| 7. | With the middle mouse button, drag the material from the Hypershade onto the surface.
or
Select the surface, right-click the material to open the Marking menu, and select Assign initialShadingGroup To Selection (Figure 15.34).
Figure 15.34. When you right-click a material in the Hypershade, a Marking menu appears that allows you to assign that material to the selected surface. This is a particularly convenient method if you're assigning shaders to multiple surfaces simultaneously. 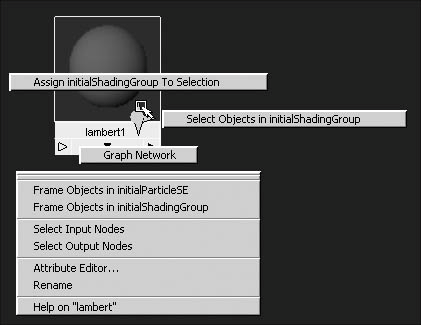
|
 Tip Tip
If you assign a shader to a surface by using the middle mouse button to drag it from the Hypershade, be sure that the view you drag it into is in shaded mode. If it were in wireframe mode, you would need to drag it precisely onto an isoparm or edge of the surface, which is more difficult. However the drag method of assigning textures will only allow you to assign a shader to one object at a time. In most cases it's easier to use the Marking menu since it allows you to assign a shader to many objects or groups.
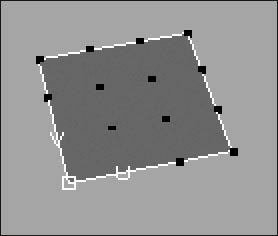
About texture-mapping NURBS surfaces A NURBS surface is always four-sided. Even a sphere is four-sidedit's pinched at the top and bottom, and the other two sides meet. NURBS surfaces have U and V directions. In a plane, the U direction extends from left to right, and the V direction extends from bottom to top. This makes the lower-left corner the start point (Figure 15.35). Figure 15.35. On this plane, the CVs are visible, and you can easily see the U and V directions. The square at lower left is the start point; the U is to the right of it, and the V is above it. This means that the U direction goes from left to right, and the V direction runs from bottom to top. 
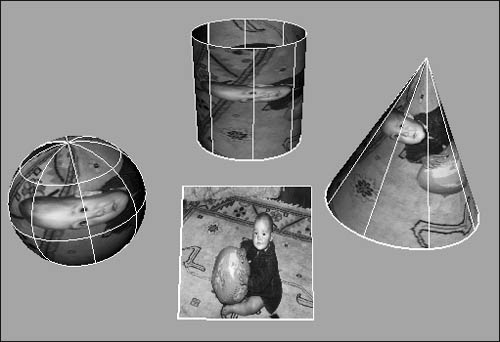
Any image you bring in is also four-sided since image files are square or rectangular. The lower-left corner of the image is placed at the start point of the surface. The bottom of the image is mapped on the surface along the U direction, and the left side of the image is wrapped along the V direction (Figure 15.36). Figure 15.36. The same image is assigned to different NURBS surfaces. It gets wrapped around the surface, and its orientation depends on the U and V directions of the surface. 
Once the image has been placed on the surface, you can move, rotate, and repeat it. If you want to place one image over two or more surfaces, you must use a projection mapwhich is a bit like pointing a slide projector at a surface. Maya comes with several textures, but you can also use your own images. Maya can accept many different image formats, including JPEG, TIFF, and Maya's own format, IFF. To assign an image map from the Shader Library to a NURBS object: 1. | From the Create menu, select NURBS Primitive > Plane.
| 2. | From the Panel menu in any pane, select Panel > Panel > Hypershade to open the Hypershade in the current pane instead of as a free-floating window.
| 3. | Click Lambert in the Create bar of the Hypershade to create a new material.
A new Lambert material appears in the Hypershade.
| 4. | Assign the material to the plane by using the middle mouse button to drag it onto the surface.
| 5. | Click the Shader Library tab, in the lower half of the Hypershade window.
| 6. | Click the Textures folder, in the lower half of the Hypershade.
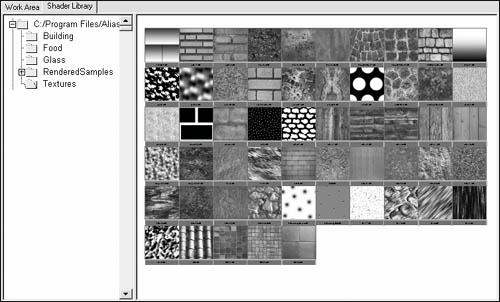
Several textures appear to the right (Figure 15.37).
Figure 15.37. The Shader Library provides several texturesall of which are repeatable, which means that if they're tiled on a surface, there will be no seams. 
| 7. | With the middle mouse button, drag a brick texture onto your new Lambert (probably called lambert2), which is in the top half of the Hypershade.
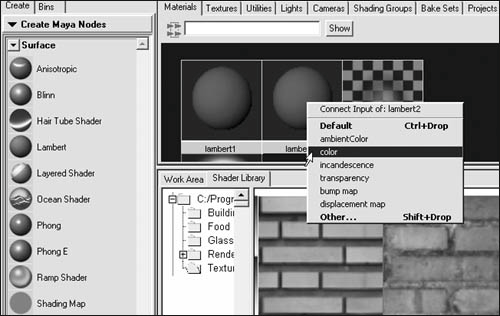
| 8. | From the Marking menu that appears, select "color" (Figure 15.38).
Figure 15.38. When a texture is dragged onto a material, a Marking menu appears that allows you to choose which attribute you want to map the texture to. 
The brick texture appears on the Lambert node and is mapped to the Lambert's color channel.
| 9. | Click in the Perspective view, and press  to switch to textured mode. to switch to textured mode.
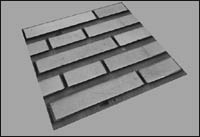
The brick texture shows up on the surface to which it was assigned (Figure 15.39).
Figure 15.39. The brick texture appears on the plane. It's only visible when you're in textured mode. 
|
 Tip Tip
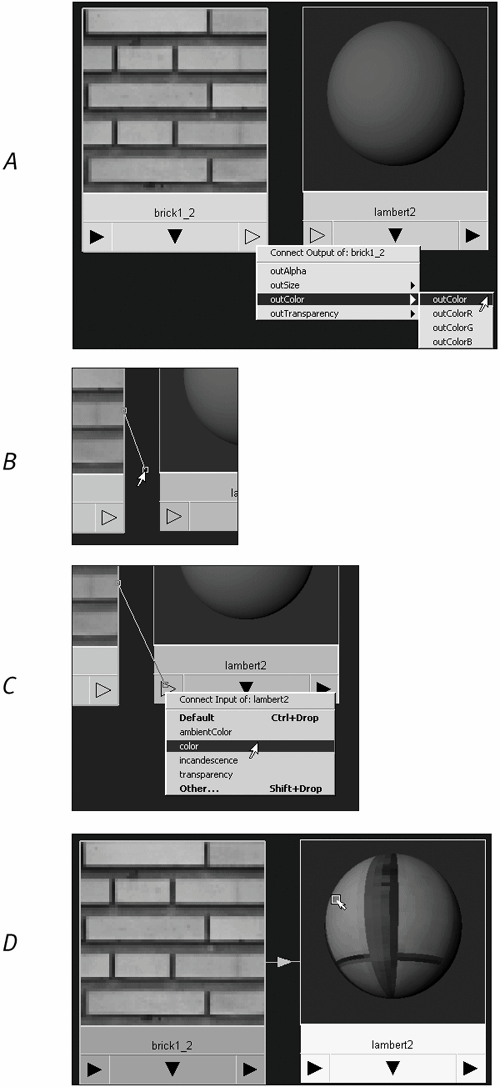
If you don't have a three-button mouse, you can use the Marking menu, but this workaround is a little complicated. Following step 7 in the previous task, click the brick texture so that it appears in the work area. Click the triangle in the lower right corner of the brick texture icon, and from the Marking menu that appears, choose outColor > outColor (Figure 15.40A). A line connects the brick texture to the cursor (B). Now click the triangle in the lower left corner of the lambert2 shader, and from the Marking menu that appears, select color (C). The brick texture appears on the Lambert node, indicating that it is connected to the Lambert's color channel (D). Figure 15.40. (A-D) Click the lower right-hand corner of the brick texture and select outColor from the menu that appears (A). A line from the texture to the cursor indicates that it is ready to be connected to an input (B). Select color by right-clicking the lower left-hand corner of the lambert2 shader (C). The icon of the Lambert shader updates, indicating that the brick texture has been connected (D). 
To assign your own image map to a NURBS object: 1. | From the Create menu, select NURBS Primitive > Plane.
| 2. | Open the Hypershade and click Lambert to create a new material.
A new Lambert material appears in the Hypershade.
| 3. | Double-click the new Lambert you just created in the Hypershade.
The Attribute Editor for the Lambert opens.
| 4. | Click the Map icon, which is to the right of the Color slider (Figure 15.41).
Figure 15.41. By clicking the Map icon, which is the little checkerboard to the right of the slider, you can map a texture to the color. 
The Create Render Node window opens.
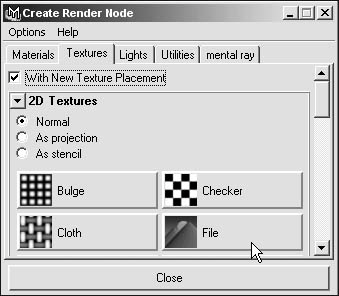
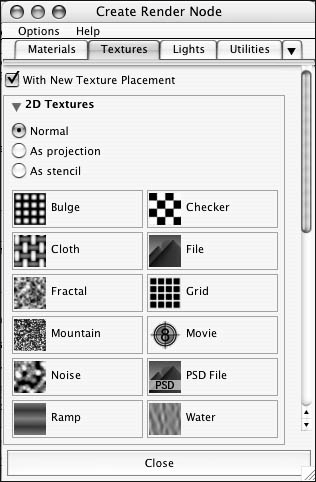
| 5. | Make sure the Normal radio button is selected, and then click File in the Create Render Node window (Figure 15.42).
Figure 15.42. In the Create Render Node window, you can choose which texture you want to map to an attribute of a material. 
The Attribute Editor for the File node opens.
| 6. | Click the Browse button  next to Image Name. next to Image Name.
| 7. | Browse for and open your own image file.
| 8. | With the middle mouse button, drag the Lambert you created from the Hypershade onto your surface.
| 9. | Click in the Perspective view, and press  to switch to textured mode. to switch to textured mode.
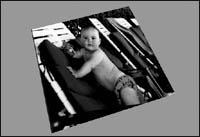
The image you chose is now color-mapped to your surface (Figure 15.43).
Figure 15.43. An image is mapped to the color of the plane. 
|
 Tip Tip
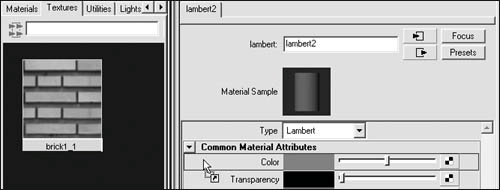
You can similarly map an image to any of the common material attributes. You can also map an image by dragging an existing texture onto the name of an attribute in a material's Attribute Editor (Figure 15.44). Figure 15.44. The file texture in the Hypershade is being dragged with the middle mouse button to the color in the Attribute Editor of a material. This provides a quick and convenient way to make connections. 
You can find your textures more quickly if you place them in the source images folder of your project directory. Maya will default to this directory whenever you use an Open dialog box to assign an image file.
When you first map an image on a NURBS surface, it may not be oriented correctly. You can use the place2dTexture node to rotate, move, and scale the image on the surface. To use place2dTexture: 1. | Map a brick texture to a NURBS plane as you did when assigning an image map to a NURBS object from the Shader Library above.
| 2. | Select the surface.
| 3. | Open the Hypershade and click the Graph Materials on Selected Objects icon  . .
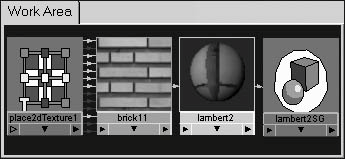
The entire shading network and its connections show up in the work area of the Hypershade (Figure 15.45).
Figure 15.45. In the work area of the Hypershade, we can see all of the nodes that are associated with this material. 
| 4. | Double-click the place2dTexture node, on the left side of the work area.
The Attribute Editor for the place2dTexture node appears.
| 5. | Click the Interactive Placement button in the Attribute Editor for the place2dTexture node. A red square with a dot in the middle appears on the surface.
| 6. | Drag with the middle mouse button, starting from the center point of the interactive placement icon on the object's surface.
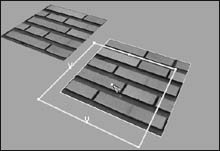
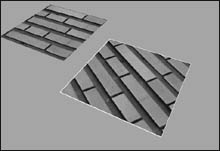
The texture moves on the surface (Figure 15.46).
Figure 15.46. The position of the texture is moved via interactive placement. Compare the bricks' position after they've been moved (lower right) with their original position (upper left). 
| 7. | With the middle mouse button, drag at the corners of the red square. The texture rotates (Figure 15.47).
Figure 15.47. The interactive placement was used to rotate the brick texture. 
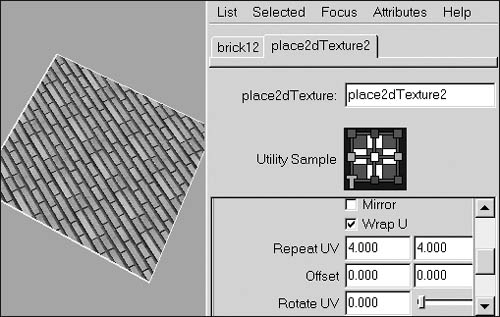
| 8. | Click in the field next to Repeat UV, and type 4. Press  . .
The bricks are repeated four times in the U direction. The column on the left is for U values; the column on the right is for V values.
| 9. | In the field two columns to the right of Repeat UV, type 4. Press  . .
The bricks are now also repeated four times in the V direction (Figure 15.48).
Figure 15.48. By increasing Repeat UV of the place2dTexture to 4 (in the Attribute Editor on the left), you can make the brick texture repeat many times on the surface. 
|
Procedural textures are built into Maya; they do not rely on an image file. Their color and luminance are determined mathematically. One commonly used procedural texture is a ramp, which is like a gradient. To assign a ramp texture to a surface: 1. | From the Create menu select NURBS Primitive > Sphere.
| 2. | In the Channel Box, type 90 in the field next to Rotate X, and press  . .
| 3. | Open the Hypershade and click Phong E.
A Phong E material shows up in the work area.
| 4. | Double-click the Phong E material in the Hypershade.
The Attribute Editor for the Phong E material appears.
| 5. | In the Attribute Editor for the Phong E, material, click the Map button next to the Color slider  . .
The Create Render Node window opens.
| 6. | Click the Ramp button (Figure 15.49).
Figure 15.49. When you click Ramp in the Create Render Node window, a new ramp texture is created and mapped to a material. 
The Attribute Editor for the ramp appears. A ramp texture node also appears in the Hypershade.
| 7. | With the middle mouse button, drag the Phong E from the Hypershade onto the sphere to assign the shader.
If you have trouble finding the Phong E material, click the work area of the Hypershade and press  . This will frame all of the nodes. . This will frame all of the nodes.
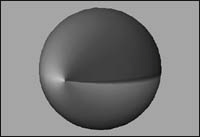
| 8. | Click the Perspective view and press  to see the texture (Figure 15.50). to see the texture (Figure 15.50).
Figure 15.50. This sphere has a ramp textured to its color. 
|
To make the ramp texture look like an eyeball: 1. | Create a material with a ramp texture, and assign it to a sphere as in the previous section.
| 2. | Open the Hypershade, and in the work area, double-click on the ramp texture.
The Attribute Editor for the ramp appears.
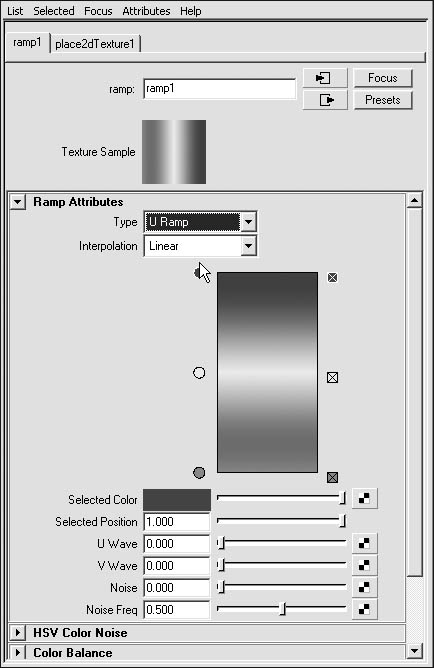
| 3. | In the Attribute Editor for the ramp, change the type to U Ramp.
| 4. | Click and drag the top position indicator down slightly (Figure 15.51).
Figure 15.51. The Attribute Editor for the ramp holds the controls for determining the look of the gradient it produces. Position indicators are the circles to the left of the ramp. They determine where a color is positioned within the gradient. 
| 5. | Change its color to black by dragging the Selected Color slider all the way to the left.
| 6. | Click and drag the middle position indicator, which is green by default, to just below the top one.
| 7. | Click on the ramp about one-fifth of the way down from the top.
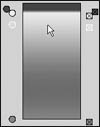
A new position indicator appears (Figure 15.52).
Figure 15.52. When you click in the middle of the ramp, a new position indicator is created. By clicking the square with the X in it to the right of the ramp, you can delete a position indicator. 
| 8. | Click and drag the bottom position indicator up to just below the new one.
| 9. | With the bottom position indicator still selected, click the color swatch next to Selected Color.
The Color Chooser opens.
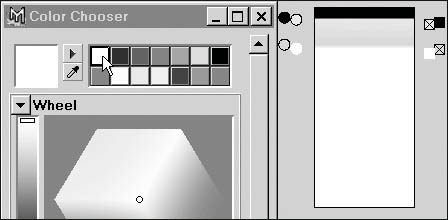
| 10. | Click the white swatch at the top of the Color Chooser (Figure 15.53).
Figure 15.53. The white swatch is selected in the Color Chooser, causing the selected position indicator and the ramp below it to become white. 
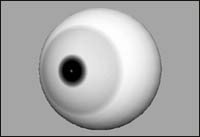
The sphere is now textured like an eyeball (Figure 15.54).
Figure 15.54. The eyeball is complete with a pupil and iris. 
|
In addition to the 2D ramp texture available in past versions, Maya now includes a shadercalled a Ramp shadersimilar to the 2D ramp texture. Like the 2D ramp texture, the Ramp material shader can be used to create more exotic textures such as cartoon shading, which involves creating a shader that renders like a flat 2d cartoon, instead of rendering with the appearance of 3d surfaces, and advanced gradient effects. You can also use the new Ramp shader to produce the same type of eyeball effect as we created in the steps above, making it a worthy addition to your texturing toolset. To create a simple cartoon look on a surface: 1. | From the Create menu select NURBS Primitives > Sphere.
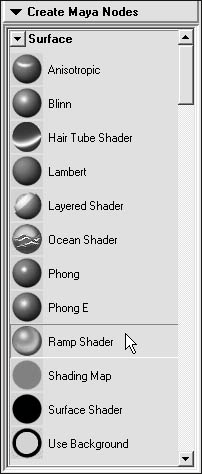
| 2. | Open the Hypershade, and under the Create Maya Nodes menu, click Ramp Shader in the Surface section to create a ramp shader (Figure 15.55).
Figure 15.55. You can create a ramp shader from the Create Maya Nodes drop-down menu. 
| 3. | Double-click the Ramp Shader material in the Hypershade.
The Attribute Editor for the Ramp Shader material appears.
| 4. | Click the Selected Color swatch to open the Color Chooser.
| 5. | Select a color for the shadow area of the sphere.
| 6. | Click Accept to close the Color Chooser.
| 7. | Click once in the Color slider beside Selected Color.
A new color is added to the slider (Figure 15.56).
Figure 15.56. Each time you click in the Color slider you create a new color. 
| 8. | Click the Selected Color swatch and adjust the Value (V) slider to 1.
| 9. | Click Accept to close the Color Chooser.
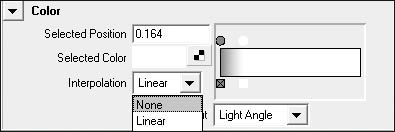
| 10. | Set the Color Interpolation drop-down menu to None.
The None setting changes the gradient between the selected colors to two flat colors with no gradient in-between (Figure 15.57).
Figure 15.57. The ramp will remain a gradient until you set Interpolation to None. 
| 11. | Set Color Input to Brightness.
The Brightness setting flattens out the sphere's color to give the surface a flatter, more cartoon-like appearance.
| 12. | Create two colors in the slider beside the Selected Color section of the Incandescence area. Make the left one white and the right one black (Figure 15.58).
Figure 15.58. Set Interpolation to None to limit the Color slider to only two colors, no gradients. 
| 13. | Set Incandescence Interpolation to None.
| 14. | Apply the material to the surface.
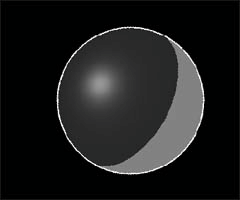
The surface now appears to have flat color inside and a white outline (Figure 15.59).
Figure 15.59. A cartoon-style rendering. 
|
 Tip Tip
For best results, use different shades of the same colors when adding colors to the color sliders. Using shades of color helps to better form the object because when using similar colors, your eye reads those colors as the same surface; whereas using completely different colors makes your eyes jump from color to color.
To create a layered shader: 1. | From the Create menu select NURBS Primitives > Sphere.
| 2. | Create two Blinn materials; color one red and one blue.
| 3. | Open the Hypershade and double-click the blue Blinn material.
| 4. | Click the Map icon  next to the Transparency slider. next to the Transparency slider.
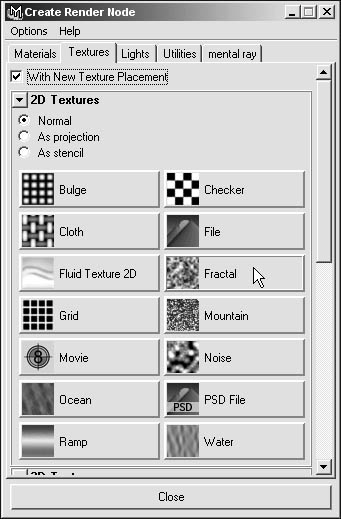
| 5. | Click Fractal in the Textures tab of the Create Render Node window (Figure 15.60).
Figure 15.60. We're adding a fractal to the Transparency channel so that we can see our red shader through our blue shader. 
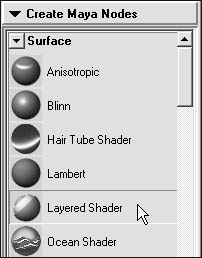
| 6. | Under the Create Maya Nodes menu in the Hypershade, click Layered Shader in the Surface section (Figure 15.61).
Figure 15.61. You can click Layered Shader once to create it, or you can use the middle mouse button to drag the icon into the Hypershade to create it. 
| 7. | Double-click the Layered Shader material in the Hypershade.
The Attribute Editor for the Layered Shader material appears.
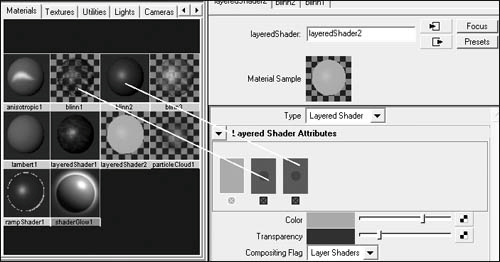
| 8. | With the middle mouse button, drag the red and blue materials from the Hypershade into the red square under Layered Shader Attributes (Figure 15.62).
Figure 15.62. You can drag multiple shaders into your layered shader to create layered effects using the transparency of each layer. 
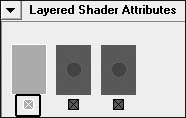
| 9. | Click the x under the original green square to delete it (Figure 15.63).
Figure 15.63. The small x at the bottom of each square is used to remove shaders from your layered shader. 
You should now have two squares in the red square under Layered Shader Attributes.
| 10. | Apply the layered shader to the sphere.
| 11. | From the Window menu, select Rendering Editors > Render View.
| 12. | In the Render view, click the Redo Previous Render icon  . .
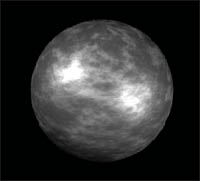
The sphere is now red and blue. The red can be seen through the blue because we added a fractal to its transparency channel (Figure 15.64).
Figure 15.64. The rendered layered shader has both red and blue coloring. 
|
 Tip Tip
To assign a bump map to a surface: 1. | From the Create menu select NURBS Primitives > Plane.
| 2. | Open the Hypershade and create a Lambert.
| 3. | Assign the Lambert to the plane by using the middle mouse button to drag it from the Hypershade to the plane.
| 4. | Double-click the Lambert in the Hypershade.
The Attribute Editor for the Lambert appears.
| 5. | Click the Map button next to Bump Mapping  . .
The Create Render Node window appears.
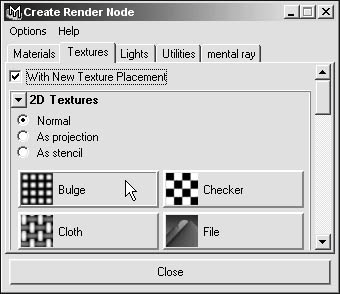
| 6. | Click Bulge (Figure 15.65).
Figure 15.65. Clicking Bulge in the Create Render Node window creates a bulge texture that is mapped to the bump of a material. 
The bulge shows up in the work area of the Hypershade. We'll need to render it to see the resulting bump.
| 7. | From the Create menu, select Lights > Directional Light.
Bump maps show up better with a directional source of light than with ambient light.
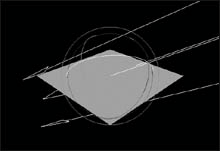
| 8. | Rotate the light so that it points diagonally at the plane (Figure 15.66).
Figure 15.66. A directional light is created and rotated diagonally to the plane. Directional lights make bumps stand out in greater contrast because the light is only coming from one side. 
| 9. | Click the Render icon  , which is near the top right of the interface. , which is near the top right of the interface.
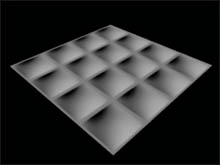
The image renders out into a new window. The bulge is visible on the surface (Figure 15.67).
Figure 15.67. This is a rendered image of a plane with a bulge texture mapped to its bump. Render to see the bumpit does not show up in the Perspective view. 
|
 Tip Tip
To adjust the height of a bump map: 1. | Create a plane with a bump map, as in the previous task, "To assign a bump map to a surface."
| 2. | Select the plane.
| 3. | Open the Hypershade and click the Graph Materials on Selected Objects button  . .
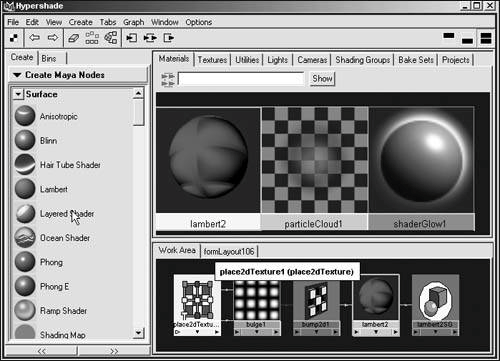
The material with all its connections appears in the work area of the Hypershade (Figure 15.68).
Figure 15.68. All of the nodes associated with the material are visible in the work area of the Hypershade. The utility that controls the height of the bump is in the middle. 
| 4. | Double-click the bump2d node.
The Attribute Editor for the bump2d node appears.
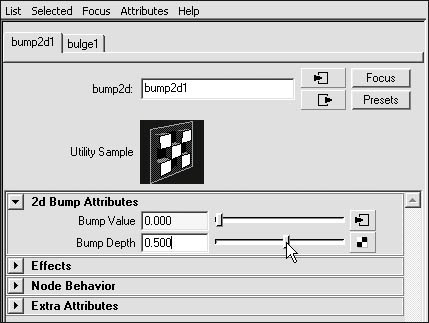
| 5. | Change the bump depth by moving the slider or typing in a number (Figure 15.69).
Figure 15.69. The Attribute Editor for the bump2d node contains the Bump Depth attribute. Bump depth controls the overall height of the bump. 
| 6. | Click the Render icon  . .
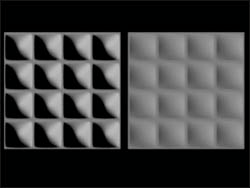
The bumps are smaller than in the previous bump map (Figure 15.70).
Figure 15.70. The plane on the left has a bump depth of 1; the plane the right has a bump depth of 0.5. 
|
|


 Tip
Tip