Maya s Interface
|
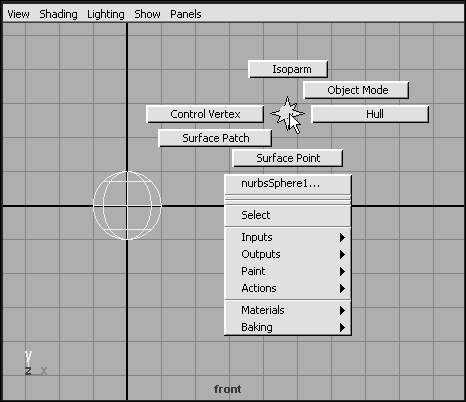
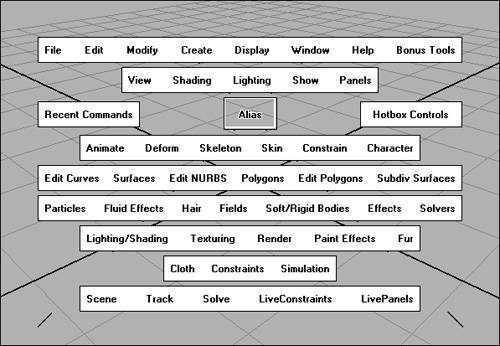
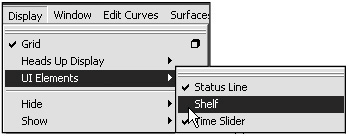
Maya's InterfaceThe Maya interface can appear daunting at first glance, but it's actually very organized and easy to get around once you're familiar with it (Figure 1.8). Along the top of the Maya interface is the main menu bar, which contains all the major Maya commands. Because Maya contains more menus than can fit in a window, you can't view all of them simultaneously in the menu bar. For this reason, Maya's menus are grouped into menu sets, arranged by tasks, which can be accessed from the menu at the far left of the status line. Figure 1.8. This is the Maya interface as it appears by default. Many of the elements seen here can be hidden or customized to suit the task at hand. The status line, located directly beneath the main menu bar, holds many important selection functions. Below the status line is the Shelf, which holds often-used tools. Along the left side of the interface is the toolbar, which holds Maya's manipulation tools. You use these tools to select, rotate, move, and scale objects or pieces of objects, called components. The typical Maya layout shows four views: Front, Side, Top, and Perspective. The areas containing these views are called panes. The default layout has four panes. At the bottom of the interface are the Range Slider and Time Slider, which allow you to control your position in time for animation. At the right-hand side of the interface is the Channel Box, which holds shortcuts to object attributes. Below the Channel Box are the Display Editor and Render Layer Editor. In addition to the main menu bar, there are menus that can be accessed from within individual panes and through Marking menus (Figure 1.9). Marking menus represent a convenient way to quickly access tools or commands. They appear when you right-click an object or when you click in one of the five Hotbox regions (see "About the Hotbox," later in this chapter). Maya is full of menus, and it can take a significant amount of time to truly master them. Figure 1.9. A Marking menu holds additional shortcuts for turning different components on and off. One of Maya's best features is the Hotbox (Figure 1.10). It holds all of Maya's menu sets and appears directly above the mouse pointer when you hold down the Figure 1.10. The Hotbox is a convenient way to access the program's menus and commands. It can be modified to suit a user's workflow in the Hotbox Controls menu. To change an object's position, rotation, or scale (collectively known as transforms), you can type values in the Channel Box (Figure 1.11) or use Maya's manipulators, which allow you to change an object's value by clicking and dragging an interactive handle (Figure 1.12). Figure 1.11. You can interactively change values by first selecting the attribute's name in the Channel Box, moving the mouse over a view pane, and then dragging the pointer back and forth in the view using the middle mouse button to alter the attribute numbers. Figure 1.12. This cone is surrounded by a Rotate manipulator. By clicking and dragging the circles, you can make the cone rotate. Using the ShelfThe Shelf is where you can store often-used tools and commands. You can use multiple Shelf sets to organize your favorite and most frequently used tools. Maya provides an extensive set of preset shelves (Figure 1.13). It is convenient to categorize items into individual Shelf sets. For instance, you could create one Shelf for all the modeling tools you frequently use and another Shelf for all your favorite rendering tools. You might even have a third Shelf that just holds your 10 or 15 most frequently used tools and commands. Figure 1.13. The Shelf holds tools and commands. You can customize it, or create additional Shelves, to contain frequently used commands and tools to suit the current task. All of the default shelf sets are shown (from top): General, Curves, Surfaces, Polygons, Subdivs, Deformation, Animation, Dynamics, Rendering, and Paint Effects. In the Shelf you can add or delete items or choose from any of the preset Shelf commands. Although the Shelf is useful, it also takes up a lot of screen space. You can show and hide the Shelf when you need more screen space. To hide the Shelf, simply choose Display > UI Elements > Shelf (Figure 1.14). You can also hide the Shelf by clicking on the dimpled strip to the left of it. Figure 1.14. Maya's many windows can make screen space scarce. To save screen space, you can hide many interface elements by deselecting them in the Display > UI Elements submenu. The items you add to a Shelf retain their most recent settingswhich means you can add the same tool to the Shelf twice but with different settings. For example, you could add two Create > Primitive > Sphere icons to the Shelf but adjust one's option to be a full 360 degrees and the other to less than 360 (for example, 240). You could then just click each of these icons to produce the sphere with the amount of degrees you want without having to go back into the options. To add an object to the Shelf:
To remove an object from the Shelf:
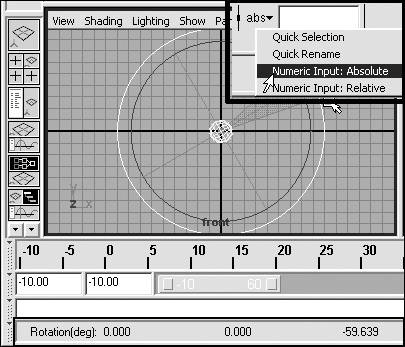
About the Help LineThe Help Line provides information on object transformations and hints as to what your next step should be. When you move the mouse pointer over a menu item, text appears in the Help Line describing the steps needed to complete the command. If you rotate an object, the Help Line will reflect the change numerically (Figure 1.15). Figure 1.15. The Help Line shows important information about commands and translations. Here, at the bottom of the image, it is showing the rotation of a sphere in degrees. The Numeric Input field to the right of the status line is where you can type precise values for the transformations. This can be useful when you need to have exact positioning for objects such as architectural buildings and product designs. Maya gives you the option to build things by eye or by entering exact position and size figures. When these changes are made, the new values appear in the Help Line. About the Channel BoxThe Channel Box, which lists a selected object's keyable attributes, is located on the right side of the Maya interface (Figure 1.16). Keyable attributes are object properties that can be animated. You can change an attribute's value quickly in the Channel Box without having to open another full window (thus saving screen space). You can enter values in any attribute's field, or you can click on the attribute's name and interactively change its value by using the middle mouse buttonto drag in any view pane. Figure 1.16. The Channel Box, at right, holds information about an object, including its position (Translate), scale and rotation.
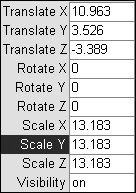
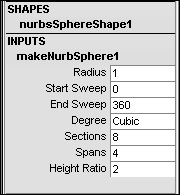
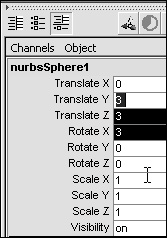
Ten default attributes in the Channel Box display when an object is selected (Figure 1.17): Translate X, Translate Y, Translate Z, Rotate X, Rotate Y, Rotate Z, Scale X, Scale Y, Scale Z (known collectively as transforms), and Visibility. The values for these attributes can be typed in one at a time, in small sets, or all at once. More attributes can be added to the Channel Box list by using the Channel Control. Figure 1.17. The Channel Box includes ten default attribute listings for an object; however, you can also add or change attributes. Below the transforms are the Shapes and Inputs nodes (Figure 1.18). The Shapes section lists the node name of every object that is defined by a node, and these node names collectively define the geometry. Take a close look, for example, at how the Shapes section lists pSphereShape every time you create a sphere. If more than one shape makes up an object, the nodes for those shapes will be listed under the shapes section. The Inputs section usually holds attributes that affect the construction history of the selected object. (See "About construction history," later in this chapter.) Figure 1.18. Inputs node attributes can be adjusted to change a surface's attributes after it is created. If more than one object is selected, the Channel Box displays the last object selected; however, any value change to an attribute will affect all selected objects. You can click and drag across multiple values in the Channel Box to select them (Figure 1.19). With multiple attributes selected, you can change all the values at once, as opposed to making the same change to each attribute one at a time. As your scenes become larger with more objects, lights and shaders, being able to adjust many attributes quickly will become essential. Figure 1.19. Once multiple attributes in the Channel Box are selected, they can be changed simultaneously.
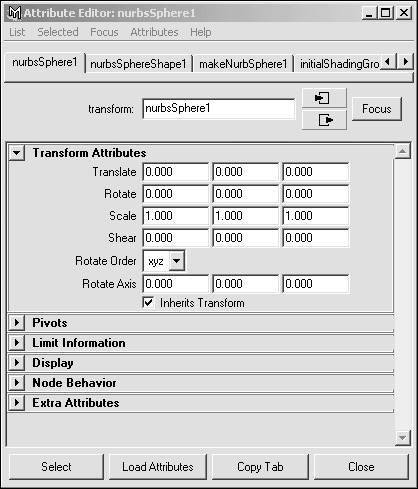
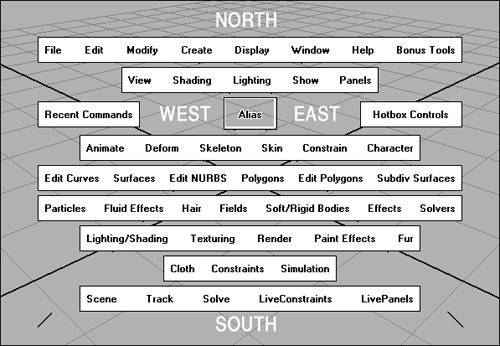
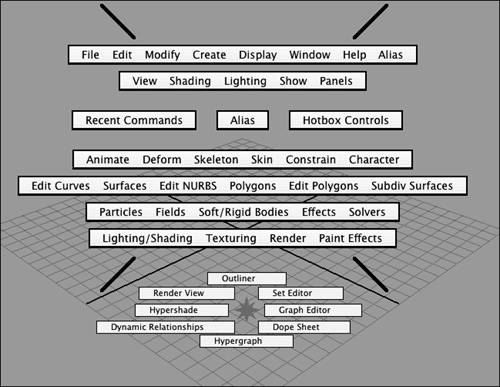
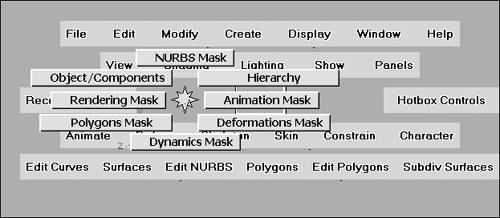
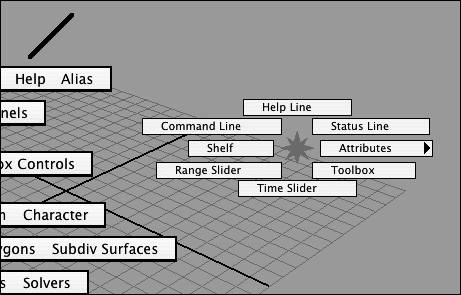
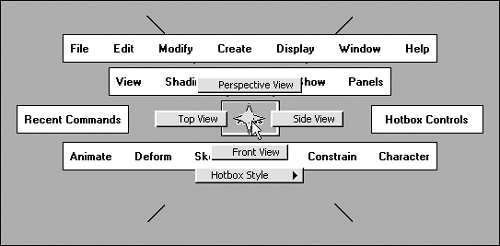
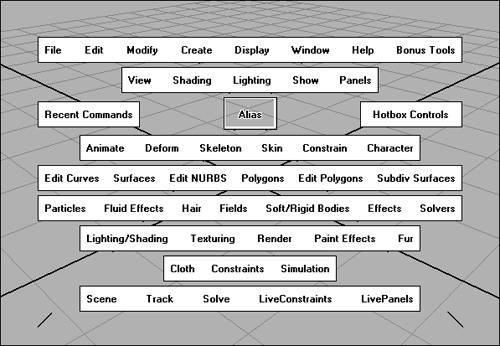
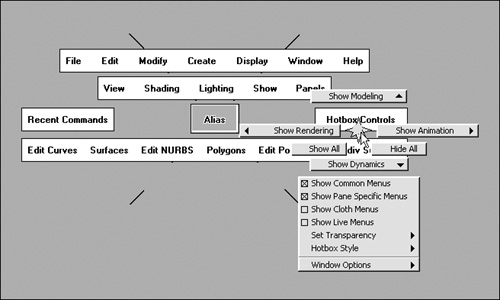
About the Attribute EditorThe Attribute Editor is similar to the Channel Box in that it allows you to access attributes that can be changed. However, the Attribute Editor provides a much more detailed representation of the attributes (Figure 1.20). In addition to the attributes in the Channel Box, the Attribute Editor contains attributes that are not keyable (that is, they cannot be animated). Figure 1.20. The Attribute Editor contains all of the information about a selected object (or objects). About the HotboxThe Hotbox is a collection of menu sets you can access from anywhere your pointer is located, simply by holding down the Figure 1.21. Each of the five Hotbox regionsNorth, South, East, West, and Centerholds a different Marking menu. The center region is defined by the Alias symbol. The default Marking menu for the North region holds shortcuts to different interface layouts (for example, a Single Perspective window) (Figure 1.22). The South Marking menu changes the contents of the selected pane (Figure 1.23)for example, from a Perspective view to an Outliner (see "About the Outliner," later in this chapter). The West Marking menu holds preset selection masks (Figure 1.24), which filter the object types that can be selected. The East Marking menu hides or displays specific user-interface elements (Figure 1.25)for example, allowing you to hide the Shelf to create more screen space. The Center Marking menu offers shortcuts for switching camera views (for example, from a Front view to a Perspective view) (Figure 1.26). Figure 1.22. In the North region Marking menu, you can select from different interface layouts. Figure 1.23. The South region Marking menu allows you to change contents of panes. Figure 1.24. You can change object and component selection modes with the Hotbox's West region Marking menu. Figure 1.25. You can toggle interface elements on and off with the East region Marking menu to make more room for modeling and animation. Figure 1.26. You can change views using the Hotbox's Center Marking menu. In addition to providing access to all of the Marking menus, the Hotbox also provides access to all of Maya's menu sets. The top row of menus in the Hotbox includes the most commonly used commands (such as those for saving and opening scene files). The second row of menus includes those that you'll find at the top of each panel. In the third row are the Recent Commands and Hotbox Controls menus. The Hotbox Controls allow you to hide or show rows of menus in the Hotbox. You can choose to show only the middle row of menus, or you can choose to make other, specific, menu sets visible. You can even display all of the rows of menus simultaneously (Figure 1.27). Figure 1.27. This is the Hotbox with all of the menus visible. To show all menu sets in the Hotbox:
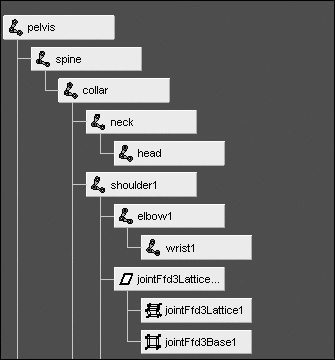
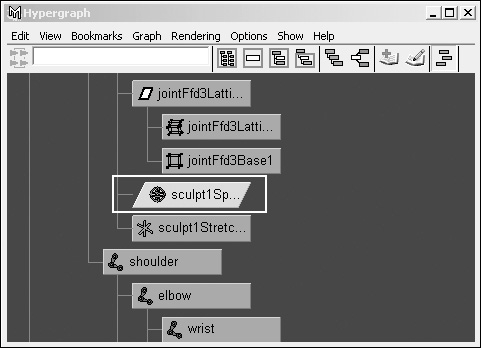
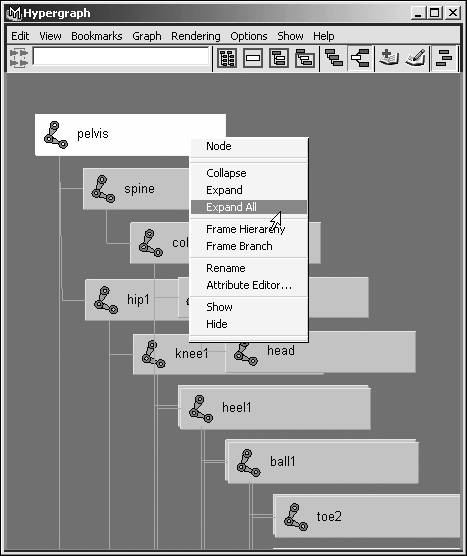
About the HypergraphThe Hypergraph window shows how all the nodes in your Maya scene are organized and connected. These connections are very important to the quality of the final animation and rendering. Character setup and movement rely on proper node connections in order for character body parts to move naturally as one entity. This organization and connection of individual nodes is called a hierarchy (Figure 1.29). A scene's hierarchy is shown in the Hypergraph as well as in the Outliner and can be adjusted and deleted within these windows or from inside a pane. Figure 1.29. Any number of nodes connected together creates a hierarchy. The order of the hierarchy is shown in the Hypergraph and Outliner. Each Maya object type has an associated icon (Figure 1.30). Without these icons, each node would look exactly the same. As you get more familiar with Maya, you will begin to recognize each object type's icon. For example, a CV (Control Vertice) Curve tool's icon is Figure 1.30. A small icon on each node reveals that node's object type. For example, a surface node has a small, blue icon that resembles a simple surface.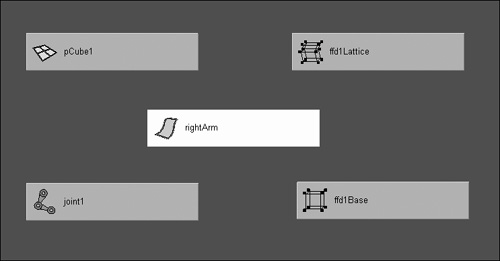 Figure 1.31. You can have the Hypergraph display just one type of node to make it easier to find and select specific objects. For modeling, for example, you might only want to see curves and surfaces. However, for animating, you might choose to see just joints and IK handles. Joints and IK handles are used to select and move portions of a character to simulate motion.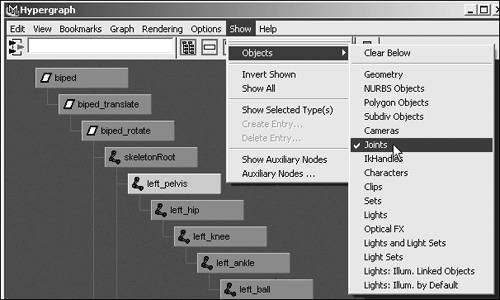 Figure 1.32. The default setting for the Hypergraph is Show All. This view helps illustrate how geometry is connected to a joint, and other hierarchy information.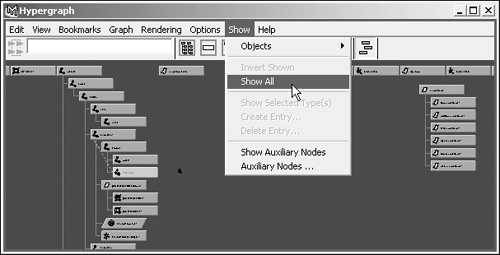 Figure 1.33. Animated nodes appear slanted, making it easy to isolate unwanted animation on an object. To show the Hypergraph
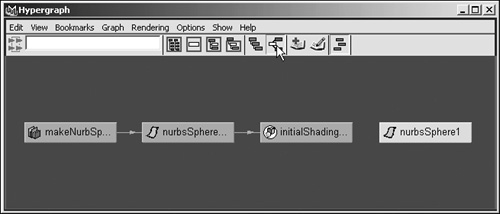
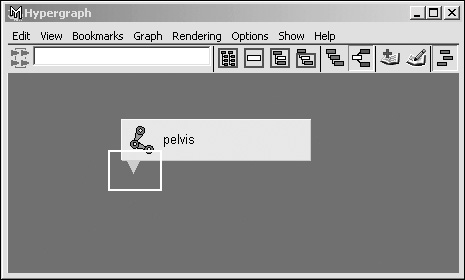
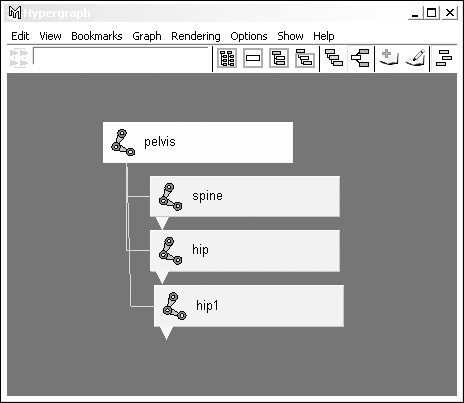
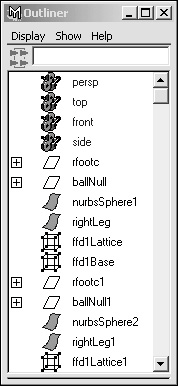
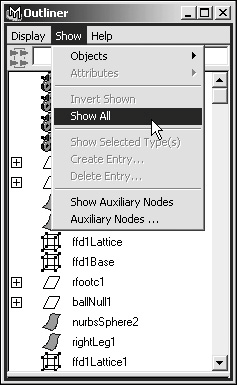
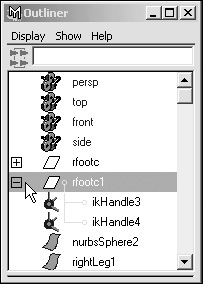
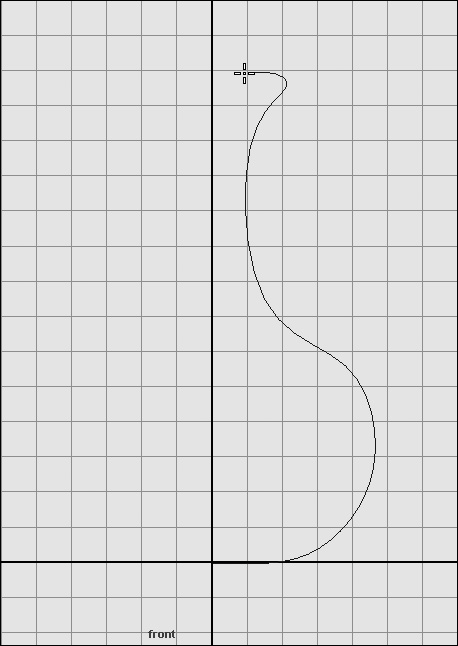
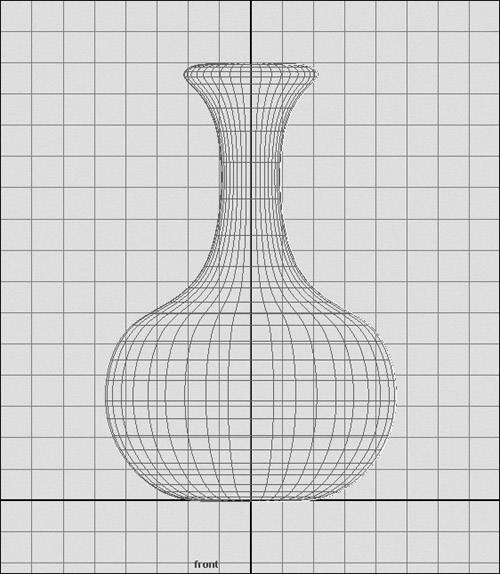
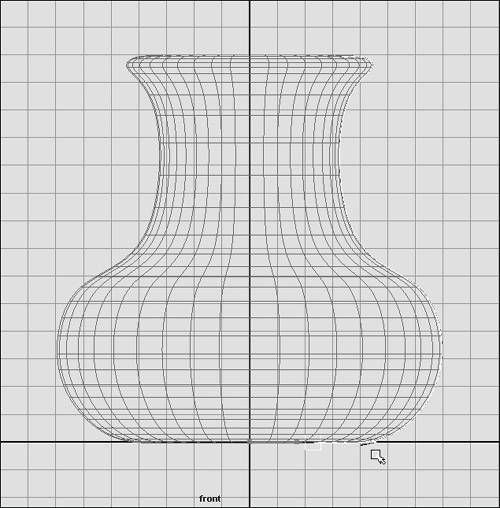
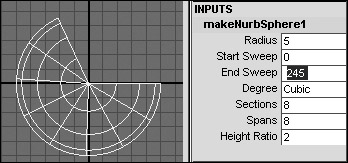
About dependenciesEach node in the Hypergraph has connected dependencies, which display additional nodes connected to the selected object. Say you were selecting a newly created sphere and showing its input and output connections in the Hypergraph (Figure 1.34). The sphere's Shape node, the default Shader node, and the connected makeNurbs Construction History node would all become visible. Arrows between the nodes show the directions of the connections. One way you can view a node's dependencies is to click the Show Input and Output Connections icon Figure 1.34. The input and output connections of an object reveals additional dependencies of the object. Some of these dependencies may be shading groups, lights, or textures. Connected nodes can be collapsed to shrink the number of simultaneously displayed nodes and then expanded again when needed. A red arrow appears on a collapsed node hierarchy (Figure 1.35). To collapse a hierarchy, double-click the topmost node. Double-clicking the top node of a collapsed hierarchy expands the hierarchy one node at a time (Figure 1.36). To expand the entire hierarchy, click the topmost node using the right mouse button and select Expand All from the pop-up menu (Figure 1.37). Figure 1.35. You can collapse a hierarchy to make more room in the Hypergraph. A collapsed hierarchy is indicated by a red arrow under the top node. Figure 1.36. A collapsed hierarchy can be expanded one node at a time, which is often useful for temporarily showing a node and then collapsing it again. Figure 1.37. When you want to see the whole hierarchy again, you can right-click the top node and select Expand All. The Hypergraph is one of the most heavily used windows in Maya. The ability to connect, disconnect, and move nodes around is essential to keeping your scene organized and functional. About the OutlinerThe Outliner is similar to the Hypergraph, but it displays the hierarchy in a small, vertical window (Figure 1.38), which makes it easier to find and select objects. The Outliner's menus contain functions for filtering out specific object types, thereby reducing the number of nodes displayed at one time (Figure 1.39). You can use the Outliner to change an object's position in the hierarchy as well as to quickly select objects deep down in the hierarchy. Figure 1.38. The Outliner appears in a slim window, which makes it easy to select and move objects. Figure 1.39. In the Outliner, as in the Hypergraph, the user can control which objects are viewed. When the Outliner is opened and before any new objects are created, you will see colored listings of the top, front, side, and perspective camera nodes in addition to the defaultLightSet and defaultObjectSet icons (Figure 1.40). As each new object is created, a new node becomes visible. Once connections are made and a hierarchy has been established, a plus sign appears next to the top object in the hierarchy; you click this to expand the list of objects within the hierarchy (Figure 1.41). Figure 1.40. The four default camera views appear in the Outliner. Figure 1.41. To see which objects are connected to other objects, click the arrows to expand the hierarchy. Each object in the Outliner has its own icon to indicate its object type. Its small size makes the Outliner a convenient tool for selecting objects. However, although the Outliner occupies much less screen space than the Hypergraph, it doesn't give the user as much flexibility in node placement. About construction historyAs you build surfaces in Maya, the software maintains connections to the original curves or surfaces used to create them. This connection is referred to as construction history. The construction history remembers the steps you used to create an object and allows you to change the final object's shape by altering the original curve or surface geometry. This is very useful when you want to tweak a surface without having to rebuild it. An example might be drawing a curve that defines the shape of the outside of a vase (Figure 1.42) and revolving it to complete the vase shape (Figure 1.43). Once the vase is created, the construction history remembers the curve's position and ties it to the shape of the final surface. When you want to change the shape of the vase, you can select part of the original curve and move it; the final surface will follow the changes of the curve (Figure 1.44). Figure 1.42. Curves can be used to outline a shape that can later be revolved to create a surface. Figure 1.43. One curve can be revolved and then edited to affect the final surface shape after it's created through the object's history. Figure 1.44. The entire curve or just individual points on it can be selected and moved to alter the surface shape. The surface is attached to the curve through history and must follow the curve's edits. Most of the NURBS (nonuniform rational B-splines) and polygon primitives have construction histories attached to their surfaces. The History nodes for the primitives appear in the Channel Box under the Inputs heading. These Inputs nodes are useful for altering common object attributes after the original object creation. An example of this is adjusting the End Sweep of a primitive sphere to take a slice out of the shape (Figure 1.45). Figure 1.45. An object's primitive surface can be altered via its Inputs node, which contains multiple editable attributes specific to each object type. To turn the construction history on or off:
To delete an object's construction history:
|
|



 Tip
Tip