Send and Receive Contacts Wirelessly
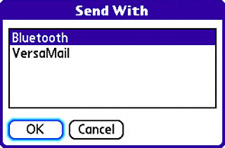
| One of the most common transactions in business is exchanging business cards. Business cards represent one of the most basic forms of communication in the business world. When you think about it, each contact on your Treo acts somewhat like a virtual business card. With your Treo device, you can even create and identify a single contact that serves as your own virtual business card. This is important because your device is capable of sending and receiving contacts with little effort on your part. In other words, it offers a high-tech way to share virtual business cards. Tip If you want to take your ring tones to another level entirely, you might want to look into a third-party application called LightWav by Toysoft. LightWav enables you to customize contacts with caller ID ring tones and to assign ring tones to alarms using MIDI, Wave, and MP3 songs. To learn more about LightWav, check it out on the Web at http://www.toysoft.ca/ lightwav.html. A few different options are available for sending and receiving contacts with your Treo. One approach involves using one of two messaging options to send a contact to another device, which can be a Treo device or any other computer, for that matter. The messaging options involve using email or Bluetooth. The other approach is Palm specific and involves sending a contact via infrared to another Palm devicereferred to as beaming a contact. To send a contact via email or Bluetooth, follow these steps:
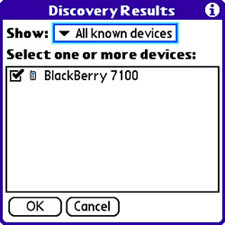
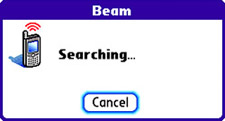
Keep in mind that you can also send a contact via more traditional channels, such as email and SMS. If you select these options, you're prompted to specify to "To" address for the contact. Perhaps even more interesting than sending a contact via Bluetooth or email is the capability of beaming contacts via infrared. Most Palm devices support transferring contacts via infrared, so you shouldn't have any trouble sharing contacts with other Treo devices and other devices in the Palm/palmOne family, not to mention numerous other mobile handheld devices that also support infrared. To beam a contact via infrared, follow these steps:
If you're on the receiving end of an infrared contact transfer, first make sure you have your device's infrared port turned on. Then when the beamed contact notification arrives, select a category for it and accept it to receive the contact. The contact is then added to your contact list. One other handy feature associated with beaming contacts is identifying a particular contact as your own virtual business card. This makes it possible to quickly beam your business card contact without having to search through the contact list to find it. To designate a contact as your business card, open the contact to edit it, and press the Menu button. Choose the Select Business Card command on the Record menu to indicate that the current contact should be your business card. When you're prompted to confirm the business card designation, just tap the Yes button. You've now established a business card contact for your device. To quickly send your business card to another Palm device, press the Menu button in the Contacts application and select Beam Business Card from the Record menu. Your business card contact is then beamed to another Palm device exactly as though you had selected it in the contact list and beamed it. You can think of the business card contact as a shortcut for quickly and easily beaming your own contact information. Tip An even quicker way to send your business card is to hold down the shortcut key for the Contacts application, which by default is Option + Calendar. In other words, press and hold the Option key and the Calendar button for a couple of seconds to beam your business card. |
- Step 1.2 Install SSH Windows Clients to Access Remote Machines Securely
- Step 2.1 Use the OpenSSH Tool Suite to Replace Clear-Text Programs
- Step 3.4 Use PuTTYs Tools to Transfer Files from the Windows Command Line
- Step 4.1 Authentication with Public Keys
- Step 4.7 Using Public Key Authentication for Automated File Transfers