1. | Follow steps 1 and 2 of "To create and upload a Web page with iWeb."
The iWeb interface loads, showing the "Choose a template for your webpage" dialog (see Figure 5.8).
| 2. | In the dialog, choose a theme from the column on the left (such as Black, White, or Formal), choose the Movie template, and then click Choose (Figure 5.64).
Figure 5.64. The first step in creating a movie page is to select a theme on the left and the Movie template on the right. 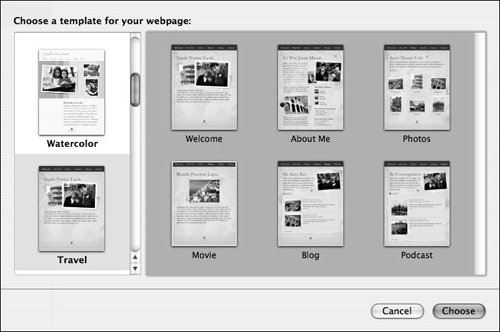
The template loads, complete with placeholder image and text (Figure 5.65).
Figure 5.65. The Movie template is filled with a placeholder movie and text that you'll replace with your own content. 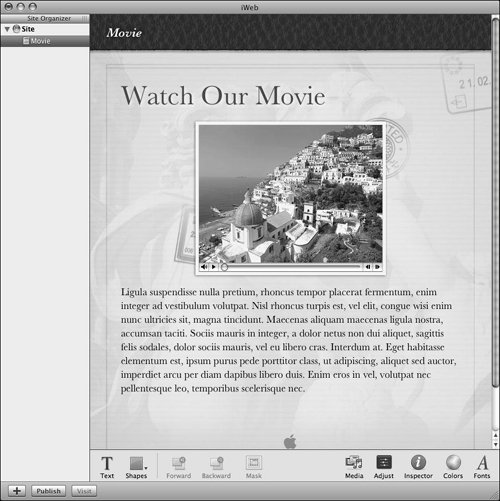
| | | 3. | Click the Media button in the lower right corner of the window (Figure 5.66).
Figure 5.66. Click the Media button to open the Media Browser. 
The Media Browser opens (Figure 5.67).
Figure 5.67. When you open the Media Browser, it may not show the media that you want to include on your page. 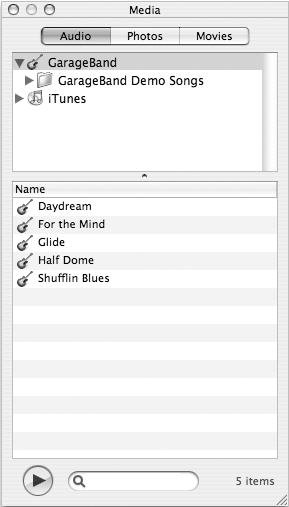
| 4. | If it's not already selected, click the Movies tab in the Media Browser window. The contents of the Movies folder in your home folder are displayed (Figure 5.68).
Figure 5.68. The Movies pane of the Media Browser shows all movies in your Movies folder. 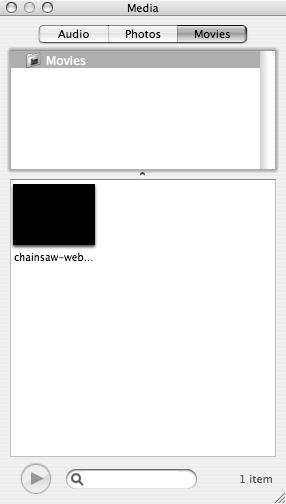
| | | 5. | Drag the movie you want to use from the inspector to the placeholder movie in the iWeb page (Figure 5.69).
Figure 5.69. To add a movie to your page, simply drag it from the Media Browser to the page. 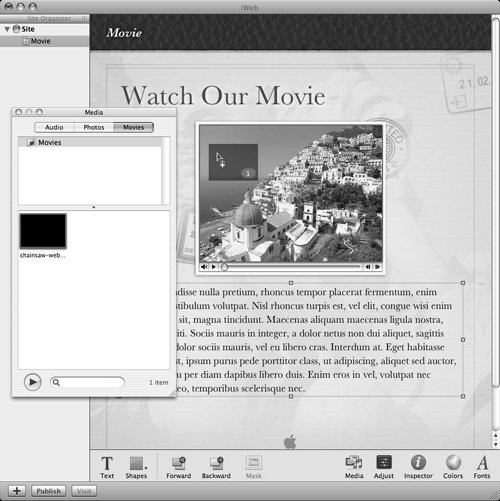
Your movie is added to the page (Figure 5.70).
Figure 5.70. After you've dragged a movie to your iWeb page, it appears there, ready to be uploaded. 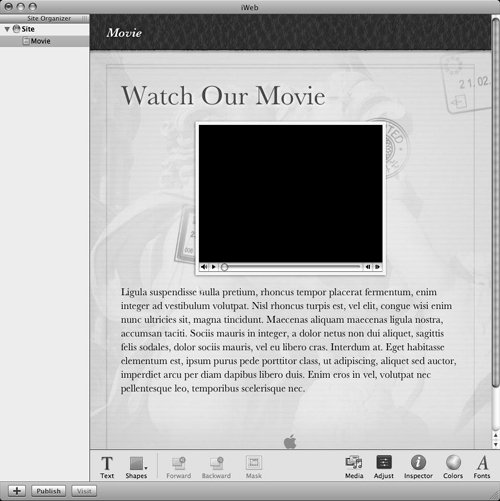
| 6. | Double-click the placeholder text blocks on the page, and type in the text you want to use.
Your movie page is ready to go (Figure 5.71).
Figure 5.71. Once you've added your movie and edited the text, your page is ready to publish. 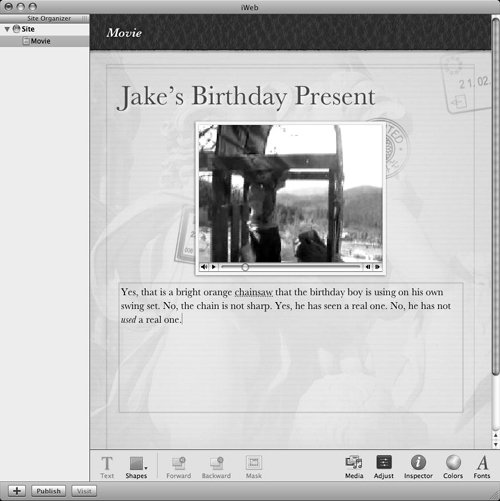
| | | 7. | Click the Publish button.
Your movie page (along with the movie itself) is uploaded to your .Mac account, and a dialog slides down, offering three buttons: Announce, Visit Site Now, and OK (Figure 5.72).
Figure 5.72. After you've uploaded your movie, iWeb lets you tell folks about it, visit the new page, or go back to iWeb. 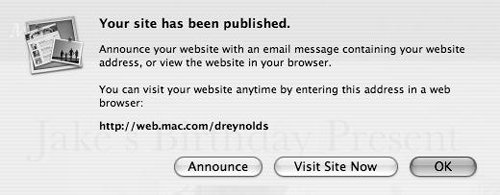
| 8. | In the dialog, click one of the following buttons:
Click Announce to automatically generate an e-mail message that you can send out to announce your new page and site (Figure 5.73). Figure 5.73. When you click Announce, an e-mail message is automatically generated in your preferred e-mail client. You can edit it, add e-mail addresses for the people you want to send it to, and then send it. 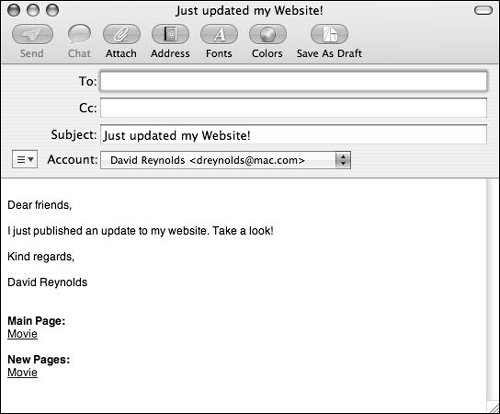 Click the Visit Site Now button to go directly to your new page (Figure 5.74). Figure 5.74. When you click Visit Site Now, your newly updated page is loaded in your Web browser. 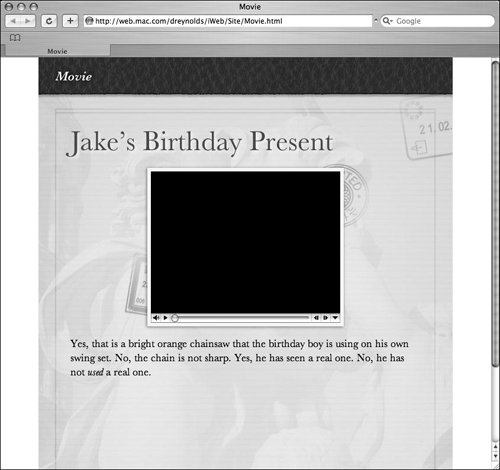 Click the OK button to return to work in iWeb (Figure 5.75). Figure 5.75. When you click OK after publishing a page, you are returned to iWeb just where you left it. 
|
 Tips Tips
To see movies in the Media Browser window, create them in iMovie 3 and save them in the Movies folder. If you take movies with a digital still camera, you'll find those files in iPhoto, using the Photos tab of the Media Browser.
|