You can use a mask layer to create a hole through which the contents of one or more underlying layers are visible. You can group multiple layers below a single mask layer to create sophisticated effects. You cannot mask layers inside buttons .
-
Click the Scene 1 icon, or choose Edit > Edit Document. Lock all the layers in the movie, select frame 12 of the Background layer, and choose Edit > Copy Frames.

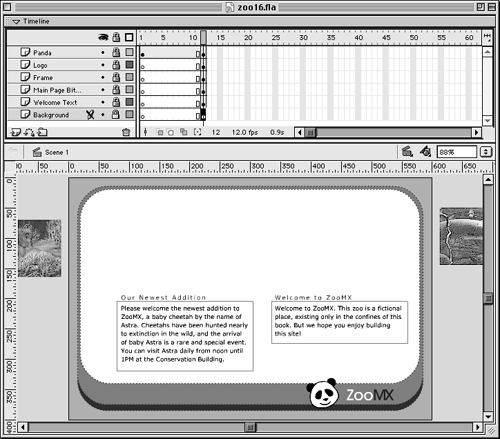
When you click the Scene 1 icon to return to the main movie, notice that the bitmaps in the Main Page Bitmaps layer appear off the sides of the stage. That means that when you publish your movie in Lesson 12, the bitmaps will appear off the edges of the movie. When the instance of the Bitmap Animation plays, the bitmap instances will move to the middle of the stage, as they appeared before you added your motion tween.
You can lock all the layers in the movie by clicking the Lock/Unlock All Layers icon at the top of the timeline. Click the icon until a lock appears to the right of each layer's name . Locking the layers will prevent you from accidentally moving anything around.
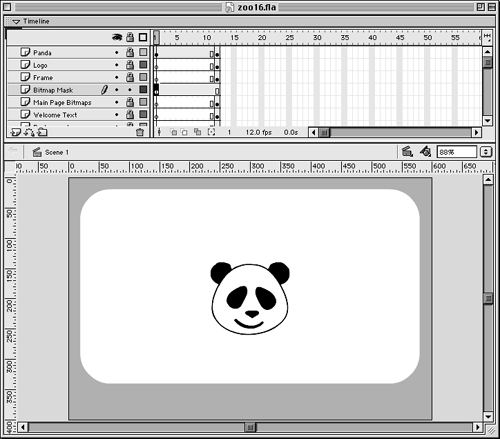
The Background layer contains only a white rectangle. That white rectangle is exactly the shape we want to use for our maskyou want to modify the movie so the Bitmap Animation appears only inside the confines of the contents of the Frame layer, and the shape in the Background layer will do nicely . When you copy the frame, you don't have to unlock the layer.
-
Add a new layer, named Bitmap Mask, above the Main Page Bitmaps layer. Select frame 1 of the new layer, and choose Edit > Paste Frames.

When you paste the frame, the contents of the frame that you copied appear in the Bitmap Mask layer.
NOTE
If you don't name the new layer Bitmap Mask before you paste the frame into it, the layer name will be set to Background. This is a handy feature of the Edit > Paste Frames command.
-
Right-click (Windows) or Control-click (Macintosh) the name of the Bitmap Mask layer, and choose Mask.

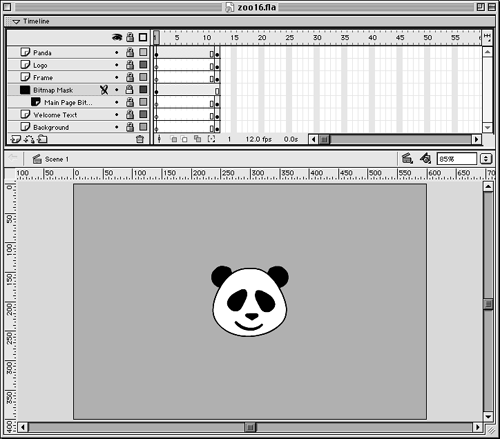
This step turns the Bitmap Mask layer into a mask for the layer below it, which is the Main Page Bitmaps layer. Only the area covered by the rectangle in the Bitmap Mask layer (the mask layer) shows through in the Main Page Bitmaps layer (the masked layer). Flash locks the mask and masked layers automatically. Icons identify the mask and masked layers in the timeline.
You can mask more than one layer with a single mask layer. Move the layer under any mask or masked layer; right-click (Windows) or Control-click (Macintosh) the layer's name and choose Properties from the drop-down menu. In the Layer Properties dialog box, set the layer's Type to Masked, and click OK.
-
Drag the playhead to frame 12.
You shouldn't be able to see the contents of the Main Page Bitmaps layer anymore. The bitmaps are still there, you just can't see them because the layer is masked and the bitmaps are outside the mask.
-
Choose Control > Test Movie. Save the movie as zoo17.fla.
When you test the movie, it's going to loop over and over. You probably want to see how the mask affected everything, so choose Control > Loop to make the movie stop looping. Notice when you select Loop, the Bitmap Animation starts when the movie reaches the last frame. Also notice that the Bitmap Animation plays over and over. You'll learn how to stop both the main movie and the Bitmap Animation from looping in Lesson 5.
Your movie is coming along nicely now. It's getting more and more complex, so now is another great time to save.
