Creating a Simple Spreadsheet


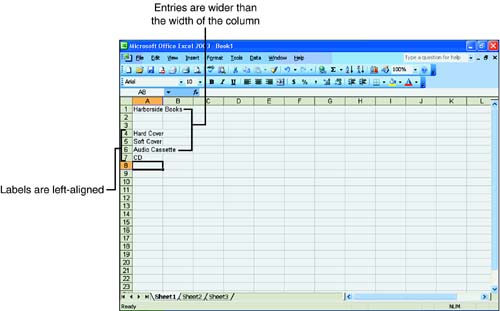
Now it's time to put everything you've learned into action as you begin creating a simple worksheet. This section gives you some practice making entries into a cell and using Excel's AutoFit feature. You add to the worksheet in the other exercises contained in this hour. Before you begin, Excel should be open and visible on your computer. (If you're not sure how to open Excel, review the information in Hour 1.)

To Do: Create a Simple Spreadsheet

  1. Click cell A1. A selector appears around the cell. Type Harborside Books . Notice that the text appears in the cell and the Formula bar. Press Enter when you're done typing.

  2. Move down to cell A4 and type Hard Cover . Press the down-arrow key when you're done typing to enter your text and move down to the next cell.

  3. Type the following text, making sure to press the down arrow key after each group of words : Soft Cover , Audio Cassette , CD . Be sure not to type a comma after each entry in the cell. When you're done, your screen should look like the one shown in Figure 2.4.

    Figure 2.4. Your sales worksheet as it's being created.

    graphics/02fig04.jpg

  4. Notice that some of the entries in column A are wider than the column and spill over into column B. Select column A by positioning the mouse pointer on the heading for the column (the mouse pointer assumes the shape of an open cross) and clicking one time. The entire column appears highlighted.

  5. Click Format, Column and choose AutoFit Selection. The column adjusts to accommodate the longest cell entry. Deselect the column by pressing the right arrow key.

  6. Click into cell B3 and type January . Without pressing any of the arrow keys or Enter, notice that a tiny square called a fill handle appears in the bottom-right corner of the cell.

  7. Position your mouse pointer over the fill handle (the pointer assumes the shape of a small cross). Click the left mouse button and slowly drag to cell D3. As you drag, a ScreenTip displays the value of the cell that the pointer is directly over.

  8. Release the mouse button. The other months are filled in and appear highlighted.

Dragging to the right or left of the portion of the worksheet visible on your computer screen can sometimes produce unwanted results. When the mouse crosses the current screen, the dragging process seems to speed up. You might need to practice your drag technique a few times before you get it right. To reverse the result of a fill that has gone too far, click the Undo button on the Standard toolbar. Then try the fill again.

graphics/lightbulb_icon.gif

Remember to always select (highlight) the cells , rows, or columns that you want to change. Any change you make from a menu or toolbar affects only the selection.


Sams Teach Yourself Microsoft Office Excel 2003 in 24 Hours
Sams Teach Yourself Microsoft Office Excel 2003 in 24 Hours (Sams Teach Yourself in 24 Hours)
ISBN: 1435276337
EAN: 2147483647
Year: 2003
Pages: 279
Authors: Trudi Reisner

flylib.com © 2008-2017.
If you may any questions please contact us: flylib@qtcs.net