Choosing a Data Source
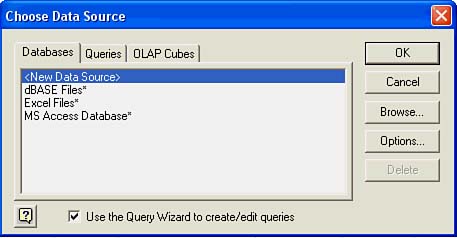
| To use Microsoft Query, choose Data, Import External Data, New Database Query. The Choose Data Source dialog box appears, as shown in Figure 22.9. Figure 22.9. The Choose Data Source dialog box. The first step involved in using the Query Wizard is choosing a data source on the Databases tab. This item is the database driver that Excel uses to access the data. The database driver can be any of the following:
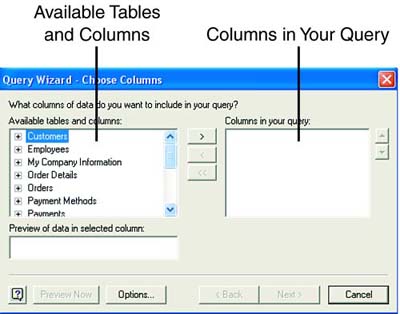
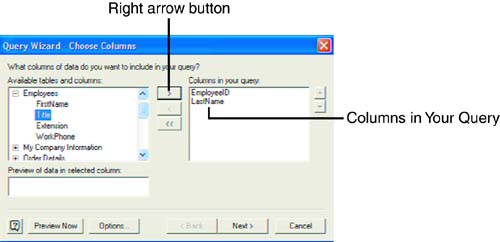
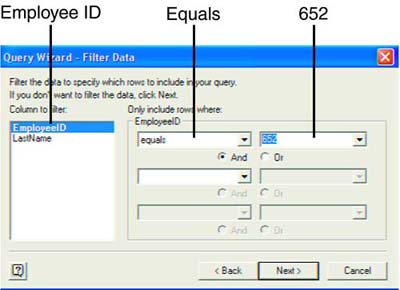
After you select a database driver, click OK. The Select Database dialog box opens. Navigate to the folder that contains the database, select the database file, and click OK. The Query Wizard ” Choose Columns dialog box opens, as shown in Figure 22.10. You should see two lists: Available Tables and Columns and Columns in Your Query. Now you need to further define the data source. There are two things you must do to accomplish this task. First you select the database file, and then you choose the tables and columns you want to use for the query. Figure 22.10. Query Wizard ”Choose Columns dialog box. To choose a table, click the plus (+) sign next to the name of the table in the Available Tables and Columns list. The column names appear beneath the table name. Click a column name and click the right arrow button to move the column name into the Columns in Your Query list (see Figure 22.11). Figure 22.11. Selecting columns for the query. Repeat the previous step for each column you want to include in the query. When you're finished selecting columns, click the Next button. Filtering DataEarlier in this hour and in Hour 21, you learned how to filter records in various ways. Well, Excel offers yet another filter feature. After you choose the data source and define it, you can use the Query Wizard to filter data. When filtering data with the Query Wizard, you choose the column you want to filter and specify how you want to filter the data in the Query Wizard ”Filter Data dialog box (see Figure 22.12). For example, you select the EmpID column and choose Is Greater Than. The next step is to choose the specific item in the column you want to filter the records with. For example, an item can be a specific employee ID number such as 652. In this case, you choose Equals and type 652 in the text box. When you're done, click the Next button. Figure 22.12. Query Wizard ”Filter Data dialog box. Sorting DataYou can sort the data and arrange the rows of a database in a particular order, based on the contents of the fields or columns. You can use the Query Wizard to sort your data. When you sort your data, you can specify how Excel should reorder the data rows. If you specify an ascending sort order, the lowest number, the beginning of the alphabet, or the earliest data appears first in the list. Excel uses the following order for an ascending sort:
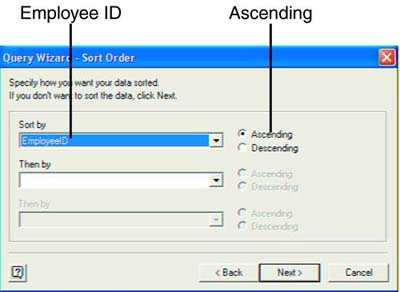
Descending order starts with the highest number, the end of the alphabet, or the latest data. Sorting in descending order reverses the order mentioned in the preceding list, except for blanks, which are always sorted last. Figure 22.13 shows an example of sorting the Employee ID column in ascending order. When you finish selecting the sort order, click the Next button. Figure 22.13. Query Wizard ”Sort Order dialog box. |
EAN: 2147483647
Pages: 279