Customizing Excel
| You can customize Excel to change they way things look in the Excel window when you start the program. The startup options in the Customize dialog box let you personalize menus and toolbars, set the icon size, list font names in their font, show ScreenTips on toolbars , and change menu animations. Customizing ToolbarsExcel offers several toolbars to save you time in choosing commands. The Standard toolbar and Formatting toolbar appear at the top of the screen. Earlier in this book, you learned that other toolbars appear when you create a template, a picture, a chart, and an org chart. The toolbars listed in Table 14.1 are available when you need them.
Table 14.1. Excel's Toolbars
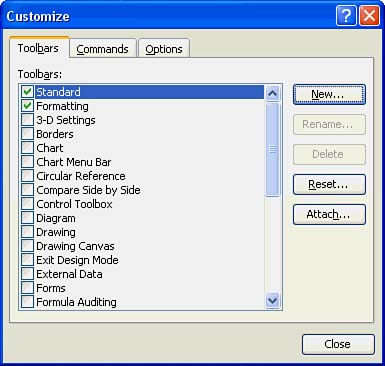
If you want to show or hide a toolbar, choose View, Toolbars. On the Toolbar menu, a check mark appears next to a toolbar that is displayed. To show or hide a toolbar, click a toolbar name in the menu. Excel displays or hides the toolbar in the Excel window.
After you display the toolbars you need, you may position them in your workspace so that they are most convenient for you. To move toolbars to a new location on the screen, look at the vertical line that appears at the left edge of a docked toolbar. When you point to the vertical line, the mouse pointer changes to a four-headed arrow, which indicates that you can move the toolbar. Hold down the mouse button and drag the toolbar to a new location. You can drag it to a dock or let it float anywhere in the window. If you decide to drag the toolbar to a dock, you can position it in one of four toolbar docks:
When you find a dock, the toolbar outline changes from square to rectangular. Then you can release the mouse button.
If there are too many or not enough options on an Excel toolbar, you can edit the toolbar. And if necessary, you can even design your own. Select View, Toolbars, Customize to add, remove, and move buttons to get the toolbar just the way you want it. In addition to customizing toolbars, you can customize the way your menus appear when you select a menu command. For example, you can choose an animation option that causes a menu to display with special effects, such as random, unfold, and slide effects. You can create a shortcut to a workbook by creating a shortcut icon for your workbook. The icon appears on your Windows desktop. Then, when you click the shortcut icon, Windows opens both Excel 2003 and your workbook. Changing Startup OptionsExcel's Customize command lets you change the startup options for Excel. These options determine how things look on your screen when you start Excel. The startup options are self-explanatory:
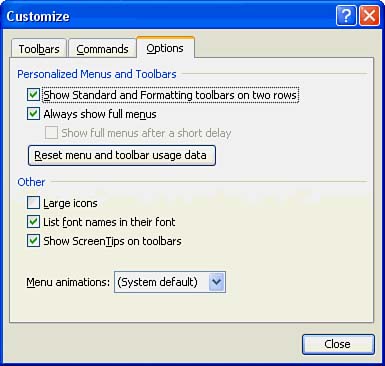
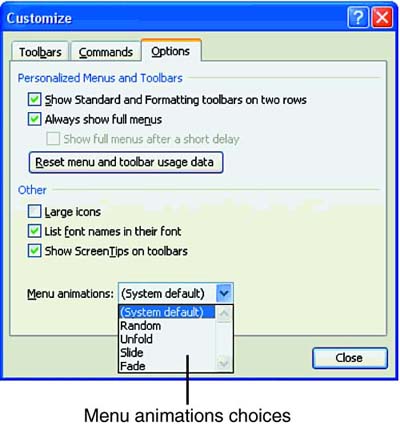
There are several startup options that are turned on by default: Standard and Formatting Toolbars Share One Row, Menus Show Recently Used Commands First, List Font Names in Their Font, and Show ScreenTips on Toolbars. The other startup options are turned off. The figures in this book show full toolbar menus, and if your toolbars and menu options are turned on, you won't see all of the options we show. Personalized toolbars and menus are there specifically to ease their use, especially for beginning users. You don't have to turn them off if you find them easier to use right now. When you are feeling confident with using Excel's toolbars and menus, feel free to change the toolbar and menu options in the Customize dialog box. To change any startup options, choose Tools, Customize. The Customize dialog box appears. Click the Options tab, as shown in Figure 14.12. Figure 14.12. The Options tab in the Customize dialog box. A check mark in a check box indicates that the option is turned on. An empty check box indicates that the option is turned off. Choose any options you want and then click Close. The next time you start Excel, the screen will display the startup options you selected. Designing a Custom ToolbarOne great thing about Excel is that you can design a custom toolbar that provides all the options you need to perform tasks in Excel with ease. The upcoming To Do exercise builds a toolbar that contains three tools: Save, Undo, and Spelling. To Do: Build Your Own Toolbar
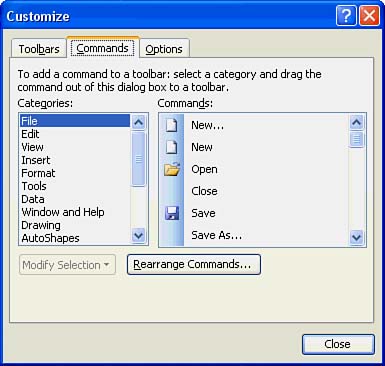
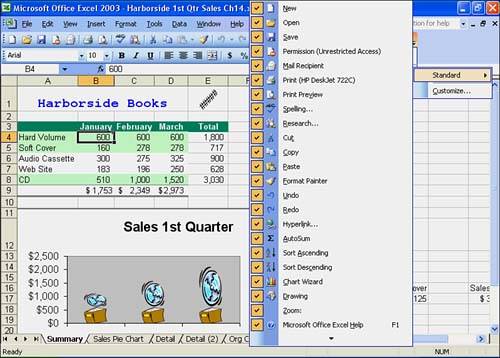
Editing an Existing ToolbarWhy would you want to edit an existing toolbar? The primary reason is to tailor an existing toolbar so that it contains only the buttons you really need for the commands you use most frequently. That way you have a toolbar that offers tools just for the type of work you do in Excel. When you edit an existing toolbar, you add or remove buttons and move buttons to the most convenient location on the toolbar. In Excel, adding and removing buttons is a cinch. Just click the Toolbar Options down arrow button at the right end of a toolbar. Next click the Add or Remove Buttons menu, and then click the name of the toolbar on the menu. For example, Standard or Formatting. A menu of icons with their commands appears, as shown in Figure 14.16. Figure 14.16. The Add or Remove Buttons menu for the Standard toolbar. A check mark appears next to the commands that appear on the toolbar. Click a check mark to tell Excel to remove the button from the toolbar. Click a command that doesn't have a check mark to add the button to the toolbar. When you're done adding and removing tools, click any cell in the worksheet to hide the Add or Remove Buttons menu. To rearrange buttons on a toolbar, open the Customize dialog box, click the Commands tab, and then click the Rearrange Commands button. In the Rearrange Commands dialog box, select the button you want to move, and then click the Move Up or Move Down button until the button is where you want it. Click Close to close the Rearrange Commands dialog box, and then click Close to close the Customize dialog box.
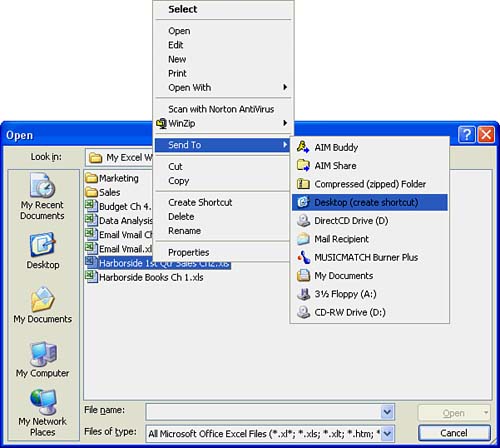
Changing Menu AnimationsNormally, the Menu Animation feature is set to None (System Default), which means that when you choose a menu command, nothing special happens. But you can animate your Excel menus by choosing a Menu Animation option that opens and closes a menu with a special effect. Whatever menu animation you choose becomes the setting for menus in all other Office programs. To animate your menus, choose Tools, Customize and then click the Options tab. In the Menu Animations drop-down list, select one of these options: Random, Unfold, or Slide (see Figure 14.17). Then click Close. Figure 14.17. The Menu Animations options. Try out each animation option to find the one you like. If you don't like any of them, you can always opt for no animation by choosing (System Default) in the Menu Animations drop-down list. Creating a Shortcut to a WorkbookIf you use a particular workbook frequently, you might want to keep that workbook conveniently at your fingertips on your Windows desktop. That way, you can open the workbook quickly and easily at any time directly from the desktop. You won't have to open Excel and then open the workbook, thereby reducing the number of steps involved in opening the workbook. An icon with a small arrow in the lower-left corner represents the shortcut. The "shortcut" arrow indicates that you can use an icon as a shortcut to an object. In this case, the object is a file within an application. Double-clicking the shortcut icon opens the object to which the shortcut is pointing. For example, you create a shortcut to the Sales 1st Qtr workbook by placing a Sales 1st Qtr shortcut icon on the Windows desktop. Then, when you double-click the shortcut icon, Windows opens Excel 2003 and the Sales 1st Qtr workbook. To create a shortcut icon, follow the steps in the To Do exercise. In this exercise, you create a shortcut icon for the Sales 1st Qtr workbook. To Do: Create a Shortcut to a Workbook
|

EAN: 2147483647
Pages: 279