| In some situations, you might have more than one workbook open at a time. You can open as many workbooks as will fit in your computer's memory. However, when you open multiple workbooks, you need to know how to manage them. You can arrange them in various ways on your screen and then move between them in a snap to get to the workbook you want. You can even copy and move data between workbooks instead of typing the same data over and over into multiple workbooks. Arranging Workbooks Suppose that you want to see all the open workbooks at one glance. You can do just that by arranging them on the screen for easy viewing. Excel makes it easy to have multiple workbooks open and to avoid getting lost in the maze. With the help of Excel's Window Arrange command, you can arrange workbooks in windows in four ways: -
Tiled Arranges the open workbooks in small windows displayed in a tiled fashion on the screen -
Horizontal Displays the open workbooks in windows as horizontal bands across your workspace -
Vertical Organizes the open workbooks in windows as vertical bands in your Excel window -
Cascade Layers the open workbooks in windows on the screen Follow the instructions in the next To Do exercise to arrange workbooks in all four ways. You start by opening the Sales 1st Qtr workbook, and then you save the workbook with a different name to create two more workbooks, Sales 1st Qtr 2 and Sales 1st Qtr 3. Be sure to have the Sales 1st Qtr workbook open before you begin the exercise. To Do: Arrange Workbooks -
Choose File, Save As. Name the workbook Sales 1st Qtr 2 and click Save. -
Choose File, Save As. Name the workbook Sales 1st Qtr 3 and click Save. -
Open the Sales 1st Qtr workbook. -
Open the Sales 1st Qtr 2 workbook. Now you should have all three workbooks open: Sales 1st Qtr, Sales 1st Qtr 2, and Sales 1st Qtr 3. When you arrange workbooks, all the workbooks you want to use must be open. -
Choose Window in the menu bar and click Arrange. The Arrange Windows dialog box appears, as shown in Figure 14.1. Figure 14.1. The Arrange Windows dialog box. 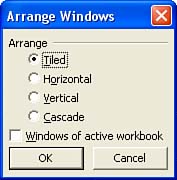 -
If necessary, select Tiled and then click OK. Excel should place your workbooks in the arrangement you selected; in this case, your workbooks should appear in small windows in a tiled effect (see Figure 14.2). Figure 14.2. Tiled workbooks. 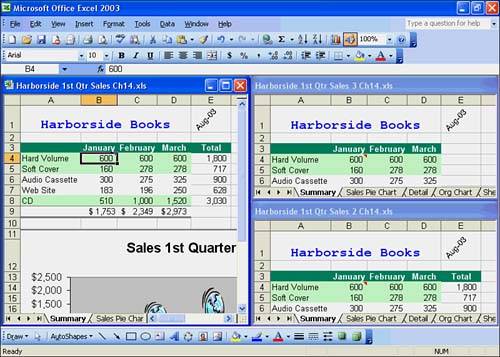 -
Choose Window, Arrange; select Horizontal; and click OK. Excel arranged your workbooks in windows as horizontal bands across the workspace (see Figure 14.3). Figure 14.3. Horizontal arrangement. 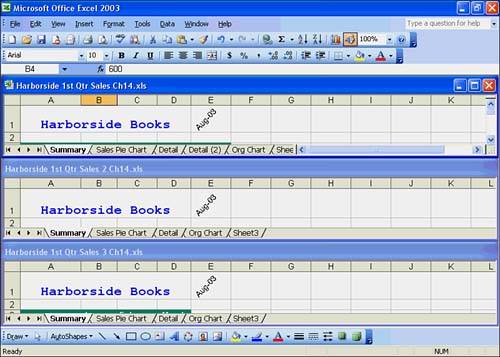 -
Choose Window, Arrange; select Vertical; and click OK. You should see your workbooks arranged in windows as vertical bands in the Excel window (see Figure 14.4). Figure 14.4. Vertical arrangement.  -
Choose Window, Arrange; select Cascade; and click OK. Your workbooks should appear in layers in the Excel window (see Figure 14.5). Figure 14.5. Cascaded workbooks. 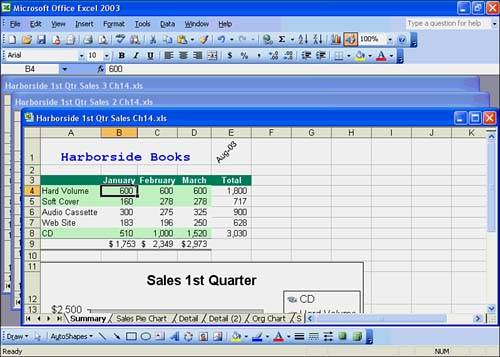 Moving Between Workbooks Regardless of whether you decide to arrange the open workbooks or just leave them on top of each other in the order in which you opened them, you can move among open workbooks very easily. Excel provides several quick ways to get to the workbook you want. You can use the mouse, shortcut keys, or the Window menu to move to the workbook of your choice. Here are your choices for moving between open workbooks: -
Click a visible part of a workbook window. -
Press Ctrl+F6 or Ctrl+Tab to move from one workbook window to another. -
Click Window in the menu bar. At the bottom of the Window menu is a list of workbook names , allowing you to switch to any open workbook. Simply select the name of the workbook you want to display. Perform the steps in the next exercise to move between workbooks. You should be using three workbooks: Sales 1st Qtr, Sales 1st Qtr 2, and Sales 1st Qtr 3. Be sure to have all three workbooks open before you begin the exercise. To Do: Move Between Workbooks -
Double-click the Sales 1st Qtr workbook title bar. The workbook should appear in a full-size window onscreen. -
Press Ctrl+F6 to move to the next open workbook (Sales 1st Qtr 2). -
Press Ctrl+F6 to move to the other workbook (Sales 1st Qtr 3). -
Click Window in the menu bar. The Window menu appears with a list of workbook names at the bottom of the menu, as shown in Figure 14.6. The check mark next to Sales 1st Qtr 3.xls indicates that the workbook is active. Figure 14.6. Workbook names on the Window menu. 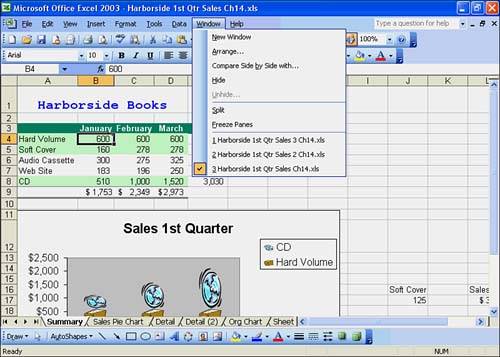 -
Choose Sales 1st Qtr 3 from the Window menu. The workbook you selected should appear in a full-size window onscreen. -
Close the Sales 1st Qtr 3 workbook. If you're asked to save any changes, click No. Copying Data Between Workbooks With Excel's Copy command, you can even copy data from one workbook to another. For example, you open two workbooks: one that contains a quarterly budget and another with the annual budget. To make things easier, you might want to copy the first-quarter projected budget figures in the first workbook to the second workbook. The original data in the first workbook remains intact. A copy of the data appears in the second workbook. To copy data between workbooks, open both workbooks. Select the data in the first workbook and click the Copy button on the Standard toolbar. To switch between workbooks, you can use any of the methods mentioned in this hour . One of those methods is clicking Window in the menu bar and choosing the second workbook at the bottom of the Window menu. Select the sheet and click in the cell where you want the data to appear. Click the Paste button on the Standard toolbar. Excel copies the data to the second workbook. The instructions in the following To Do exercise help you practice copying data from one workbook to another. You're going to work with two workbooks: Sales 1st Qtr and Sales 1st Qtr 2. Be sure to have these workbooks open before you start step 1. In the exercise, you first enter data in the Sales 1st Qtr workbook and then copy the data to the Sales 1st Qtr 2 workbook. To Do: Copy Data Between Workbooks -
In the Sales 1st Qtr workbook, in the Summary sheet, in cell E3, type Total and press Enter. Excel formats the text with the AutoFormat color and font style. In cell E4, double-click the AutoSum button on the Standard toolbar. The total for row 4 appears in cell E4. -
Drag the fill handle in cell E4 down to cell E8. The totals appear in column E. -
Select cells E3:E8. -
Click the Copy button on the Standard toolbar. -
Press Ctrl+F6 to switch to the Sales 1st Qtr 2 workbook. -
In the Summary sheet, click cell E3. -
Click the Paste button on the Standard toolbar. The data you copied and pasted into the second workbook should appear starting in row 3, as shown in Figure 14.7. Figure 14.7. Data copied from one workbook to another. 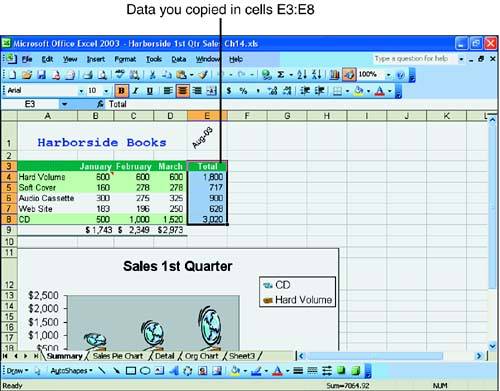 Moving Data Between Workbooks Moving data between workbooks is similar to copying data between workbooks. Select the data in the first workbook and click the Cut button on the Standard toolbar to cut the data; when you switch to the second workbook, click the Paste button on the Standard toolbar. Excel removes the data from the first workbook and places it in the second workbook.  | The fast way to move data between workbooks is to use the drag-and-drop method. First, open the workbooks you want to use for the move. Choose Window, Arrange and select the Tiled option. Click OK to arrange the windows so that a small portion of each one appears onscreen. Select the tab of the worksheet(s) you want to copy. Move the mouse pointer over one of the selected tabs, click and hold the mouse button, and drag the tab to its new location. When you release the mouse button, the worksheet moves to the other workbook. |
 |