Setting Up a Computer Account
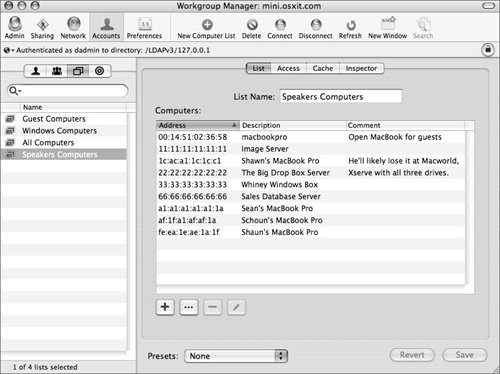
| A computer list account is a list of computers that have the same preference settings and are available to the same set of users and groups. You create and modify these computer lists in Workgroup Manager. Computer lists that you set up appear in the searchable list on the left of the Workgroup Manager window. Computer list settings appear in the List, Access, and Cache panes on the right of the window. When you set up a computer list, make sure you have already determined how computers are identified. Use descriptions that are logical and easy to remember. (For instance, the description might be the computer name.) You must use the "onboard," or built-in, Ethernet address for a computer's address information. This information, often called the MAC address (which is short for Media Access Control), is unique to each computer. The client computer uses this data to find preference information when a user logs in. An easy way to add computers to a list is to use the Browse (...) button. When you select a computer from the browse list, Workgroup Manager automatically enters the computer's Ethernet address and name. It is best to use a computer list for resources in a specific area, as well as for computers of a specific type, such as portables. For example, all kiosk computers might have the same login preferences or all computers in a lab might have the same default printer preferences. When a computer starts up, it checks directory services for a computer list record that contains its Ethernet address. If it finds one, it uses settings for that computer list. If no record is found, the computer uses settings for the default Guest Computers computer list. You can add up to 2000 computers to a computer list, but a computer cannot be a member of more than one computer list. Creating a Computer ListTo set up a computer list account in Workgroup Manager:
Note Computers added to the computer lists at this stage are available in the Managed Network View section of Workgroup Manager. Resources may reside at specific computers (for example, Web or file servers). Tip When there are only a few computers to manage, it is useful to enter them into a computer list or lists. In this way they are accessible to the multiple mechanism of management. This list is also less likely to change frequently. Controlling Guest ComputersIf an unknown computer (one that isn't already in a computer list) connects to your network and attempts to access services, that computer is treated as a guest. Settings chosen for the Guest Computers account apply to these unknown or guest computers. Using the Guest Computers list (or just a single computer list) is not recommended for large numbers of computers. Most of your computers should belong to regular computer lists. This makes managing them easier. During server software installation, a guest computer record is automatically created in the original directory domain only. Afterward, you can create additional Guest Computers accounts in other directory domains. After the account is created, "Guest Computers" appears in the list of computer lists. Each directory domain can have only one Guest Computers list. Depending on network organization and setup, you may not be able to create a Guest Computers list in certain directory domains. Select the "Define Guest Computer preferences here" option in the List pane if you want to set up managed preferences. Click Access and select the settings you want to use. Then, click Cache and set an interval for clearing the preferences. Select the "Inherit preferences for Guest Computers" option in the List pane if you want guest computers to have the same managed preference settings as the parent server. Finally, to restrict access to the Guest Computers account to certain groups, use the Access pane. |
EAN: 2147483647
Pages: 128