| Virtual private networks, or VPNs, extend the reach of your security measures considerably by allowing your remote users to keep their communication with your LAN secure. Not only does that help to protect the data flowing in and out of your organization, but you also don't have to compromise the security of your network in order to provide convenient remote access for your users. VPNs create a secure, encrypted tunnel through which your users can connect to your LAN. Any services that aren't already encrypted will be protected by the VPN. It also makes it easier for your remote users to access certain resources that are restricted to your LAN, such as services restricted by the firewall to IP addresses on the LAN. In short, a VPN allows a remote computer to behave as though it is directly connected to your LAN. The VPN service gives you the option of adding other routes to your routing table as well. For example, if you have two different networks at your business and each network has different IP address ranges, you can add these networks to your VPN client information. If you are not sure which IP ranges need to be made available, consult the network administrator at your organization. There are two methods of connecting to a network via a VPN connection using Server Admin, and each of these contains variances as well. The more secure of the two is Layer Two Tunneling Protocol over IP/Sec (L2TP). The other, less secure method is Point-to-Point Tunneling Protocol (PPTP). L2TP has various options (which will be discussed in the following task). PPTP only offers to add lower 40-bit level encryption to the existing 128-bit encryption. To enable the VPN service 1. | In Server Admin, select the VPN service for your server in the Computers & Services list.
| 2. | Click the Settings button and then select the L2TP tab (Figure 10.19).
Figure 10.19. Select the check box to enable L2TP over IP/Sec for the VPN Service. 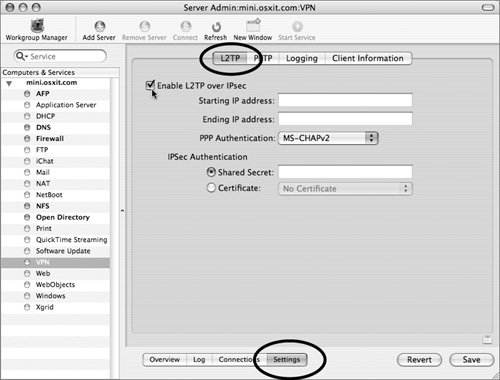
| 3. | Click the Enable L2TP check box and fill in starting and ending IP addresses to define the range (Figure 10.20).
Figure 10.20. Setting various L2TP options. 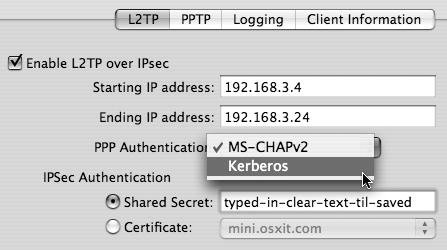
| 4. | From the PPP Authentication pop-up menu, choose either Microsoft's implementation of the Challenge Handshake Authentication Protocol, version 2 (MS-CHAPv2) or Kerberos.
| 5. | In the IPSec Authentication area, select either a Shared Secret (that can be seen when typed in) or a Certificate.
| 6. | To configure PPTP, select the PPTP tab and enter the appropriate information for clients connecting over PPTP (Figure 10.21).
Figure 10.21. PPTP options are minimal. 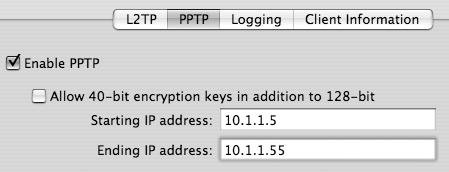
| | | 7. | Click the Client Information tab and fill in the DNS and search domain so the connecting machine can access internal devices accurately (Figure 10.22).
Figure 10.22. Client information can include DNS and domain information and... 
| 8. | Add any public or private routes to be listed in the user's routing table (Figure 10.23).
Figure 10.23. ...both public and private routes that will be added to the user's routing table. 
| 9. | When you've finished making changes, click the Save button and start the VPN service.
|
 Tip Tip
Internet Connect application setup The Internet Connect application also needs to be configured to allow Mac OS X clients to connect to the VPN. When this is done, a new virtual interface is added to the current network location's interface list. If you have more than one location, you should repeat the process that follows for each location, thereby adding the virtual interface to each location. To configure the Internet Connect application 1. | Launch the Internet Connect application located in /Applications (Figure 10.24), and select the VPN icon, if available, in the application's toolbar.
Figure 10.24. Opening the Internet Connect application... 
or
Choose New VPN Connection from the File menu (Figure 10.25).
Figure 10.25. ...to add a new VPN connection from the File menu. 
| 2. | In the dialog that appears, choose the appropriate connection method and click Continue (Figure 10.26).
Figure 10.26. When adding a new VPN connection, a new VPN dialog appears. 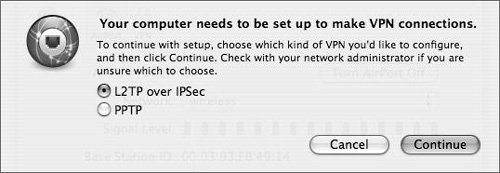
| | | 3. | In the Internet Connect application, choose Edit Configurations from the Configuration pop-up menu (Figure 10.27).
Figure 10.27. Choosing to edit the new VPN configuration. 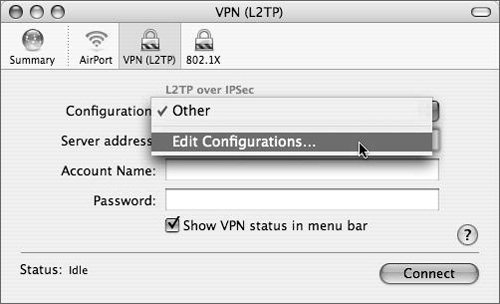
| 4. | In the description field that subsequently appears, provide a name for this VPN connection, in case you have more than one to choose from (Figure 10.28).
Figure 10.28. Entering various data into the new VPN dialog. 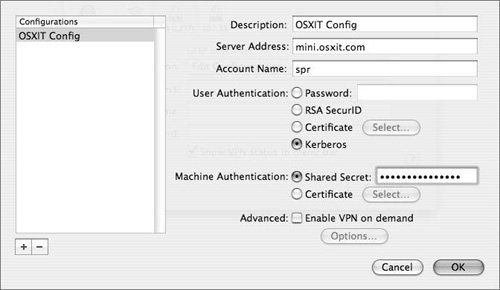
| 5. | In the Server Address field, provide the IP address or domain name of the VPN server.
| 6. | In the Account Name field, enter the short name of the user who will connect to the VPN.
| 7. | In the User Authentication area, select a method of authentication.
If you are using CryptoCard instead of RSA, contact CryptoCard for information on compatibility at www.cryptocard.com.
| 8. | In the Machine Authentication area, select either a Shared Secret or Certificate.
| | | 9. | In the Advanced area, you can click the "Enable VPN on demand" check box and then click Options to display a dialog where you can provide a domain name to trigger the connection (Figure 10.29).
Figure 10.29. Adding a domain to enable VPN on demand. 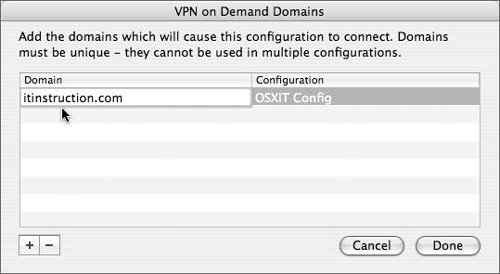
| 10. | Click OK and then click Connect to connect to your VPN service (Figure 10.30).
Figure 10.30. Internet Connect showing VPN connection. 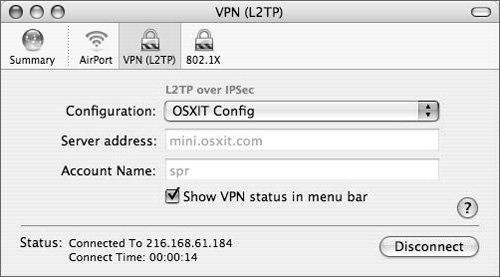
|
Tips You can select the "Show VPN status in menu bar" check box in the Internet Connect application to connect to the VPN directly from the menu bar. There are other, more complex connection methods to other types of VPN servers that are beyond the scope of this book.
Firewall VPN Ports The firewall should have the following ports open, depending on your VPN configuration: 500Internet Security Association and Key Management Protocol/Internet Key Exchange (VPN ISAKMP/IKE) 1701VPN L2TPLayer-Two Tunneling Protocol 1723VPN PPTPPoint-to-Point Tunneling Protocol 4500IKE NAT Traversal
Always back up your firewall settings with the tear-off configuration plist icon in the lower-right corner of the Settings window so that you can return to a set state, if necessary. |
|