| The Apple Xserve hardware has a number of unique features, including a 1U rack mount form-factor, blower fans, and fast-swap hardware. Xserve also includes built-in real-time hardware monitoring and diagnostic tools. The Server Monitor tool is the user interface for this feature. The Server Monitor tool can run on any Mac OS X computer or Mac OS X Server and monitor hundreds of different Xserves simultaneously. Server Monitor also has the ability to automatically notify you, via email and/or paging services, when there is a potential problem. Initially, there are no Xserves in the Server Monitor list; you must add any computer you want to monitor. Xserve Apple introduced the Xserve as a solution for enterprise customers who wanted a rack-mounted solution while still using Apple hardware. The G4 Xserve came with four hot-swappable disk bays and the ability to use Gigabit and/or fiber connections. The G5 Xserve has three available hot-swappable disk bays and similar options for networking. Each Xserve comes with a CD drive for installing the software. The main difference between the Xserve and running Mac OS X Server on another Apple product is that the Xserve was designed to be managed remotely. You don't generally sit in front of an Xserve to install software or configure Mac OS X Server. While you can purchase a video card for either Xserve (allowing you to plug in a video monitor), you can just as easily manage your Xserve remotely from another room or another state. If you choose to manage your Xserve remotely, you must to know how to use command-line tools. Installing and initial configuration can easily be done remotely, but you'll use such command-line tools to make changes to the networking structure and base system configuration. If the command-line interface (CLI) isn't your cup of tea, you can purchase an Apple product called Apple Remote Desktop. This software allows you to take control of the mouse and keyboard of another Macintosh. Using this software from a remote Macintosh lets you see the desktop of the Xserve as if you were sitting in front of it. Another option available to each Xserve (G4 and G5) is the ability to configure the hot-swappable disks in various RAID configurations (see the RAID table on RAID configurations). Not only can you configure the disks, but you can also add the optional Xserve RAID hardware to your Xserve. |
Using Server Monitor Without an Xserve Server Monitor can connect to any type of hardware running Mac OS X Server. However, none of the hardware-monitoring features will work. But you can still perform some basic functions available from the Info pane, such as restarting, shutting down, and getting System Profiler reports. |
To add a computer to the Server Monitor list 1. | Open the Server Monitor tool  by choosing /Applications/Server/Server Monitor. by choosing /Applications/Server/Server Monitor.
| 2. | Click Add Server  . .
| 3. | Enter the IP address or name of the server, and include the administrator authentication information (Figure 2.90).
Figure 2.90. In Server Monitor, enter the IP address or name of the Xserve, include administrator authentication information, and click OK. 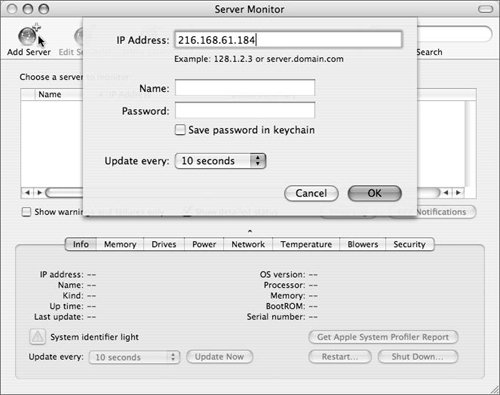
Remember, saving a password to the keychain will automatically log you in to that server from this point forward.
| 4. | Click OK to add the server to your server list.
Server Monitor will maintain a persistent connection to your server as long as it's in the list. You can repeat the process to add as many servers as you wish to monitor (Figure 2.91).
Figure 2.91. The default view of Server Monitor with a server selected. 
|
To monitor a server 1. | Select your server from the Server Monitor list, and then select the "Show detailed status" check box to display a more detailed monitoring view in the Status Summary column (Figure 2.92).
Figure 2.92. Select the "Show Detailed Status" check box for more information about your Xserve. 
| 2. | Click each tab in the middle of the window (Info, Memory, and so on) to monitor a specific category.
Each tab shows a variety of information and statistics about your Xserve. For example, clicking Drives monitors the drives inside the Xserve (Figure 2.93).
Figure 2.93. Clicking the Drives tab shows the status of the drives in the bottom half of the window. 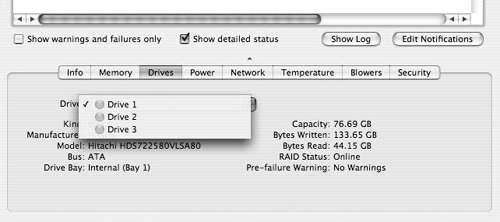
| 3. | Click the Info tab, and then click Get Apple System Profiler Report to remotely run a System Profiler report (Figure 2.94).
Figure 2.94. Click the Info tab, and then click the Get Apple System Profiler Report button. 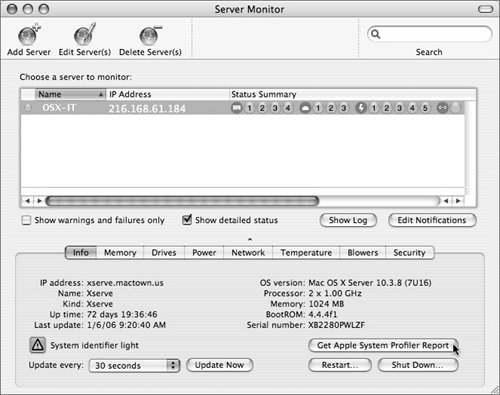
Apple System Profiler, or System Profiler, lets you query a Mac OS X or Mac OS X Server for a variety of hardware and software information.
The Server Monitor log window appears, and the System Profiler Report is displayed (Figure 2.95).
Figure 2.95. The Server Monitor log window subsequently shows the System Profiler report. 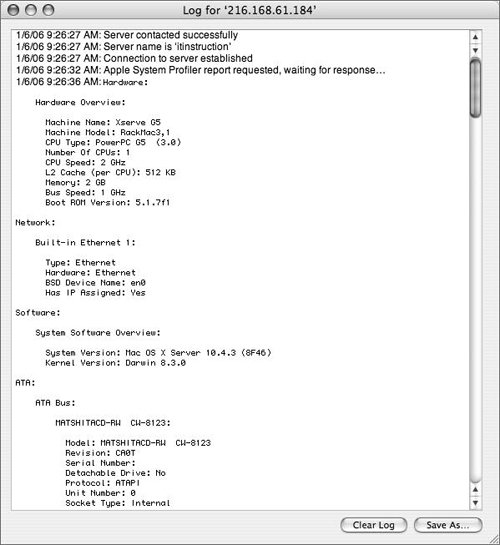
| 4. | In this window, you can click Save As to save the log as a text file for future inspection.
|
To enable Server Monitor notifications 1. | Select your server from the Server Monitor list, and then click the Edit Notifications button (Figure 2.96).
Figure 2.96. Select a server from the Server Monitor list, and then click the Edit Notifications button. 
The Notifications dialog appears.
| 2. | In the Enabled Notifications section, select the monitoring devices you want to be automatically notified about (Figure 2.97).
Figure 2.97. Select the monitoring devices you want to be automatically notified about. 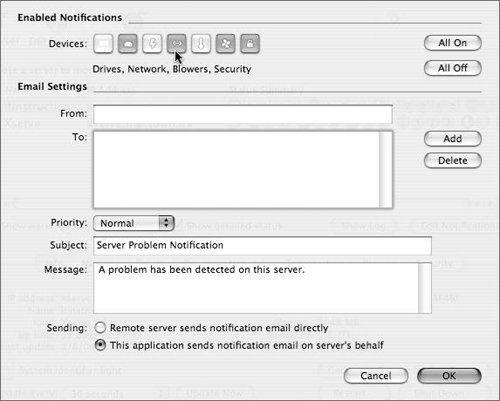
These buttons work as toggle switches: Clicking a button switches it between disabled and enabled.
| 3. | In the Email Settings section of the dialog, configure an email account from which the Server Monitor should send its messages (Figure 2.98).
Figure 2.98. Configure an email account(s) from which the Server Monitor should send its messages, and email accounts you want to receive the messages. 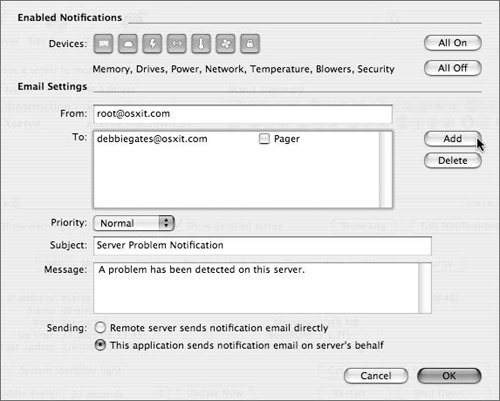
| | | 4. | Configure as many email accounts as you want to receive the messages and set the message priority, subject, and beginning message text.
| 5. | Choose one of the following options to specify whether you want the current tool or the server itself to send the message (Figure 2.99):
- Remote server sends notification email directly
- This application sends notification email on server's behalf
Figure 2.99. Choose an option to specify whether you want the current tool or the server itself to send the message. 
| 6. | Click OK to save the settings.
|
|