| Administrative user accounts on Mac OS X Server are very similar to administrative user accounts on Mac OS X Client. Administrative users can configure any settings or file permissions on both Mac OS X Client and Server. Essentially, an administrative user account is any user who is also in the Admin group. Thus, it's important to restrict administrative user accounts to only those users who require such authority. From an account management standpoint, administrators aren't that different from other user accounts. In fact, administrative users and regular users are only separated by one check box in the Workgroup Manager application. This chapter assumes you've already created additional user accounts on your server. If you haven't, refer to the instructions for creating a basic user account in Chapter 2, "Server Tools." To change administrative user options: 1. | Launch the Workgroup Manager tool located in /Applications/Server, and authenticate as the administrator (Figure 4.8).
Figure 4.8. Open Workgroup Manager, and authenticate as an administrator. 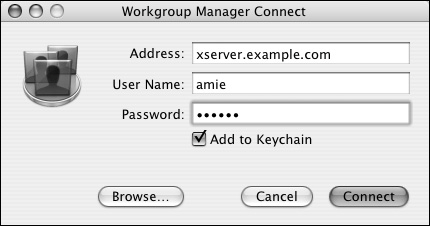
| 2. | Click the Accounts icon  in the Toolbar and the User icon in the Toolbar and the User icon  in the account types tab. in the account types tab.
The user information is displayed (Figure 4.9).
Figure 4.9. Click the Accounts button and the User tab in Workgroup Manager. 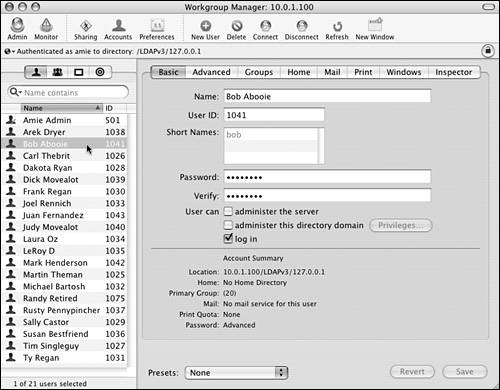
| 3. | Click the directory authentication icon  , and select the appropriate directory database from the pop-up menu (Figure 4.10). , and select the appropriate directory database from the pop-up menu (Figure 4.10).
Figure 4.10. Select the appropriate directory database from the selection pop-up menu. 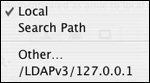
| 4. | Select the user or users you wish to configure from the user list (Figure 4.11).
Figure 4.11. Choose a user from the selected database. 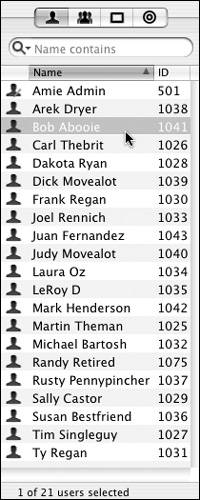
| 5. | In the user settings frame, click the Basic tab  . .
| 6. | Depending on whether the user account is in a local or a shared directory, do one of the following:
If the user account is in a local directory, select the "User can administer the server" check box (Figure 4.12). Figure 4.12. If the user account is in a local directory, select the "User can administer the server" check box. 
If the user account is in a shared directory, select the "User can administer the server" check box and the "User can administer this directory domain" check box (Figure 4.13). Clicking that check box invokes the administrator privileges dialog (Figure 4.14); click the OK button  to accept the default settings. to accept the default settings. Figure 4.13. If the user account is in a shared directory, select the "User can administer the server" check box and the "User can administer this directory domain" check box. Doing so... 
Figure 4.14. ...opens the administrator's privileges dialog. 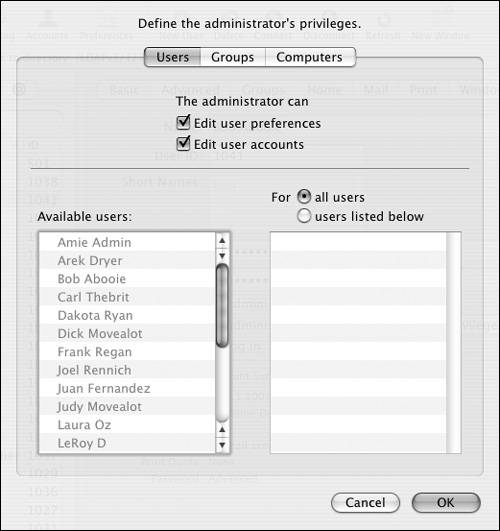
| 7. | When you've finished making changes, click the Save button  . .
This user is now allowed to make changes to all server settings, file permissions, and user accounts.
|
 Tips Tips
Administrative users can also become the root user by typing sudo s in the Terminal and then pressing Return and entering their password. To revert the administrative account back to a regular user account, deselect both administrator check boxes and save your changes. An administrative user account in a shared directory can administer any computer that authenticates against that shared directory. In other words, if your client computers use the directory server, then server administrators also have administrative rights on client computers.
Restricting administrator directory access On Mac OS X Client, every administrative user is allowed to edit all settings, permissions, and user accounts. However, Mac OS X Server gives you more granularity when configuring administrative user permissions. Specifically, Mac OS X Server distinguishes administrators who can configure service settings from those who can configure account settings and share points. For example, server administrators can use the Server Admin tool, whereas directory administrators can use the Workgroup Manager tool. In the task "To change administrative user options," you were instructed to enable unlimited server and directory administration rights for a user account, thus turning it into an administrative account. The following task explains how to restrict an administrator's directory permissions. To restrict administrator directory access: 1. | In Workgroup Manager, navigate to configure an administrative user's Basic account attributes (Figure 4.15).
Figure 4.15. Click the Accounts button and the User tab in Workgroup Manager. 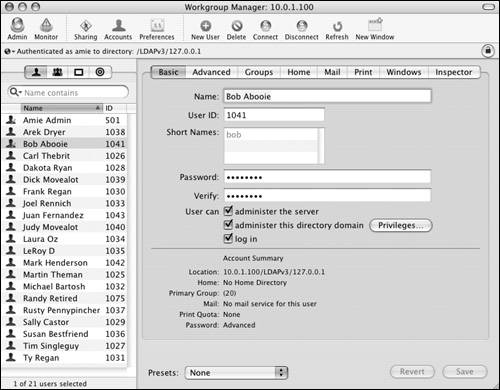
| 2. | Verify that the "User can administer this directory domain" check box is selected (Figures 4.16).
Figure 4.16. Verify that the "User can administer this directory domain" check box is selected. 
| 3. | Click the Privileges button  . .
The administrator's privileges dialog drops down (Figure 4.17).
Figure 4.17. Click the Privileges button to display the administrator's editing privileges dialog. 
| 4. | Select one of the following account types to edit:
At this point, the task assumes you've chosen the Users tab. The options are similar for each account type.
| 5. | To configure the administrator's permissions, select or deselect the following options (Figure 4.18):
Figure 4.18. Set the administrator permissions in the administrator privileges dialog. 
| 6. | Select the "For users listed below" radio button (Figure 4.19).
Figure 4.19. Choose the option button that allows an administrator to administer certain users. 
| 7. | Drag and drop accounts from the "Available users" column to the right column (Figure 4.20).
Figure 4.20. Drag users into the field to allow administration by a certain administrator. 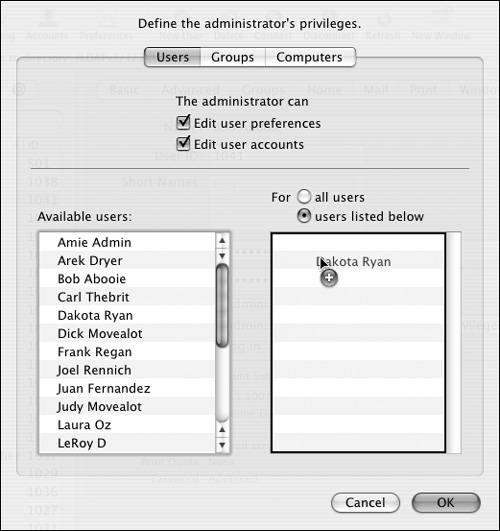
| 8. | Click the OK button to accept the changes .
The administrator's permissions dialog closes.
| 9. | Click the Save button .
|
Tips When it's properly configured, you can safely delegate the task of managing accounts to other users with more time on their hands for such tasks. Keep in mind that every administrator can still become root in the terminal. You can select more than one account at a time while in the administrator's privileges dialog by holding down the Shift or Command key on your keyboard while you make your selections.
|