Applying Global User Authentication Policies
|
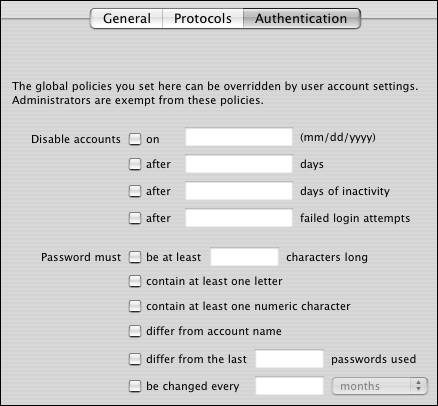
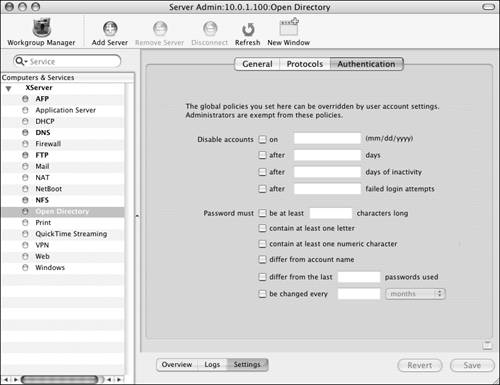
| Now that you have an LDAP directory to store your users, you have a variety of options when choosing how those users authenticate to your server. When you create users, you give them a long name, a short name, and a password. That's the minimum you need to create users on Mac OS X Server who can log in remotely and access folders and files needed for their work. Chapter 2, "Server Tools," examined how to quickly add users to a local directory. You probably haven't yet created a secondary directory, and it isn't necessary to do so if all you wish to do is let users log in remotely to access folders and files. You reduce the security and functionality by having the secondary directory, but it can be done. When you create an Open Directory master, you then have the ability to set certain global authentication polices regarding user's password(s) (Figure 3.67). This is the case because user passwords are managed differently than those in the local directory. You've seen how to create that Open Directory master, but this chapter should help convince you that doing so is a wise decision. The global user authentication policies are listed in Table 3.1. Figure 3.67. The Authentication tab of the Open Directory service shows password server policies.
These policies help ensure security on your server by maintaining a better level of complexity when dealing with passwords. To set the minimum length for passwords:
About authentication policies with Mac OS X ServerMac OS X Server can authenticate users using several built-in methods. Depending on whether you upgraded your server or installed Mac OS X Server for the first time, you may need to change the type of password stored for each user. Crypt passwords may have been used on a version of Mac OS X Server prior to 10.3. You can check this by opening Workgroup Manager, selecting a user, clicking the Advanced tab, and seeing whether the User Password Type pop-up window shows Crypt Password. Crypt passwords aren't as secure as other passwords and should generally be changed to a more secure methodin this case, Open Directory passwords. One reason to keep a user's password as a crypt password is if that user is connecting to your Mac OS X Server from an older Macintosh operating system, such as Mac OS 8.6. Users of Mac OS X Server who aren't promoting the server to a master (keeping it a stand-alone server) may wish to keep the crypt passwords as well, although this is a terrible security risk. Open Directory passwords are more complex and are stored securely in a separate database. One of the advantages of using an Open Directory password is that the password database can be stored on another Mac OS X Server, thus allowing one server to be the file server and Web server and another server to be used solely for user authentication. When you're using Open Directory passwords, there are several editable methods of authentication (editable means you can turn off these authentication methods to restrict access to your server via the methods): SMB-NT is used for Windows clients. SMB-LAN-MANAGER is used for Windows clients. MS-CHAPv2 is used for VPN connections to the server. CRAM-MD5 is used primarily for IMAP mail. WEBDAV-DIGEST is used for Web-DAV connections. APOP is used by the POP protocol when retrieving mail. There are additional methods of authentication, but they aren't editable. You can't turn them off in the GUI; you must do so via the command line using NeST (a command-line utility that's used to manage Password Server and therefore has several functions). Not only can you turn off various authentication methods, but you can also disable Password Server and create a Password Server administrator, in case the administrator you have doesn't work.
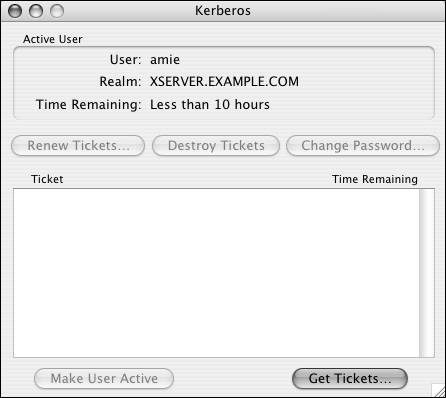
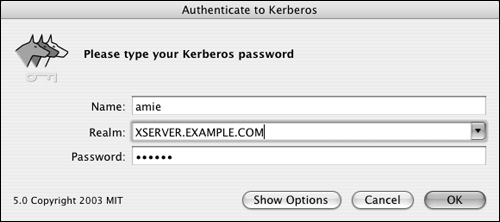
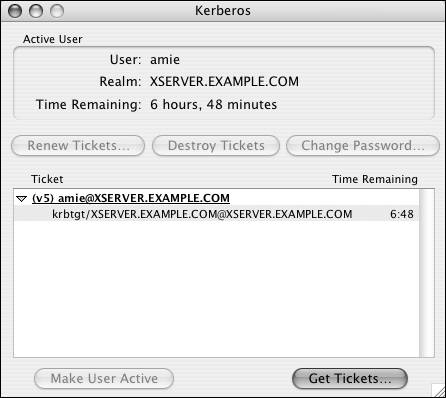
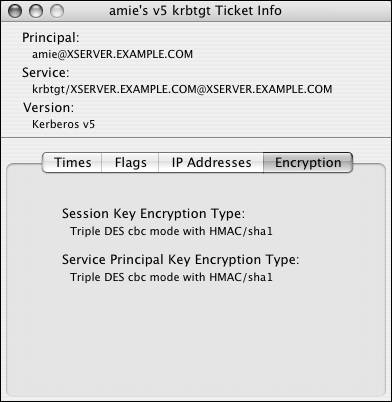
Kerberos overviewUnderstanding that Password Server exists isn't the end of the authentication options when you're dealing with Mac OS X Server. Once a master has been created, a Kerberos Key Distribution Center (KDC) is also created. Kerberos is an authentication method in which a ticket is granted to a user by a KDC for presentation to a service to utilize that service. The KDC knows the user's password, and both the user's computer and the KDC use a complex method to determine if the password entered by the user is correct. Once the password has been approved by the KDC, additional conversations take place between the user's computer and the KDC. Ultimately, the user receives a ticket for a service, such as Apple File Protocol (when done from a Mac OS X Server). The ticket is presented to the service, and the service then grants access to (in this case) the share points the user has permission to access. Mac OS X Server has made Kerberos mostly invisible. You can ensure the KDC is running by clicking the Overview button in the Open Directory service and viewing the status. Note that on both the Mac OS X Client and Server, an edu.mit.kerberos file must be present for Kerberos to function properly; it's located in /Library/Preferences. When a Mac OS X Client is properly bound to a Mac OS X Server, this file is sent down from the Server to the client automatically. Literally all you need to do is choose the services on Mac OS X Server for which you wish to use Kerberos. The currently available services are Apple Filing Protocol, FTP, and the Mail server (there are others, but Kerberos is already built into them). Mac OS X clients (Mac OS X 10.2 and later) can obtain Kerberos tickets for these services automatically. Refer to Chapter 5, "File Sharing," for more information about setting up Apple File Service and FTP, and see Chapter 8 ("Mail Services") to learn about Mail server setup. Administrators use Kerberos to help reduce problems associated with traditional authentication methods, such as lack of encryption for passwords, packet sniffing, and attacks against services to compromise the computer and harvest passwords. By keeping the KDC in a locked room with an excellent administrator password and no root user active, you reduce your risk.
Not everyone will use Kerberos, and not all services can be Kerberized. But it's important to understand that as more and more services utilize Kerberos, the cost of setting up and managing those services will drop, and the advantages of Kerberos will become greater. The bottom line for first-time Mac OS X Server users is that Kerberos is there, whether you use it or not. It may be a good idea to experiment with the service to see if it suits you.
To view the Kerberos tool:
|
|
EAN: 2147483647
Pages: 105
 Tip
Tip