| LDAP stands for Lightweight Directory Access Protocol, which indicates that LDAP is a protocol: a way to connect devices and share information. It is that, and more. LDAP is also a way to store information. LDAP data is arranged in a fashion that may be foreign to some users. LDAP schema describe the overall structure of a directory. The schema contains entries, and the entries contain attributes. For example, attributes dictate such things as your short name, long name, password, user ID, and group ID. All of these things, when grouped together, form an entry. The items associated with the attribute (User ID, Group ID, and so on) can be defined as the data associated with that particular attribute. These terms may make you feel overwhelmed, but the basic setup of Mac OS X Server doesn't require you to know them. You need to understand the basics of LDAP because Mac OS X Server is extremely flexible. Attributes that don't exist by default in Mac OS X Server can be added, such as Address, City, State, Zip, and Phone Number. The other reason to understand the basic terminology of LDAP is that you may need to map attributes from another LDAP server, such as a server running eDirectory, to your Mac OS X Server's Open Directory architecture. Although at first this seems overly complicated, essentially all you're doing is connecting the dots. For example, suppose you wish to connect to an eDirectory server. You know the Open Directory attribute for Group ID is called PrimaryGroupID. Now all you need to do is find out what eDirectory calls it, and match the names using the Search & Mappings tab of the Directory Access application (as you'll see later). If the attribute doesn't exist on the other directory service, you must either create that attribute or use an empty attribute and match the new name (Figure 3.1). Figure 3.1. Directory Access's LDAP plug-in maps the attributes from one directory service to Mac OS X or Mac OS X Server. 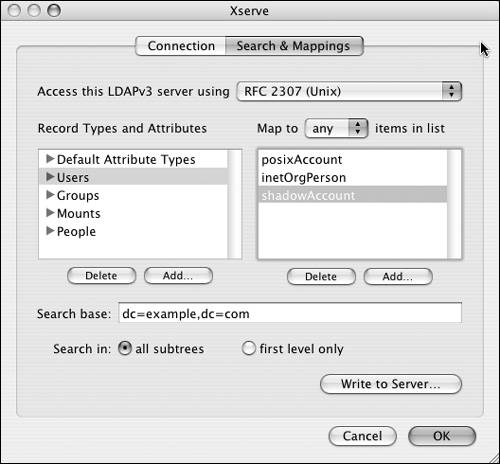
It's important to remember that most Mac OS X Server setups (especially the first Mac OS X Servers in an organization) will be Open Directory masters and will not connect to other directory services. As such, most of the plug-ins discussed in this chapter are unlikely to be configured on the initial Mac OS X Server by the administrator; however, they're configurable on any Mac OS X client. This doesn't diminish the importance of understanding the functionality and concepts behind these plug-ins. Active Directory overview Microsoft's Active Directory (AD) is another way of storing user data. Like Apple's Open Directory, it's based on the LDAP architecture. AD uses attributes, and these attributes store data. This book is only interested in the user data stored in AD. Mac OS X Server administrators need to understand how AD works because in some cases, businesses that are running AD are reluctant to relinquish control of their user attribute data to Mac OS X Server. If this is the case, then Mac OS X Server can be configured to manage the AD users in a variety of ways without changing their actual data. In other words, Mac OS X Server is used to manage groups of users that exist on the AD server by creating the group on Mac OS X Server and managing the users in that group even though they exist on the AD computer. Mac OS X Server administrators normally don't deal with AD servers, but it's worth seeing what a typical AD account looks like (Figure 3.2). Figure 3.2. This is a typical Active Directory account, showing the various attributes of that account. 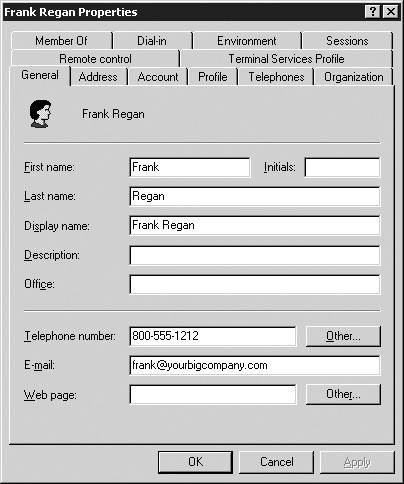
Directory Access overview The Directory Access application is found on both Mac OS X Client and Server inside /Applications/Utilities/. It's used primarily to connect a Mac OS X computer to another directory service or system. Directory Access has three tabs: one that lists all the services, one that shows the list of additional directory services from which a Mac OS X computer can obtain information, and a Contacts tab that lets applications read information from other directory services (Figure 3.3). Figure 3.3. The Directory Access application allows you to connect or bind to another directory service. 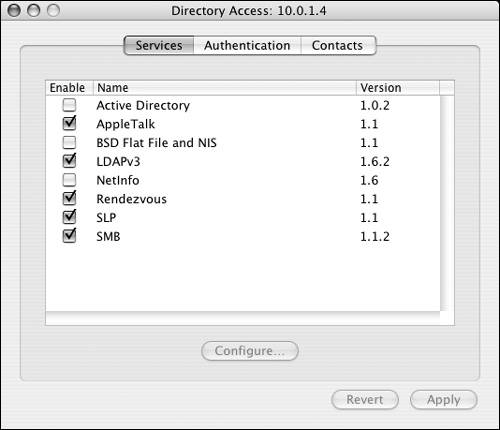
To understand how the Directory Access application works, you must be familiar with the concept behind what it does. Since Directory Access is based on a modular plug-in architecture, the application works differently depending on the plug-in used. Let's say you have another Mac OS X Server already in your organization, and you want this Mac OS X Server to see all the users and groups you've created on your first server. Or, you have a Microsoft AD server, and you wish to see all the users in that directory service (provided you have the proper access). You can choose from four different methods of connecting your Mac OS X computer (client or server) to another directory service. You'll see these options when you click the Services tab of Directory Access: Active Directory Use this plug-in to bind your Mac OS X computer to an AD machine (as you'll see later in this chapter). BSD Flat Files and NIS Use this plug-in to allow your Mac OS X computer to search locally for flat files containing user and group information and/or allow it to search the directory of an NIS computer, such as Linux or Solaris. LDAPv3 Use this option when you're connecting to another Mac OS X Server or an OpenLDAP server running on another operating system. NetInfo You can use this plug-in when you're connecting a Mac OS X computer to an older parent NetInfo directory, such as Mac OS X Server 10.2 (Jaguar Server). In short, when you're using the Directory Access application, understand that it's used to connect your Mac (client or server) to another directory service to obtain user name and password authentication, authorization information, and contact information. Authentication paths You can choose to get directory information from any of these methods, although with AD and NetInfo you're limited to binding to one server per plug-in. Once you've chosen a method and the information is retrieved correctly, you can then have your Mac OS X computer authenticate against that additional directory service. Whenever a user logs in, Mac OS X checks the local NetInfo directory first (Mac OS X and Mac OS X Server always check the local NetInfo directory first). If a user record isn't found in the local NetInfo directory, Mac OS X checks the authentication path for the username and password information, allowing the authenticated user to log in. That search list is handled by the Authentication tab of the Directory Access application (Figure 3.4). Figure 3.4. The Authentication tab allows various other locations to be searched for authentication information. 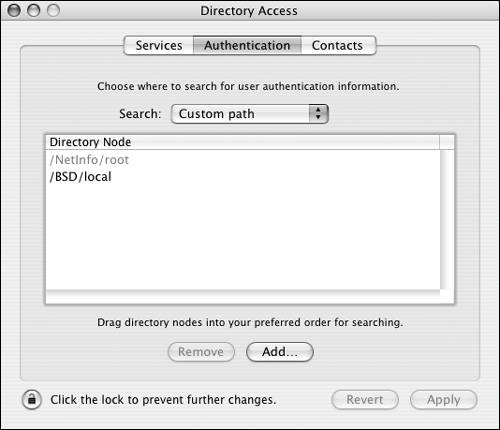
For example, suppose you want your Mac OS X Client computer users to log in to their machines, and their user names and passwords are stored on another directory server. You don't have to create any entries in your local NetInfo directorysimply have your Mac OS X Server piggyback on another server for user names and passwords, and then add computer management using your Mac OS X Server. Once you've chosen a plug-in, it's time to configure it. Let's start with the NetInfo plug-in.  Tip Tip
If you're working on an Xserve or managing your server remotely, you can connect to your server's Directory Access application through yours. To do so, launch your Directory Access application located in /Application/Utilities/, and choose Server > Connect (Figure 3.5). Type in the address or name of the server and the administrator's name and password, and click the Connect button (Figure 3.6). You'll have to reauthenticate every five minutes while this application is open, so it's a good idea to get in, make your changes, save them, and get out.
Figure 3.5. Choose Server > Connect in the Directory Access application. 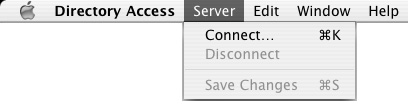
Figure 3.6. Type in the address or name of the server and the administrator's name and password, and click Connect to connect to a remote Mac OS X Server's Directory Access application. 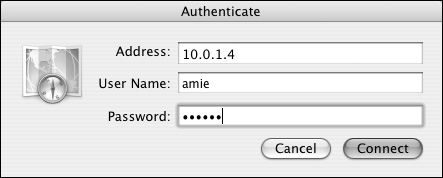
NetInfo plug-in The NetInfo plug-in is very basic. To configure your server to bind to a parent NetInfo directory, open the Directory Access application, click the Services tab, and select the NetInfo check box. Then click the Configure button  to properly configure that plug-in (Figures 3.7 and 3.8). to properly configure that plug-in (Figures 3.7 and 3.8). Figure 3.7. The Services tab of Directory Access includes the NetInfo plug-in. 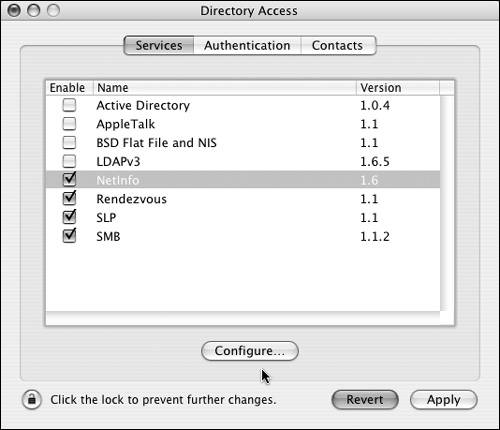
Figure 3.8. These options appear in the NetInfo plug-in after you click Configure in Directory Access. 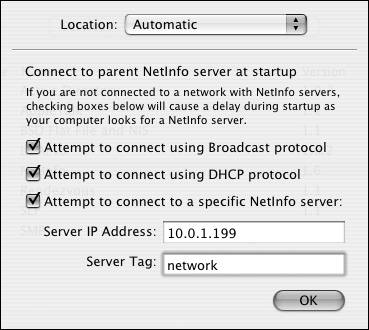
You can find a parent NetInfo server three ways: By IP address Using this method ensures that you know exactly where the NetInfo parent is located. Typical NetInfo parents have the Server Tag name network. By getting its parent information from a DHCP server This entails having your Mac OS X Server get an address from a DHCP server that can also forward NetInfo information as part of its packet delivery. By attempting to connect using the broadcast protocol Using this approach, your Mac OS X Server sends out requests asking if any servers on the local network are parent NetInfo servers. Parents must know about the child NetInfo servers binding to them. If they don't, then your Mac OS X Server won't receive the proper information. NetInfo is now legacy technology, and this is an unlikely scenario. However, if you aren't doing any NetInfo binding, it's important to unselect the NetInfo check box in Directory Access. BSD Flat File and NIS plug-in The second directory service technology this section will look at is Network Information Services (NIS). This technology is still used in certain places, and Mac OS X computers can authenticate against it using the BSD Flat File and NIS plug-in. It can also be used to authenticate against flat files that exist on the local disk, which can allow for the creation of a hidden account not found in the local directory. To configure the NIS portion of the BSD Flat File and NIS plug-in: 1. | Open the Directory Access application, located in /Applications/Utilities/, authenticate by clicking the lock in the lower-left corner of the dialog, click the Services tab, and select the BSD Flat File and NIS plug-in check box if it isn't already checked (Figure 3.9).
Figure 3.9. Select the BSD Flat File and NIS plug-in on the Services tab of Directory Access. 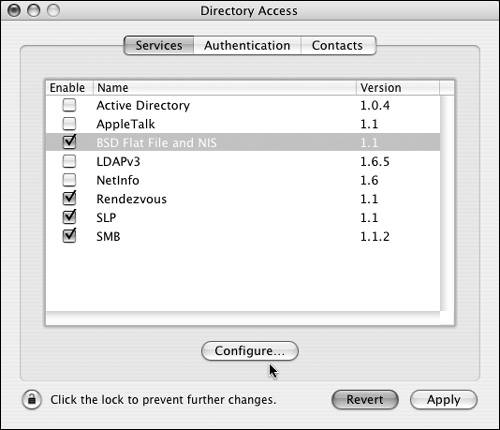
| 2. | Click the Configure button , and do one of the following (Figure 3.10):
Figure 3.10. These options are available when you connect to an NIS system. 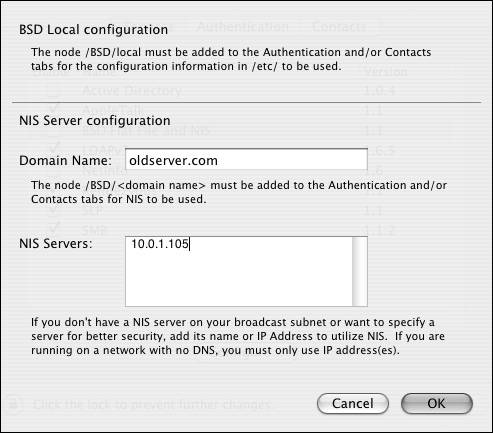
| 3. | Click OK to close the dialog, and click Apply  to confirm the changes. to confirm the changes.
| 4. | Click the Authentication tab, and choose "Custom path" from the pop-up menu (Figure 3.11).
Figure 3.11. Select the "Custom path" option on the Authentication tab of Directory Access. 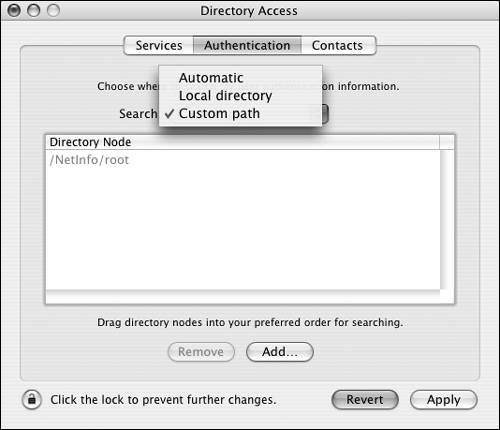
| 5. | Click Add  , and select /BSD/Local from the list. , and select /BSD/Local from the list.
Click Add again to add /BSD/Local to the Search path (Figures 3.12 and 3.13).
Figure 3.12. Select the BSD Flat File and NIS plug-in from the list of optional authentication methods. 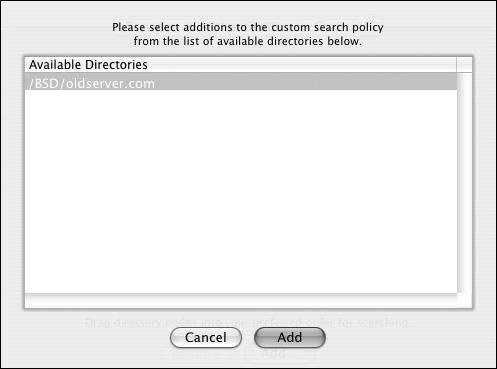
Figure 3.13. The final authentication path includes the BSD Flat File and NIS option. 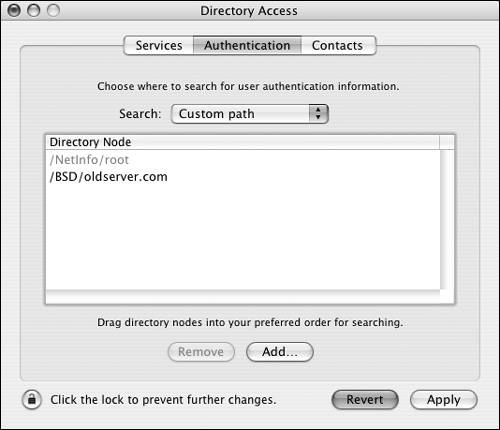
| 6. | Click Apply to commit the changes to your Open Directory architecture.
Your Mac OS X Server is now ready to have users authenticate from the NIS directory server.
|
Flat Files Before there were directories to store user information, it was stored (on various operating systems) in plain-text files on the computer. Mac OS X Client and Server still contain these plain-text files and permit an administrator to add these files in the authentication search path via the Directory Access application. See "To add flatfile searching to the authentication path," later in this chapter, for more information. |
Tip
To create a local user outside the NetInfo directory: 1. | Use the System Preferences > Accounts Preference pane to create a user with the long name Back Door and the short name backdoor (Figure 3.14).
Figure 3.14. Add a user in the Accounts Preference pane of System Preferences. 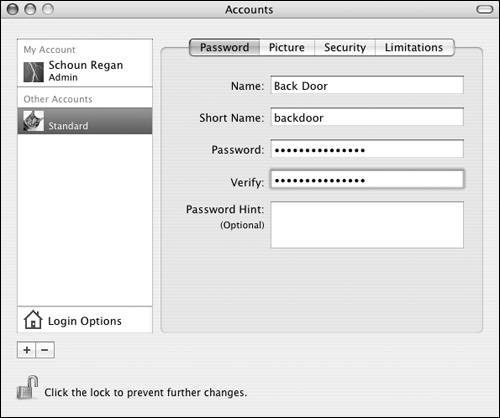
This creates the home folder directory for the user backdoor (you can use any name that suits you).
| 2. | Open the Terminal application, and type sudo mv /Users/backdoor/ /var/ (Figure 3.15).
Figure 3.15. Use the mv command to move the home folder to another folder. 
Press Return, and enter your administrator password when asked.
This moves the home folder of the user backdoor away from the normal location in the /Users folder and places it in the hidden /var folder.
| 3. | Open System Preferences, and delete the user backdoor by clicking on the Delete button below the list of users (Figure 3.16).
Figure 3.16. Delete the user account using the Accounts Preference pane of System Preferences. 
| 4. | Confirm your deletion by clicking OK in the confirmation dialog (Figure 3.17).
Figure 3.17. Click OK in the confirmation dialog to delete the user. 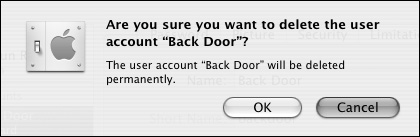
| 5. | Open a new Finder window, choose Go > Go To Folder, and type /etc in the resulting dialog (Figure 3.18).
Figure 3.18. Use the Go To Folder option to connect to the /etc directory. 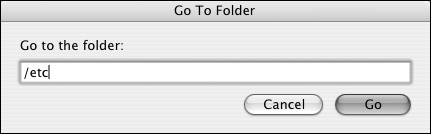
If you know Unix well, at this point you can change the contents of the file any way you see fit.
| 6. | Drag the master.passwd file that resides in /etc to the Desktop.
Because you aren't the owner of the file, you may have to authenticate to copy it (Figure 3.19).
Figure 3.19. An Authenticate dialog appears when you attempt to copy a file from a location where the user doesn't have write access. 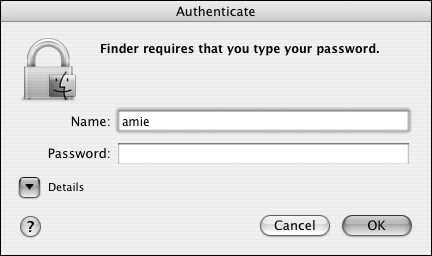
| 7. | Open the file in a text editor, such as TextEdit.
You can't save this file with an extension, so be careful what application you use to open it.
| 8. | Highlight the last line in the file, and copy it to a new line at the bottom of the file (Figure 3.20).
Figure 3.20. This master.passwd file shows the last line of the file being copied and pasted to a new line below. 
| 9. | Change the short name, user ID, group ID, long name, home folder, and shell. Leave the colons and other zeros intact.
For example, in the line backdoor: *:501:501::0:0:Back Door: /var/backdoor:/bin/bash, from left to right:
backdoor is the user's short name. The asterisk is a placeholder for the password that will be changed later. 501:501 is the user ID followed by the primary group ID. Back Door is the user's long name. /var/backdoor is the path to the home folder, which was moved into /var earlier. /bin/bash is the user shell type.
| 10. | Save the file.
Make sure the file is saved as plain text with no file extension.
| 11. | Drag the file back into /etc/, and authenticate when necessary.
| 12. | Open the Terminal, and change the password for your new user by typing sudo passwd i file backdoor and pressing Return (Figure 3.21).
Figure 3.21. Change the user's password in the master.passwd file using the passwd command. 
Enter your password first, because you started the command with sudo. Then enter and reenter the new backdoor user's password to change it.
| 13. | While you're in the Terminal, type sudo chown R backdoor:backdoor /var/backdoor, and press Return.
This command reassociates the backdoor user with the backdoor home folder.
You've created a hidden user inside the local flat file. You must now add the local flat files to the authentication search path.
|
To add flat-file searching to the authentication path: 1. | Open the Directory Access application located in /Applications/Utilities/, authenticate by clicking the lock in the lower-left corner of the dialog, click the Services tab, and select the BSD Flat File and NIS plug-in check box if it isn't already checked (Figure 3.22).
Figure 3.22. Select the BSD Flat File and NIS plug-in. 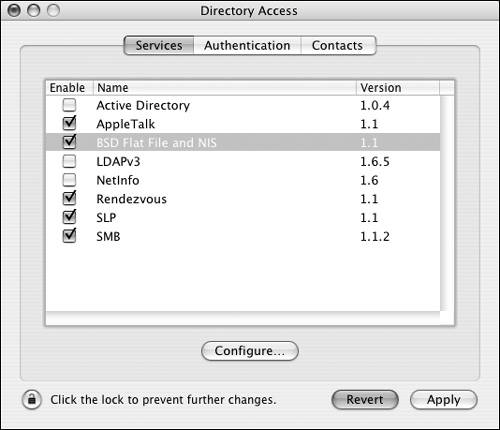
| 2. | Click the Authentication tab, and choose "Custom path" from the pop-up menu (Figure 3.23).
Figure 3.23. Choose the "Custom path" option. 
| 3. | Click the Add button , and select /BSD/local from the list.
Click Add to add it to the Search path (Figures 3.24 and 3.25).
Figure 3.24. Select the BSD Flat File plug-in from the list of optional authentication methods. 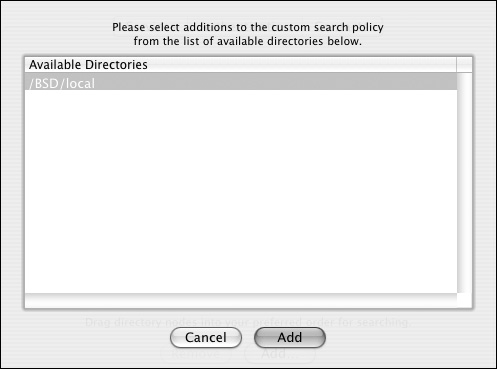
Figure 3.25. The final authentication path includes the BSD Flat File option. 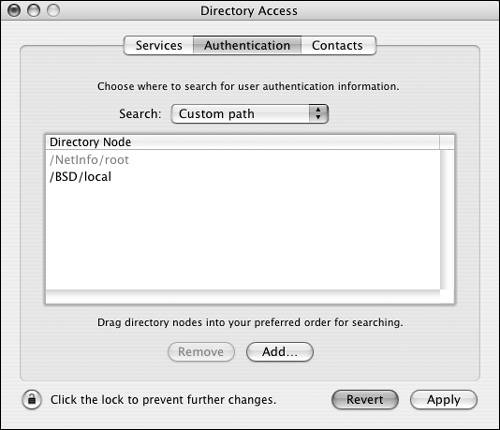
| 4. | Click the Apply button to commit the changes to your Open Directory architecture.
Your Mac OS X Server is now ready to have users authenticate from flat-file users.
| 5. | Log out, and then log in with your new hidden account.
|
Tip
Active Directory plug-in When you're attempting to bind your Mac OS X computer to an Active Directory server, you must first know a few things about your AD setup. You need to know whether your AD server is in a forest and, if so, which forest. You must know the fully qualified name of the server, and you should pick a computer ID for your Mac OS X computer (Figure 3.26). Figure 3.26. Select a computer ID in the Active Directory plug-in dialog of Directory Access. 
You'll choose from several options prior to binding. Tip
To bind Mac OS X to an Active Directory server: 1. | Open the Directory Access application located in /Applications/Utilities/, authenticate by clicking the lock in the lower-left corner of the dialog, click the Services tab, and select the Active Directory plug-in check box if it isn't already checked (Figure 3.27).
Figure 3.27. Select the Active Directory plug-in. 
| 2. | Click the Configure button .
The Active Directory configuration dialog opens.
| 3. | Enter the Active Directory forest and domain, and add a computer ID (Figure 3.28).
Figure 3.28. Enter the Active Directory forest, Active Directory domain, and computer ID. 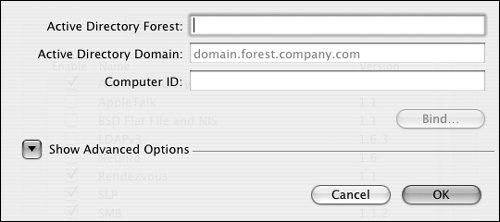
| 4. | Click the disclosure triangle next to Show Advanced Options, and add any criteria that suit your needs (Figure 3.29):
"Cache last user login for offline operation" allows a computer to be disconnected from the network but retain the authentication from the AD server.
"Authenticate in multiple domains" lets users be authenticated by several domains.
"Prefer this domain server" means that with several servers present, authentication is attempted with this server first, regardless of whether other servers are closer.
"Map UID to attribute" forces AD to use the entered attribute to hold the User ID.
"Allow administration by" allows groups entered here to have administrative rights when logging into a Mac OS X computer using their AD user name and password.
Figure 3.29. Clicking the disclosure triangle displays the Active Directory plug-in's additional options. 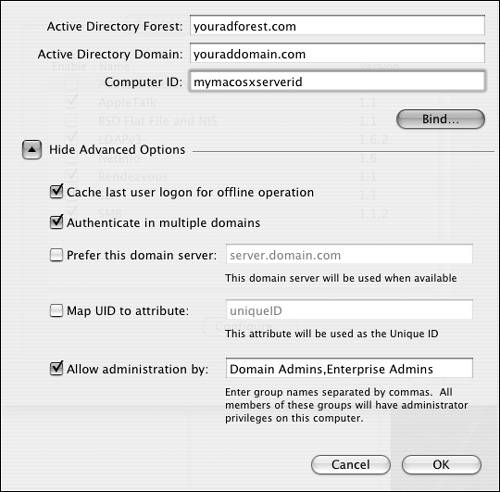
| 5. | Click the Bind button  . .
In the dialog that opens, enter the authorized AD name and password, and click OK (Figure 3.30).
Figure 3.30. After you click the Bind button, the Active Directory authentication dialog appears. 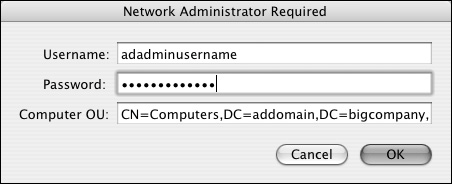
The Computer OU or correct LDAP mappings should be automatically filled in.
|
AD Forests An Active Directory forest is a collection of AD servers that are bound together, usually serving a single organization. |
Active Directory and Mac OS X Server Although you can do the previous task with Mac OS X Server, it's most commonly associated with Mac OS X Client. You would do this with Mac OS X Server to enable the management of local groups on Mac OS X Servers that contain aliases of users within the AD domain. |
To add Active Directory plug-in architecture searching to the authentication path: 1. | Open the Directory Access application located in /Applications/Utilities/, authenticate by clicking the lock in the lower-left corner of the dialog, click the Services tab, and select the Active Directory plug-in check box if it isn't already checked. (Figure 3.31).
Figure 3.31. Select the Active Directory plug-in. 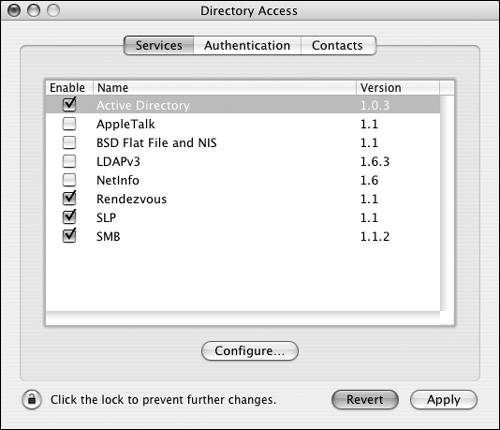
| 2. | Click the Authentication tab, and choose "Custom path" from the pop-up menu (Figure 3.32).
Figure 3.32. Choose the "Custom path" option. 
| 3. | Click the Add button , and select /Active Directory/ from the list.
Click Add to add it to the Search path (Figures 3.33 and 3.34).
Figure 3.33. Select the Active Directory plug-in from the list of optional authentication methods. 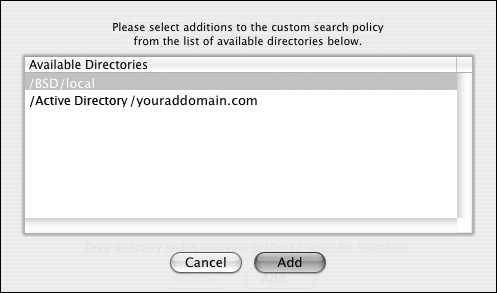
Figure 3.34. The final authentication path includes the Active Directory option. 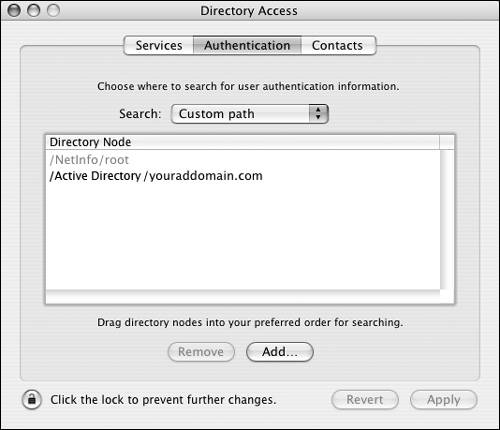
| 4. | Click the Apply button to commit the changes to your Open Directory architecture.
| 5. | Log out, and then log in with your Active Directory account.
|
LDAPv3 plug-in The LDAPv3 plug-in lets Mac OS X Client and Server bind to another LDAP server and obtain authentication and authorization information from that server. This plug-in is different than the others in that it can contain many references to even more servers. Your Mac OS X Server can choose to authenticate against any number of servers, so the number of permutations is very high (Figure 3.35). Figure 3.35. The LDAP plug-in of Directory Access has many different connections to other LDAP directory servers. 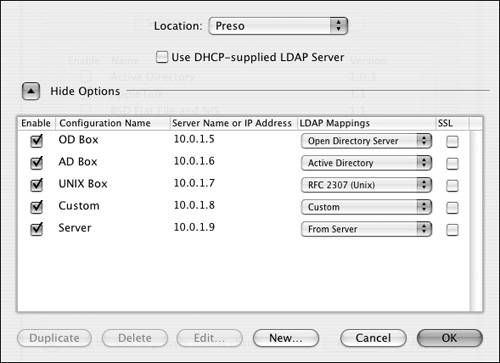
A look at the LDAPv3 plug-in reveals that you can also obtain LDAP information from a DHCP server on your network by opening the Directory Access application, selecting the LDAP plug-in, and clicking the Configure button (Figure 3.36). This subject is covered in more depth in Chapter 6, "Network Configuration Options." Figure 3.36. You can obtain LDAP information from a DHCP server on your network. 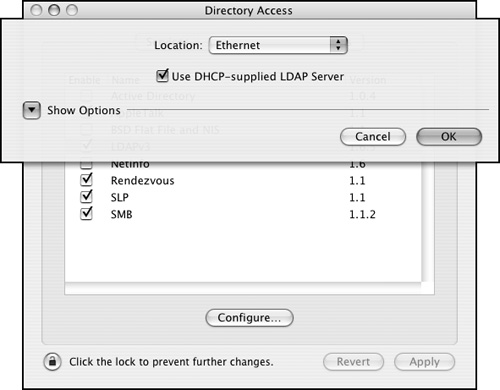
Clicking the disclosure triangle from within the LDAP plug-in displays another area full of buttons, menus, and options. To understand how to add an LDAP entry in this dialog, you must be familiar with the basics of LDAP; see the section "LDAP Overview," earlier in this chapter. To set up a manual LDAP connection: 1. | Open the Directory Access application located in /Applications/Utilities/, authenticate by clicking the lock in the lower-left corner of the dialog, click the Services tab, and select the LDAP plug-in check box if it isn't already checked. (Figure 3.37).
Figure 3.37. Select the LDAP plug-in. 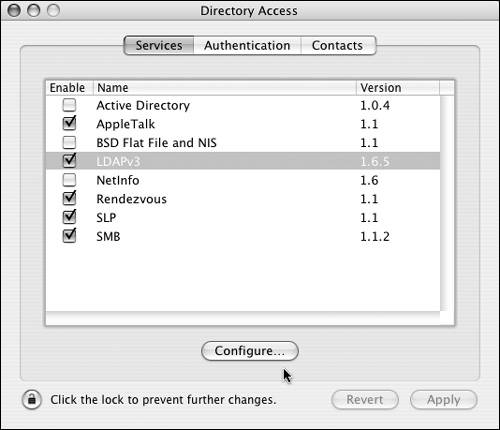
| 2. | Click the Configure button .
| 3. | Deselect the "Use DHCP-supplied LDAP Server" check box if it's selected.
Click the disclosure triangle next to Show Options (if it says Hide Options next to the triangle, then you're where you need to be) (Figure 3.38).
Figure 3.38. Click Show Options, and then click the New button. 
| 4. | Click the New button, and enter the following information:
Configuration Name The name you wish to give the server you're adding to the LDAP list. This name can be any combination of characters; you'll use it to identify the computer.
Server Name or IP Address The Fully Qualified Domain Name (FQDN) or IP address of the server you're adding to the LDAP list.
LDAP Mappings You can choose one of the following four popular server setups: From Server, Active Directory, Open Directory Server, or RFC 2307 (Unix). Or, you can make your own by choosing Custom (Figure 3.39).
Figure 3.39. Select the initial LDAP mappings from the pop-up menu... 
SSL Choose whether to encrypt traffic over secure sockets layer. This must be supported on the server you're binding to, as well.
| 5. | Once you choose an LDAP mapping method (from the pop-up menu discussed earlier), a dialog pops up, asking for a search base suffix (Figure 3.40).
Without knowing much about LDAP, you can ask the administrator of the LDAP server you're connecting with to provide you with the search base. It typically looks something like dc=example,dc=com. You can also click OK without entering anything at this point and enter the suffix later.
Figure 3.40. ...to open the Search Base Suffix dialog where you can enter the appropriate information. 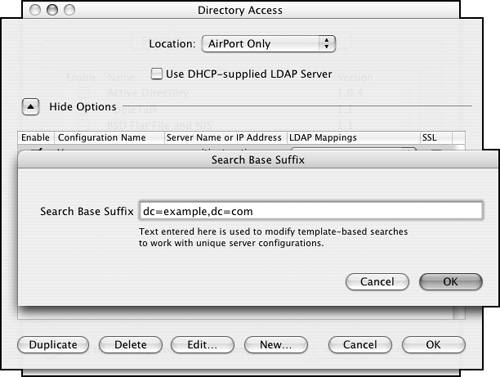
| 6. | Click the Edit button to edit the server connection and mappings (Figure 3.41).
Figure 3.41. Clicking the Edit button in the LDAP plug-in dialog allows for further editing of that LDAP data. 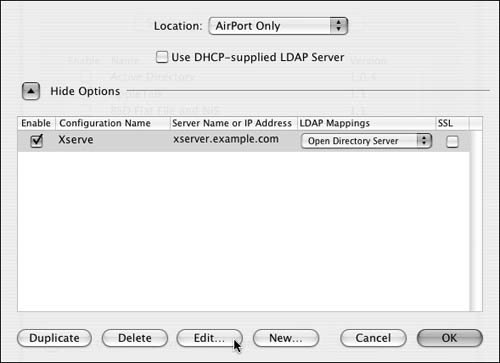
| 7. | Change the Configuration Name, Server Name or IP Address, and timeouts under the Connection tab, and click OK (Figure 3.42).
Figure 3.42. The Connection tab shows the fields associated with the current LDAP configuration. 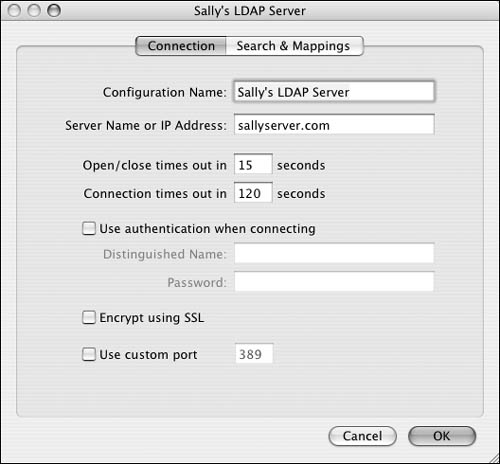
You have now set up a basic LDAP binding. It's likely that unless you're binding to another Mac OS X Server, you'll also need to manipulate the Search & Mappings tab, which is adjacent to the Connection tab (Figure 3.43).
Figure 3.43. The Search & Mappings tab lets you customize fields to permit the association of LDAP data between directory services. 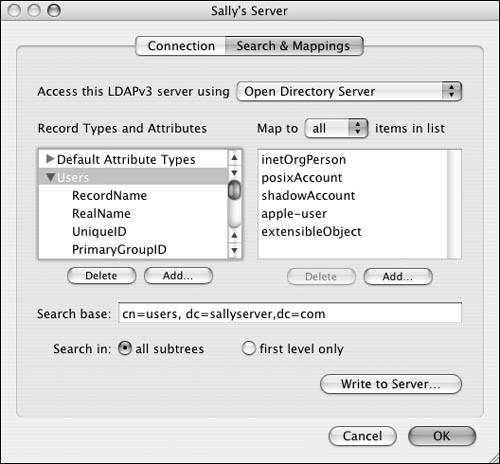
|
Tip All of these methods produce a result: You're binding to another directory to obtain user and group information that doesn't reside on your machine. Since you've spent all this time in Directory Access, you again must understand that this can be done on Mac OS X Client or Server. If you do this on Mac OS X Client, then users logging in to that client machine can authenticate against a directory that isn't on their local computer. If you do this on Mac OS X Server, users created in a third-party directory can be managed by Mac OS X Server management tools. Much thought went into Directory Access and the plug-ins that reside there.
LDAP Mappings Each of the LDAP server mappings contains the attributes that are commonly found within the setups. For example, choosing Open Directory Server results in Open Directory mappings being shown. Choosing Custom lets you create your own mappings. There is an Active Directory mapping set, but you should use the AD plug-in instead of the LDAP plug-in since the AD plug-in does a better job of addressing the issues surrounding AD. One exception to using the LDAP plug-in when binding to an AD server occurs when many additional attributes need to be mapped. In this case, the LDAP plug-in is a better choice. |
|