Hack66.Use a Digital Video Camcorder with Linux
Hack 66. Use a Digital Video Camcorder with Linux
With dvdgrab and Kino, you can pull video directly from your DV Camcorder and edit it. One of the "killer applications" for the Apple Macintosh is iMovie. This application is designed to extract digital video from a camcorder or other source and easily edit it. I've been running a MacOS desktop for some time now, but really wanted to get this capability going on my Linux-equipped laptop so I could pull video out of my camcorder when my family and I are away on a trip. It so happens that Linux supports this use quite well, thanks to its excellent IEEE 1394 (Firewire) support and an application called Kino. Kino has all of the basic editing features of iMovie on the Mac, and is on par with iMovie for ease of use. Kino is missing some of the bells and whistles, but for standard editing tasks, Kino fits the bill nicely. This was tested under Ubuntu Linux (Hoary Hedgehog release), kernel 2.6.10. It should also work with Debian Linux with little or no modification. Here's what you'll need:
Let's dig in a bit now and explain what each application does. dvgrab is a command-line program that does one thing and does it wellit pulls the DV stream out of your camcorder and saves it to your hard disk so you can edit it. Kino is the KDE-based GUI that provides all the editing featuresit's like iMovie on the Mac. Kino also includes its own DV-capture routines; however, on CPU-challenged machines (like my 867 MHz Crusoe-powered laptop) it can occasionally drop a frame or mess up due to the added overhead. dvgrab has yet to drop a frame on me. To start; verify that your kernel has all the required modules loaded: $ lsmod | grep ieee1394 ieee1394 111416 7 amdtp,cmp,raw1394,dv1394,video1394,ohci1394,sbp2 If your line resembles the line above, your kernel and modules are ready to go. If not, use modprobe to load the above modules. If these modules don't exist, you may need to rebuild your kernel or grab a newer kernel from your distribution's package manager. Next, we'll see if the device nodes exist: they should come into being when the module is loaded: $ find /dev -name "*1394*" -exec ls -l {} \; total 0 crw-rw---- 1 root video 171, 16 2005-07-24 13:08 0 crw------- 1 root video 171, 0 2005-07-24 13:08 /dev/raw1394 Note the permissions on /dev/raw1394. This means I'll need to either chmod 660 /dev/raw1934 as root to give any user of the video group access to the node or run dvgrab under sudo. Next; install dvgrab, Kino, and mjpegtools using your distribution's package manager. For instance, under Ubuntu, type: $ sudo apt-get install dvgrab kino mjpegtools Once these are installed, you're ready to begin processing video. We'll begin by using dvgrab to capture the video from your camcorder. Hook your camcorder to your PC using the Firewire cable, turn on the camcorder and cue up the tape to where you wish to begin capturing. Then run dvgrab: $ sudo dvgrab --format raw testmovie dvgrab will start your camcorder in play mode and begin capturing video to the filename testmovie001.dv. Since dvgrab is a command-line program, the only way to see where the capture is at is to monitor the camcorder's built-in screen. Once your capture has reached your desired endpoint, simply hit Ctrl-C to stop dvgrab. Now that you've extracted your movie from the camcorder, it's time to fire up Kino. Once you start Kino (either via menu or command line), you'll see the window shown in Figure 3-6. If you're familiar with the Windows program VirtualDub, you'll feel right at home. Once you load your .dv file by clicking on the Open icon, you can do basic editing on your video and can even add special effects! The key to using Kino is the six tabs along the right sidewhen clicked, the UI will change to fit whatever task you've selected. For example, Figure 3-7 shows Kino in Timeline mode with a movie loaded. Figure 3-6. Kino default window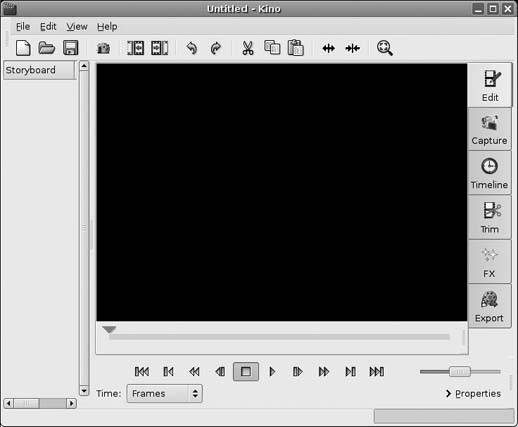 Kino's interface is very intuitive and easy to pickup. Spend some time playing with the edit functions, and you'll quickly see how easy it is to edit a video. Kino'sreal strength is in the Export tab (see Figure 3-8). After you edit your movie and add any special effects, the Export tab allows you to export your video to any one of numerous formats. You'll probably use the MPEG tab under Export most oftenthis will let you export your movie to MPEG1, MPEG2, VCD, SVCD, or DVD formats. If you're exporting to DVD, Kino will automatically create an XML control file for use with dvdauthor and a DVD-compliant MPEG2 file. With dvgrab, Kino, and some of the other tools described in this book, you should be able to create your own home movies on DVD [Hack #70]. If you have kids, home video DVDs make great Christmas gifts for nonlocal rela-tivesthey'll get a chance to watch the kids grow up. Bill Childers Figure 3-7. Kino in timeline mode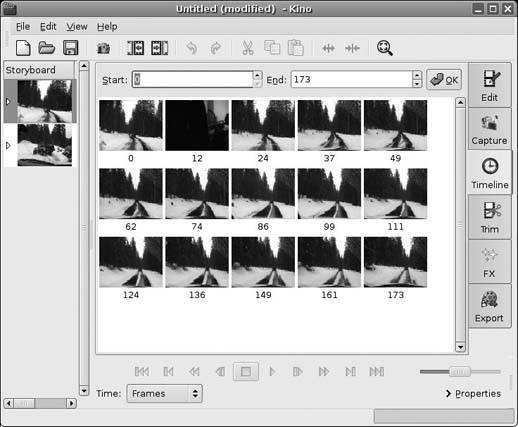 Figure 3-8. Kino's Export tab |