| Each mask in the final project has a star that travels over it as the stroked path is revealed. So, next you'll add a copy of the star.ai file to the composition for every mask in the Timeline: 1. | Add the star.ai file to the Timeline at time 0;00. Duplicate it 10 times so that you have 11 star.ai layers, one for each mask.
| 2. | Move the star.ai layers in the Timeline stack so that you have one star.ai layer above a solid layer for each mask in the solid layer. For example, since the J solid layer contains two masks, you should move two star.ai layers above the J solid layer in the Timeline.
| 3. | Rename the star.ai layers star_letter, where letter represents the name of the solid the star.ai layer is above.
| 4. | Press Ctrl (Windows) or Command (Mac OS), and click each of the star layers to select them. Press S to display their Scale properties, and set Scale to 75, 75% for all the star layers.
The Comp 1 Timeline with scaled stars 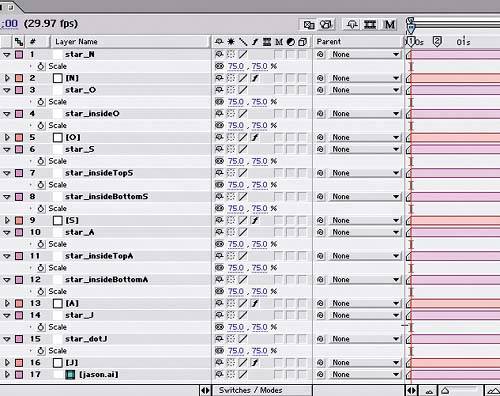 |
Animating the stars You were probably worried that animating the 11 tiny stars around the letters' paths would be mind-numbingly tedious, especially since those paths are fairly intricate. And when we tell you that the animation requires several dozen roving keyframes per star, you're probably already turning to the next chapter…but fear not! It's copy and paste all the way, baby! Note This time, instead of copying all the paths in a letter, you need to copy one path at a time.
1. | Return to Illustrator, and expand the J layer in the Layers palette to display its paths.
| 2. | Click the target circle button to the right of the path that makes up the body of the letter J, and then choose Edit > Copy.
Selecting and copying one path at a time in Illustrator 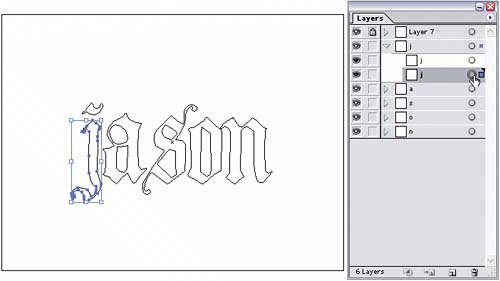 | 3. | Return to After Effects, select the star_J layer, and press P to display its Position property.
| 4. | Go to time 0;15, select the layer's Position property, and then paste. A slew of Position keyframes appear, for all the points that make up the path of the lower body portion of the letter j.
| 5. | With the Position property still selected, use the arrow keys on your keyboard or the Selection tool to position the path in the same location as the letter. (Make sure every keyframe is selected [highlighted]; otherwise, when you press an arrow key, you'll move only one keyframe instead of all of them.)
If you preview your comp, you'll see the little star fly around the letter. That was easy enough, eh?
| 6. | Now repeat steps 15 for each star layer by copying a different path in the Illustrator layers and pasting the path onto the Position property of the corresponding star layer in After Effects.
| 7. | When you're done, you can quit Illustrator.
Animating the stars by pasting the Illustrator paths onto the stars' Position properties 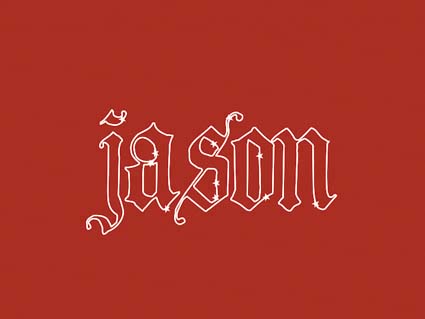
|
"Drawing" the letters At this point, all the stars travel around the paths of the letters, so the worst is over. Now you need to make it appear as if the stars are drawing the letters onto the screen. You'll accomplish this by animating each letter's Stroke effect simultaneously: 1. | Select all the solid layers in the Timeline, press E to display their Stroke effects, and then expand each effect to display their properties.
| 2. | Go to time 0;15, and set each Stroke effect's Start to 0% and End to 0%. Add a keyframe to each effect's Start property.
| 3. | Go to time 2;15, where the stars stop animating, and change each effect's Start to 100%.
Deselect the layers, and then preview your animation. The stars should wander around, appearing to draw the letters in the word jason as they go.
Animating the Stroke's Start property creates the drawing illusion. 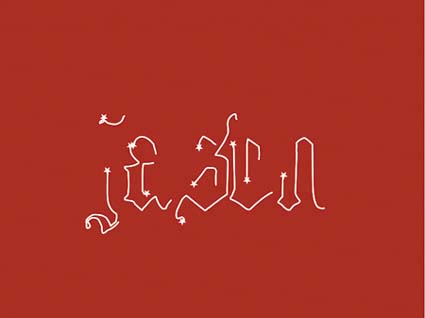
|
Fading and rotating the stars Next, you'll animate the stars' Opacity, Position, and Rotation to make them fade in and fade out while rotating the entire way: 1. | Select all the star layers in the Timeline, and press P to display their Position properties. You should see a bunch of round dots (the roving Position keyframes) book-ended by two normal Position keyframes.
| 2. | Press Home to go to time 0;00, and then move the star layers somewhere else in the composition.
| 3. | Press Shift+T to display the layers' Opacity properties alongside their Position properties.
| 4. | Make the stars fade in by adding a 0% Opacity keyframe at time 0;00 and a 100% Opacity keyframe at time 0;15 for each star layer.
| 5. | Go to time 2;15, select all the star layers, press T to display their Opacity properties, and then add a 100% Opacity keyframe to every star.
| 6. | Go to time 3;00, and change every star layer's Opacity to 0%.
| 7. | Move every star layer to a new and unique position in the composition, so the stars appear to fade away from the letters they've just drawn. Consider making each star travel in a direction it's already heading toward.
| 8. | Go to time 0;00, and add a 0 x +0.0 Rotation keyframe to every star layer.
| 9. | Go to time 3;00, and change every star layer's Rotation to 5 x +0.0 to make each star rotate five times from 0 to 3 seconds.
|
Reversing time You did a lot of work in the previous section to bring in the stars and add some nuance to their appearance and movement. To get those same results at the end of the Timeline, but in reverse time, might seem like a lot of work; but it isn't, when you outsource the work to a Keyframe Assistant! 1. | Select a star layer, and press U to display its keyframes.
| 2. | Click the first property name to select it, and then press Shift while you click each and every property name listed to select all the keyframes for every animated property in the star layer. By selecting a property name, you ensure that you've selected all the property's keyframes.
| 3. | Choose Edit > Copy to copy the keyframes.
| 4. | Go to time 7;00, and paste the keyframes.
| 5. | With the new keyframes still selected, choose Animation > Keyframe Assistant > Time-Reverse Keyframes. This command flips the selected keyframes in time, reversing the animation.
| 6. | Repeat steps 15 for every star layer.
| 7. | Repeat steps 15 for the letter layers, but go to time 7;15 in step 4 instead of time 7;00.
|
Save and play back your animation. All the letters are erased toward the end of the composition, with the stars fading and flying out. |