Creating the Letters' Paths You can create intricate masks for your solid layers by copying the letters' paths in Illustrator and pasting them onto the solid layers in After Effects. The masks aren't used to display the letters, as you might typically use a mask; instead, you'll apply an effect to the masked layers in the next section to create the letters' outlines. Create the paths as follows: 1. | In Illustrator, click the Selection tool in the Tools palette.
| 2. | To select all paths in the letter j, click the target circle next to the layer's name.
Selecting all paths in the J layer 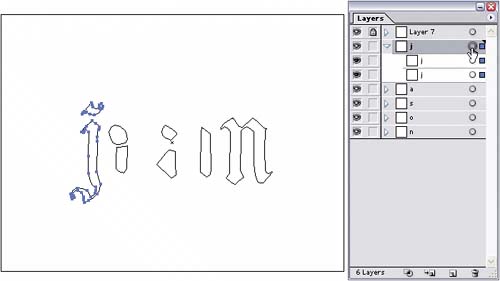 | 3. | Choose Edit > Copy to copy the paths.
| 4. | Return to After Effects, select the solid layer named J, and then paste.
| 5. | Expand the J layer and the Masks group in the Timeline to display the two masks you just created when you pasted the Illustrator paths.
Pasting Illustrator paths creates the masks for the solids. 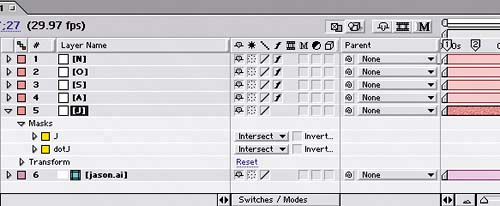 | 6. | Click a mask's name in the Timeline to select the mask, and then use the arrow keys on your keyboard or the Selection tool to position the mask so that it matches the location of the corresponding letter in the jason.ai guide layer.
| 7. | Repeat steps 16 for the other letters, copying the paths of a letter in Illustrator and pasting the paths onto the corresponding solid layer.
| 8. | Hide the jason.ai guide layer, since you no longer need it for visual reference.
|
The Comp 1 Timeline after all the Illustrator paths have been pasted 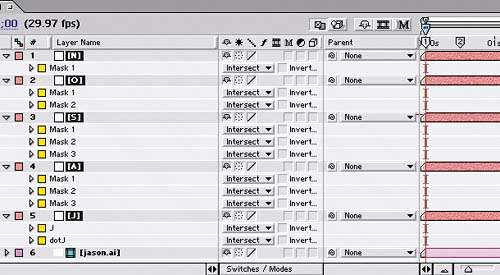 The composition window with the Mask Mode for all masks set to Add 
Stroking the paths Now that you have solid white versions of each letter in the word jason, it's time to turn them into outlines by changing their Mask Modes and applying a Stroke effect to each mask's path: 1. | Select all the letter layers in the Timeline, press M to display their masks, and then set each mask's Mask Mode to Intersect in the Switches column. (The Mask Mode menu appears at the same level as each mask's name in the Timeline.)
Now the letters aren't visible, since this mode only displays areas where a mask intersects another mask.
| 2. | Select the J solid layer, and choose Effect > Render > Stroke.
| 3. | Select the Stroke effect in the Effect Controls window, and choose Edit > Duplicate.
| 4. | Set each Stroke effect's Path property to a different mask in the current layer.
| 5. | Set each Stroke effect's Paint Style property to On Original Image.
| 6. | Repeat steps 25 for each solid layer, but with the following modifications:
In step 3, duplicate the effect as many times as you need to in order to have one Stroke effect for every mask in the layer. Layers A and S have three masks, and layer O has two masks; layer N has only one mask, so you can skip step 3 for that layer.
In step 5, set the Paint Style for the O and N layers' effects to On Transparent.
The Comp 1 Timeline with all masks and Stroke effects in place 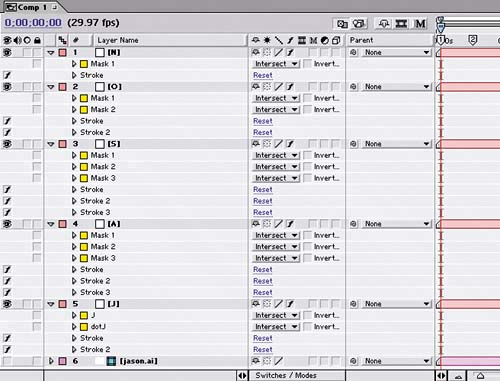 The Composition window with masked and strokedsolids 
|
|