Creating the Cube


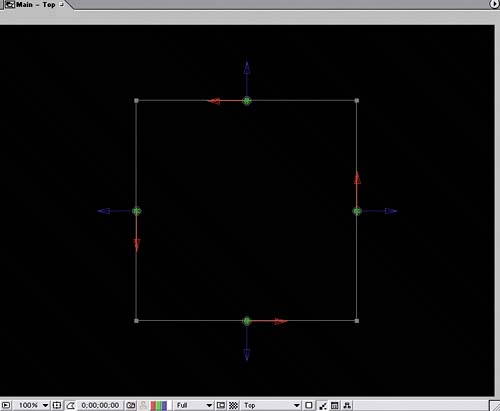
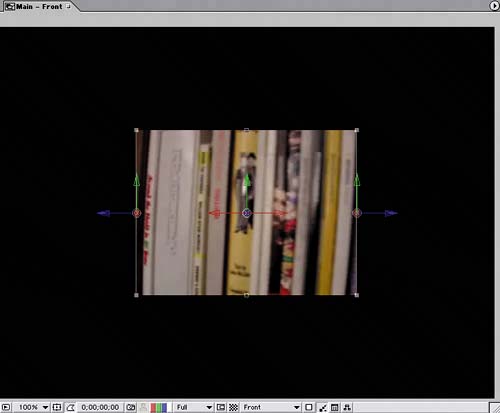
The first task in designing your animated video cube is to form the cube by positioning your movie compositions (the cube's sides) in 3D space. To make it easier to then animate your cube, you'll create a Null Object layer and assign it as the parent to the movie compositions. By parenting the movie comps to the Null Object layer, you can rotate and move all the movies together while only creating and managing the keyframes for one layer: the null object. Follow these steps:
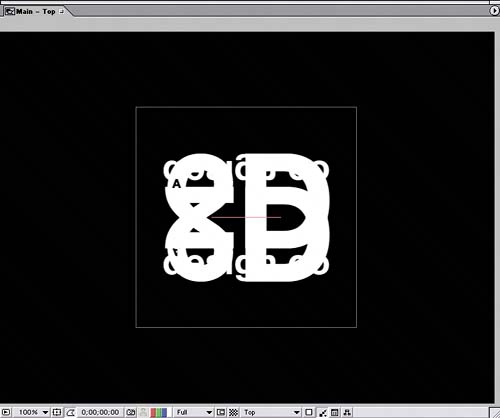
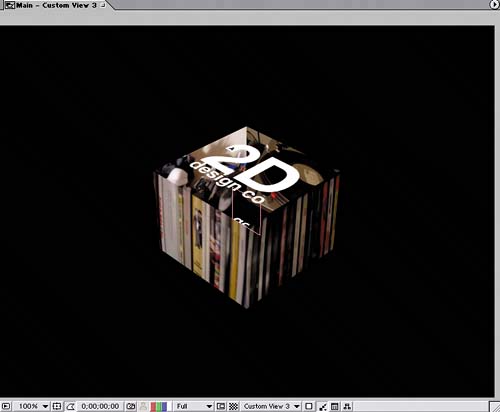
1.

Drag the four Clip compositions into the Main Timeline starting at time 0;00.

2.

Turn on the 3D switch in the Timeline's Switches column for all the layers.

3.

Create a new Null Object layer (Layer > New > Null Object) starting at time 0;00. You'll use this layer to animate the cube in a later section.

4.

Turn on the Null 1 layer's 3D switch.

5.

Set the Null 1 layer's Anchor Point to 50.0, 50.0, 0.

6.

Select all the layers except the Null 1 layer, and then set each layer's Parent value to Null 1 in the Timeline's Parent column.

7.

Choose View > New View to open another Composition window for the Main comp.

8.

Choose Top from the new view's 3D View pop-up menu at the bottom of the Composition window. The Top view lets you see the cube's shape from above as you build it.

9.

Select the four Clip layers in the Timeline, press R on your keyboard to display their Rotation and Orientation properties, and then press Shift+P to also display their Position properties.

10.

Set the following values for the Y Rotation properties of the Clip layers that are listed here:

Clip 02 Comp 1: 0 x +90.0

Clip 03 Comp 1: to 0 x +180.0

Clip 04 Comp 1: 0 x +270.0

11.

Set the following values for the Z-axis Position property of these Clip layers:

Clip 01 Comp 1: -160.0

Clip 03 Comp 1: 160

12.

Set the following values for the X-axis Position property of the Clip layers that are listed here:

Clip 02 Comp 1: 110.0

Clip 04 Comp 1: 210

The video cube seen from the comp's Top view

The video cube seen from the comp's Front view

Capping the cube

You've created the four sides of your cube, and now you need to add a top and bottom to it. This time you'll use a still image of a logo to form each side, instead of video:

1.

Add the a2d_designlogo.ai file from the Project window to the bottom of the Main Timeline starting at time 0;00.

2.

Duplicate (Edit > Duplicate) the a2d_designlogo layer once.

3.

Move one of the a2d_designlogo layers in the Main Timeline's layer stack so it's layer 2 below the Null 1 layer.

4.

Set the X Rotation of the a2d_designlogo layer that's layer 2 to 0 x +270.0 and its Y position to 70.

5.

Set the X Rotation of the bottommost a2d_designlogo layer 7 to 90 and its Y position to 170.

The cube's top and bottom caps

The cube seen from the View 3 comp view


    Adobe After Effects 6.5 Magic
    Adobe After Effects 6.5 Magic
    ISBN: 0321267230
    EAN: 2147483647
    Year: 2005
    Pages: 236

    flylib.com © 2008-2017.
    If you may any questions please contact us: flylib@qtcs.net