Converting Files
| < Day Day Up > |
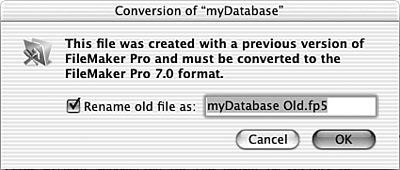
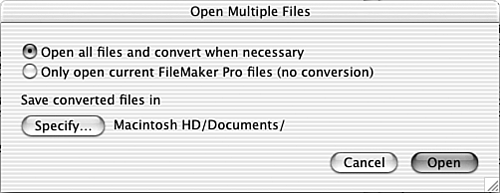
| The actual conversion of files from previous versions of FileMaker is a very simple task. Even if you have decided to do a total rewrite of a solution, you will still end up performing a conversion so that you can salvage scripts and layouts. You'll probably also do another conversion to move the data to the new version. From here on out, though, we're going to assume that you've decided to migrate your solution via conversion, and will focus on the process and methods to accomplish this. NOTE FileMaker Pro 7 can directly convert files from versions 3, 4.x, 5.x, and 6. If you have files created in FileMaker Pro 1 or 2.x, you need to convert them first to version 3 or higher before converting to 7. It's quite likely ”and even expected ”that you will need to perform multiple conversions on a solution during the course of migration. Typically, the first conversion is a throwaway that you'll use for research and experimentation. We usually refer to this as the "alpha" conversion. We've found that each solution behaves a bit differently after conversion, and rather than theorizing and guessing what features will or won't convert well, just convert them and do some poking around. You may quickly discover you need to disable startup scripts that check for the presence of plug-ins, or that you can't open the solution because you don't remember the case of your passwords. (They're case sensitive in FileMaker Pro 7, but not in previous versions.) If necessary, make minor adjustments to the source files and make a new alpha conversion set. The goal at this stage is simply to have a set of FileMaker Pro 7 files that you can open and dissect. These files will never see the light of day, so experiment freely . Later in this chapter, we'll discuss some pre-conversion tasks that can make the migration process go more smoothly. When you've completed these tasks and are ready to proceed, you'll convert your files once again, this time creating what we call the "beta" conversion set. These are the files that will eventually be deployed as your new solution. Some solutions require significant post-conversion testing and tweaking. It's important that you make frequent backups of your beta files during this process so that if you make mistakes, you can roll back to a stable version without having to re-convert the files. NOTE The types of mistakes that can necessitate a rollback include things like deleting file references before you've re-specified any objects that use them, and removing tables or table occurrences from your files without accounting for the impact on scripts or layouts. In cases where the testing and other post-conversion work takes days or weeks to perform, you are likely to need to do another conversion of your original system so that you can import fresh data before deploying the converted solution. CAUTION Be sure to take the old files offline during this conversion and data migration to prevent users from making additional modifications. For this final conversion, the only thing you care about is the raw data; the solution doesn't need to function beyond letting you open the files and show all records. You can skip converting the indexes for this conversion; they won't be necessary for the final transfer. It's also possible merely to export data from your old system and import into your new one. There's no way to import directly from the old files into FileMaker Pro 7, though. The main drawback with exporting and importing is that you'll not be able to transfer any data in container fields. You will also lose text styling information that might have been applied to bits of text within individual fields. For these reasons, we prefer to do the final import from a freshly converted set of files. Converting Single-File SolutionsThere are a few ways to actually go about converting files. If you have a multi-file system, it's important that you convert all the files at the same time so that links between the files are properly preserved. The method for converting multi-file solutions is covered in the next section. A single-file solution is one that has no links to other FileMaker databases, whether those links are relationships, external scripts, imports, or value lists. You can convert such files simply by launching FileMaker Pro 7, choosing F ile, O pen, and selecting your old file. When you do so, you see a dialog similar to the one in Figure 18.2, asking whether you'd like to rename the old file. Figure 18.2. When converting a single file, you'll have the option to rename the existing file. There's no need to do so. There's no particular need to rename the old file. During conversion, the old file is left unaltered and is still fully functional; a brand new, FileMaker Pro 7 file is created for you. You have the opportunity to name the converted file and specify a location for it as well. TIP If your file contains a large amount of data, it may take considerable time to convert your file. For the alpha conversion, it's helpful to have all the data, but for the beta conversion, consider creating a clone of your file. This speeds up both your conversion and your post-conversion development work. Converting Relational SolutionsWhen you convert a multi-file relational solution, it's important that you convert all the files at once. If you don't, and instead use the method outlined in the previous section to convert each file individually, you are forced to wade through potentially numerous "File Not Found" messages as each file converts and opens. Also, if you don't specify the correct file name for the converted files (by removing the Converted suffix appended by default), you may have a hard time fixing your file references later on. To convert a set of files all at once, simply select them all and drag them on top of the FileMaker Pro 7 application icon. You can achieve the same thing by choosing multiple files from the File, Open dialog. Hold down the ( You aren't prompted to rename your old files, nor to name your new ones. Instead, you are presented with the dialog shown in Figure 18.3, in which you're asked to select a directory in which to place the converted files. We recommend setting up a new directory for each set of converted files; if you simply place them in the same folder where your old files live, it gets a bit confusing, particularly if you're performing multiple conversions. Figure 18.3. When converting multiple files, your new files are given the same names as the old ones. You aren't prompted for filenames the same way you are when converting single files. As with single-file conversion, your old files are unaltered during conversion and can still be used. Nonetheless, it's certainly good practice to make sure you have backups of your old system in case of accidents such as deleting or renaming the wrong files. For each file in your old solution, the conversion routine creates a new FileMaker Pro 7 file, named the same as the old file but with an .fp7 file extension. Each converted file contains a single table, named the same as the file. All the relationships are turned into external table occurrences on your Relationships Graph (with the exception of self-relationships, which are local table occurrences).
|
| < Day Day Up > |