Configuring IIS


After you have installed or upgraded IIS, you'll have a Web server. At this point, it's important to configure your Web server even if you've upgraded. Windows Server 2003's IIS has many new features that you'll want to take advantage of.

IIS can be configured through the Internet Information Services snap-in, which you can access in Start, Administrative Tools.

Using the IIS Snap-in

There are many Web services components that need to be configured to optimize IIS for security, functionality, and redundancy. The IIS snap-in, shown in Figure 11.3, is the interface in which you administer the IIS services. In the left pane of the snap-in, you can find the following folders:

Figure 11.3. IIS services administration window.


  • Application Pools Application pools are sections of physical memory that are dedicated to the applications that run within a pool. Application pools segment applications from the rest of the memory resources used by other IIS services. This promotes higher reliability and security, but it also requires more memory configured on the Web server. As the name implies, the DefaultAppPool is created by default.

  • Web Sites This folder contains all the Web sites that are being hosted on the Web server. The Default Web Site is created by default.

  • Web Service Extensions Web Service extensions are services that comprise the IIS Web server. For instance, depending on your installation method and choices, you may have FrontPage Server Extensions and ASP.NET services loaded. Each of the services that you see listed can either be allowed or prohibited to run on the Web server. This is illustrated in Figure 11.4.

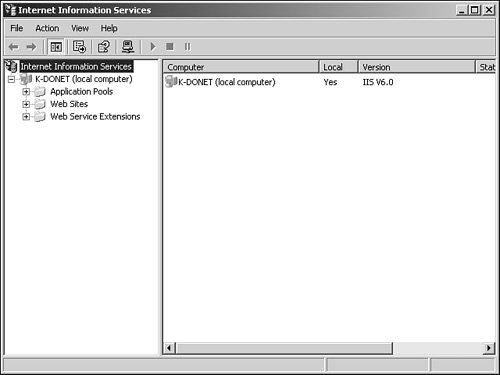
Figure 11.4. Web Service Extensions window.
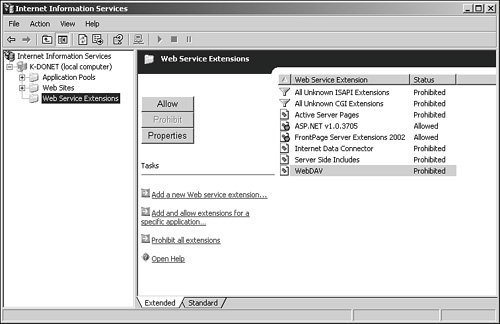

Configuring Web Services

As mentioned earlier, IIS can support up to 10,000 Web sites on a single Web server. The number of Web sites that you have depends on the way the system is configured, including the number of processors, the amount of RAM, bandwidth, and more. For every Web site that the system supports for the Internet, there must be a public IP address and registered domain name. However, if you have only one public IP address and you want to support other Web sites, you can also create virtual directories to have those sites serving users on the Internet.

Using virtual directories is a sound option to support more than one Web site on a single IP address, but keep in mind that users from the Internet will use a subdirectory from your Web site to reach a separate Web site. For instance, a company hosting http://www.companyabc.com decides to host another Web site using a virtual directory; in this case, users would connect to http://www.companyabc.com/NewWebSite/ to be able to connect to the second Web site.

Creating a Web Site with IIS

The Default Web Site is located within the Web Sites folder in the IIS snap-in. You can use the default Web site for your own Web site, but it is best that you create and configure a separate Web site.

To begin creating a new Web site, do the following:
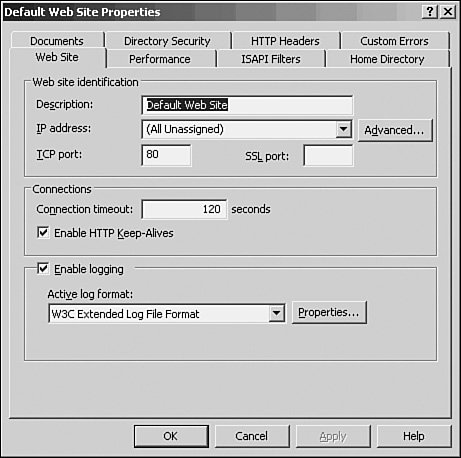
1.

Right-click Web Sites. Then select New, Web Site, or if you have the new Web site already created and located in an XML file, you can select Web Site (From File). This second option prompts you to locate an XML file to load.

2.

If you choose the latter approach, the Web Site Creation Wizard starts. Click Next to continue.

3.

Type in the description of the Web site and click Next to continue.

4.

The following screen presents network-related choices such as the IP address to use for this site, the TCP port, and the Host Header for the Web site. Complete this information and click Next to continue.

5.

Enter the home directory to use (or click the Browse button) and allow or deny anonymous access to this site. Click Next to continue.

6.

At this point, set the permissions on the home directory. Select from read, run scripts, execute, write, and browse permissions. Click Next to continue.

7.

Click Finish.

Selecting Web Site Properties

Right-clicking Web Sites or the Default Web Site in the snap-in and then selecting Properties gives you options for globally modifying the default settings for a Web site. However, right-clicking a specific Web site gives more options for configuring only that Web site. For simplicity, this section will describe the default Web site settings.

The Default Web Site Properties page, shown in Figure 11.5, has some of the tabs for configuring a Web site. From here, you can control everything from identification to specific filtering. These options are as follows:

Figure 11.5. Default Web Site Properties page.


  • Web Site tab This tab has three characteristics including identification, connections, and logging. Here, you can identify the Web site with a name, IP address, and TCP and SSL ports. Also, you can set timeout values for connections as well as logging options. Logging is enabled by default using the W3C Extended Log File Format.

  • Performance tab This tab, shown in Figure 11.6, has two options that allow you to control bandwidth to this site in terms of kilobytes per second (KBps) and limiting the number of simultaneous connections. The first option is used to control bandwidth so that one Web site doesn't consume all the bandwidth that may negatively affect other Web sites. Limiting the number of connections allows the Web site to keep response times within acceptable values.

  • ISAPI Filters tab ISAPI filters are programs that respond to certain events during HTTP request processing. You can add, enable, and disable filters for a Web site on this tab.

  • Home Directory tab A home directory is the top-level directory for a Web site. It is created for the Default Web Site and you must specify one for each additional Web site. This tab, shown in Figure 11.7, also has configuration settings for Web site applications, such as read, write, browsing, script source access, indexing, and application logging. In addition, you can assign other application settings, including execute permissions and application pool membership.

  • Documents tab Within the Documents tab, you can define the Web site's default Web page as well as enable document footers. Document footers can be appended to each Web page in the Web site.

  • Directory Security tab The Directory Security tab, shown in Figure 11.8, offers anonymous access and authentication control, IP address and domain name restrictions, and secure communications configuration options. From here, you can define who has access, how they get authenticated, and whether communications must be secure. These options are examined in the "Securing IIS" section later in this chapter.

  • HTTP Headers tab This tab manages the Web site's content. Although you can't create content for the Web site, you can define content expiration, customize HTTP headers, edit content ratings, and configure additional multipurpose Internet mail extensions (MIME) types.

  • Custom Errors tab Within the Custom Errors tab, there are numerous HTTP error messages. You can create or edit any of these messages to provide customization for your Web site.

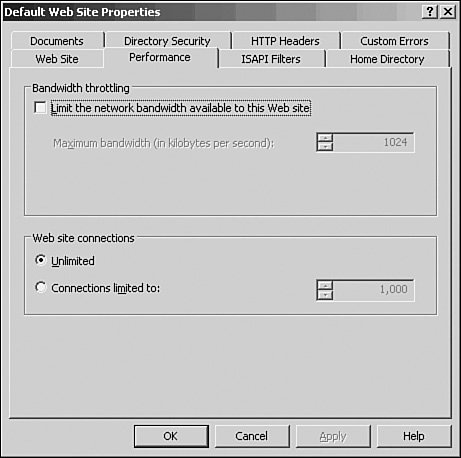
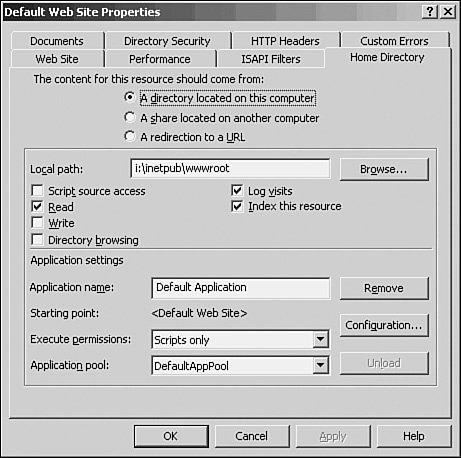
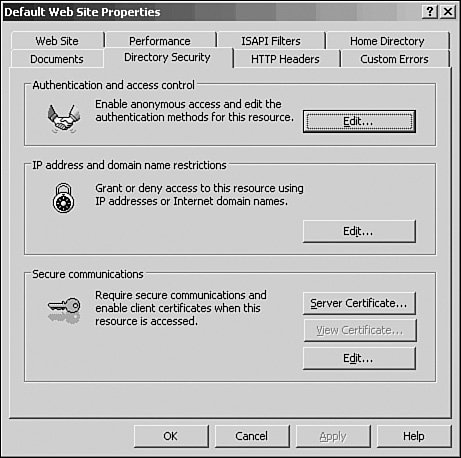
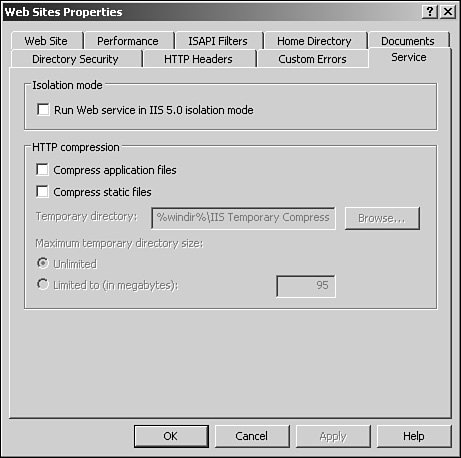
Figure 11.6. Performance tab bandwidth configuration options.


Figure 11.7. Web site home directory and application configuration options.


Figure 11.8. Directory Security tab.


One other tab, called Service, appears only after you right-click the Web Sites folder and select Properties. On this tab, you can set IIS isolation mode to run as an IIS 5 isolation mode server. Also, you can set HTTP compression on application files as well as static files to save bandwidth. This tab is shown in Figure 11.9.

Figure 11.9. HTTP compression settings.


Creating and Configuring a Virtual Directory

Virtual directories extend the home directory of your Web site by providing an alias linking another directory not contained within the home directory. This alias will appear to users as simply a subfolder to the Web site even though it may be located on an entirely different server.

The virtual directory can contain documents and other information for the Web site as well as a new Web site. For example, if CompanyABC's Web site (http://www.companyabc.com) wants to host a temporary Web site for another organization, it could use a virtual directory to contain the Web site. In this scenario, CompanyXYZ would have its own Web site located at http://www.companyabc.com/companyxyz/.

To create a virtual directory using the IIS Manager, do the following:

1.

Right-click the Web site that you want to create a virtual directory for and select New, Virtual Directory. After the Virtual Directory Creation Wizard appears, click Next to continue.

2.

Enter the virtual directory's alias and click Next.

3.

Specify the path containing the information or Web site and click Next.

4.

Choose the access privileges (read, run scripts, execute, write, or browse) for the virtual directory and click Next.

5.

Click Finish.

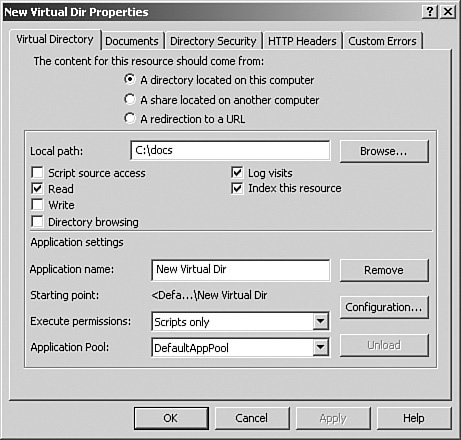
Similar to Web site properties, a virtual directory has properties pages that allow you to set specific options. Figure 11.10 illustrates the virtual directory properties pages. You'll notice that there is a smaller subset of configuration options for a virtual directory in comparison to a Web site.

Figure 11.10. Virtual directory properties page.


There are five configuration tabs including Virtual Directory, Documents, Directory Security, HTTP Headers, and Custom Errors. The tabs represent and are applied to the virtual directory but are similar to the configuration tabs for the Web site.


Microsoft Windows Server 2003 Unleashed(c) R2 Edition
Microsoft Windows Server 2003 Unleashed (R2 Edition)
ISBN: 0672328984
EAN: 2147483647
Year: 2006
Pages: 499

flylib.com © 2008-2017.
If you may any questions please contact us: flylib@qtcs.net