Automating the Tagging Process
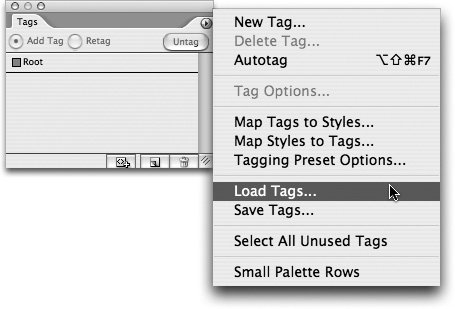
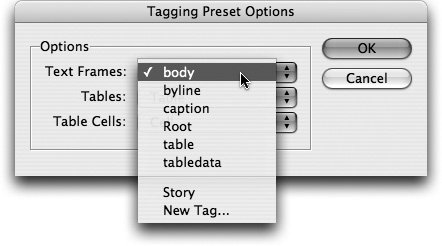
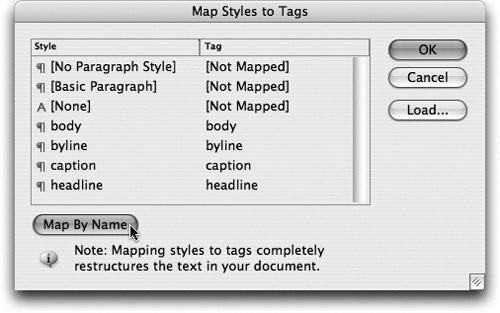
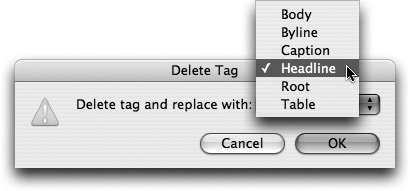
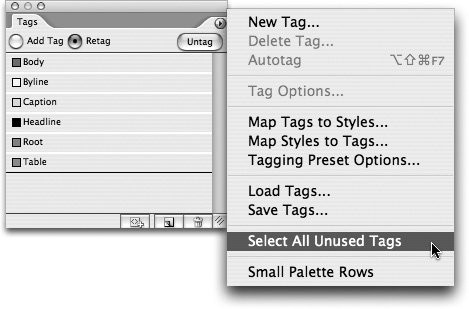
| The process of creating tags and then going through an entire InCopy document and manually applying tags to each part of the content could take as long as a TV awards show. Doesn't this seem a bit tedious? Fortunately, there are ways to streamline and automate the process. Saving XML TagsIf you regularly create the same types of documents, it's quite possible that you will be using the same tags in those documents. In the same way that your publication might regularly use the same swatches or the same styles, you might have a standard set of XML tags, which is easily saved as an XML file. If you manually created a set of tags in the Tags palette, as we described earlier, choose Save Tags from the Tags palette menu. In the Save Tags as XML dialog (Figure 7.5), navigate to where you'd like to save them and give your file a name. We find it's particularly helpful to name your set of tags in a way that makes it clear that this is the source file for tags, because there's nothing unique about the file format of a set of saved tags. It's an XML file much like any other, so an appropriate name, such as StandardXMLTags.xml, can be quite helpful. Figure 7.5. Save your XML tags with an intuitive filename and in a location that your coworkers can locate easily.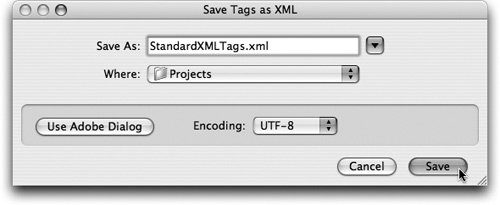 Loading XML TagsAs we mentioned earlier, someone may have previously saved an XML tag file from InCopy for you to load into your current InCopy document. From the Tags palette menu, choose Load Tags (Figure 7.6), navigate to the .xml file, click open, and your Tags palette is populated with the tags from the XML file you've loaded. Figure 7.6. You can load tags from an XML file into an InCopy file. In addition to loading a set of tags saved as an XML tags file from InCopy, you can also load a set of tags saved from the Tags palette in InDesign (saving tags from InDesign works the same as in InCopy, from InDesign's own Tags palette). Any set of tags saved from InCopy's (or InDesign's) Tags palette is an XML file that can be loaded into the Tags palette for a new file. What's more, after choosing Load Tags from InCopy's Tags palette menu, you can select a wide variety of possible sources for tags, including an XML file, InCopy files (.incx), InCopy templates (.inct), InDesign files (.indd), and InDesign templates (.indt). You can load tags from several different source files into the same InCopy document. After you've loaded the first set of tags from your first source, just repeat the steps until you have all the tags from all the respective sources. Opening XML FilesInCopy does not allow you to import XML files into an existing InCopy document. On the other hand, you can open an XML file in InCopy the same way you would open any other file, by clicking File > Open. Your XML file will open in InCopy with all its tags intact and the structure available in your Structure pane, ready for you to go to work. Autotagging ContentAutotag is a feature new to InCopy CS2 that automatically attaches default tags to newly created content in InCopy. Configure Autotag from the Tags palette menu by selecting Tagging Preset Options, which opens the Tagging Preset Options dialog where you specify the default tags. Using the three pull-downs in the Tagging Preset Options dialog, you can set InCopy to pre-assign an XML tag to each newly created text frame, table, or table cell in InCopy. Click the pull-down menu for Text Frames and you'll see a list of tags currently available in your Tags palette (Figure 7.7). Choose the tag you want to associate with text frames by default. If you choose the body tag, anytime you invoke the Autotag feature, a new text frame will automatically be tagged body. You should also choose a preset tag for tables and table cells. Figure 7.7. Assign default tags for text frames, tables, and table cells for the Autotag feature. Tip If, in the process of setting up your tag presets, you decide that you need a new tag, you can create one directly from the Tagging Preset Options dialog. Just choose New Tag from the bottom of any of the pull-down menus. You'll see the New Tag dialog and can create the new tag just the same as if you had invoked New Tag from the Tags palette menu, as described earlier. To invoke the Autotag feature, put your curser into an untagged text frame, table, or table cell and choose Autotag from the Tags palette menu (Command-Option-Shift-F7/Control-Alt-Shift-F7) or click the Autotag button Mapping styles to tagsOdds are you've already used paragraph styles and character styles throughout the story. You can take advantage of those styles by mapping your text styles to your XML tags. Mapping styles to tags is very similar to mapping Word styles to InCopy styles (see Chapter 4). When you map styles to tags, you're telling InCopy that a given style (or even several styles) in InCopy always corresponds to a given tag. For instance, you might have a style called headline that corresponds to a tag called headline. From InCopy's Tags palette menu, choose Map Styles to Tags. In the Map Styles to Tags dialog, the left column lists styles available in your InCopy document (even ones that are not in use), and the right column lists available tags. The initial view of this dialog lists everything as Not Mapped. Just click on any of the Not Mapped tags (Figure 7.8) and use the pull-down menu to choose a tag to associate with the paragraph style or character style to its left. Run through your entire list of styles and map them each to a tag. It's fast and far less work than reading through an entire InCopy document and manually tagging each piece of text. Figure 7.8. Map styles to tags to automate the tagging process.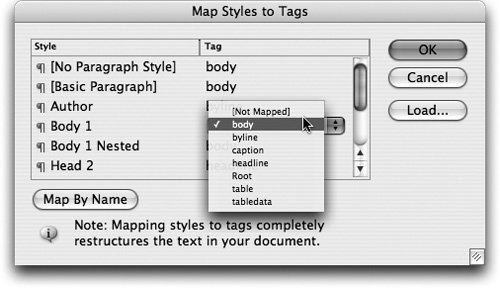 If that wasn't easy enough, the Map By Name button at the bottom of the Map Styles to Tags dialog can make the tagging process even easier (Figure 7.9). Map by Name will, as you might expect, map a style with a given name to a tag with the identical name: the headline style would map to the headline tag, and so forth. Figure 7.9. May By Name maps styles to tags with identical names. Tip Spelling counts here, so given that your XML tags cannot contain a space or punctuation, and that mapping by name is case sensitive, it's possible that you'll need to rethink your character and paragraph style naming conventions if you want to map styles by name in the future. Mapping tags to stylesOn the other hand, maybe you have XML in your InCopy document, either because you've opened it directly or because it came from an InDesign document that was already tagged. Instead of manually applying all the corresponding paragraph and character styles, you can save lots of time by automatically formatting the story based on the XML structure in the file. In this case, it's nearly the same as mapping styles to tags, but what you'll do is map tags to styles. Mapping tags to styles tells InCopy to apply a particular style to an existing tag. From InCopy's Tags palette menu, choose Map Tags to Styles. In the Map Tags to Styles dialog, the left column lists available tags in alphabetical order, and the right column lists character and paragraph styles. The initial view of this dialog lists everything as Not Mapped. Just click on any of the Not Mapped styles (Figure 7.10) and use the pull-down menu to choose a paragraph style or character style to associate with the tag to its left. Run through your entire list of tags and map them each to a style. It's fast and far less work than reading through an entire InCopy document and manually styling each piece of text. Figure 7.10. Map tags to styles the same way you map styles to tags. If that seems easy, at the bottom of the Map Tags to Styles dialog, the Map By Name button can make this even easier, just as it does when mapping styles to tags, and it works by the same rules. Deleting TagsWant to remove a tag from a document that's in use? Maybe you've decided it's too similar to another tag in your document; for instance, you have used both head and headline tags in your document. Select the tag you want to remove in the Tags palette and either click on the Delete Tag button Figure 7.11. When you delete a tag you must replace it with another tag. Mom taught you to clean up after yourself, right? It's a good idea to remove any unused tags from your InCopy document. In true Adobe style, the process is nearly identical to that of removing unused swatches or styles. From the Tags palette menu, choose Select All Unused Tags (Figure 7.12). InCopy searches your document, identifies any unused tags, and highlights them in your Tags palette. Either click on the Delete Tag button at the bottom of the Tags palette or select Delete Tag from the Tags palette menu. You'll be faced with a Warning dialog, just to make certain you're doing this intentionally. Click OK, and those unused tags will be removed. Figure 7.12. Select Unused Tags and delete them if you want to keep your files neat and tidy. Tip Don't need that extra warning? Check the "Don't show again" box in the Warning dialog. InCopy will not ask you again unless you choose to Reset all Warning Dialogs in the InCopy Preferences dialog. |

EAN: 2147483647
Pages: 122