Working with Images
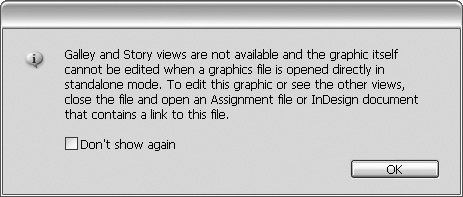
| Depending on the workflow you've established between design/production using InDesign and writers/editors using InCopy, you may find yourself working with images in InCopy. Chapter 8 covers the details of organizing your workflow, but we give you a quick run-down here. Basically, InCopy users can work with images only when graphics have been exported as InCopy stories. If a designer has only exported and assigned text frames as InCopy stories, then the InCopy user can only edit the text in the document and has no control over how images are placed, sized, or positioned in the layout. For many publications, this strict division of labor between design and editorial is the ideal scenario: the designers can design, the writers can write, and nobody's toes get stepped on. But sometimes there is flexibility in the workflow so that writers and editors using InCopy have more freedom to work with images. For example, many European publishers expect the editorial department to choose which images go with their stories. Our coverage of working with images in this chapter should teach you everything you need to know about the subject. Placing ImagesImages can be placed in InCopy assignment files and InDesign files that are open in InCopy, but with some restrictions. First, images can only be placed in existing graphic frames, so that an InCopy user can't arbitrarily overrule the designer's layout by creating new graphic frames and placing images in them. Essentially, this limitation maintains the division of labor between InDesign and InCopy, restricting the InCopy user to editing only content (text and sometimes images) without actually altering page geometry. Second, the graphic frames must first be exported to InCopy stories from InDesign. If you're opening InCopy assignments, these exported graphic frames must also be added to your assignment in order for you to place images. Graphics in InDesign can be exported as InCopy stories, but they cannot then be edited in InCopy. You can open the .incx file that contains an exported graphic in stand-alone mode, but InCopy warns you that the image can only be edited if you open the InCopy assignment or the InDesign file (Figure 6.1). See Chapter 8 for more information about assignments. Figure 6.1. Images exported from InDesign as InCopy stories can only be edited by opening an InCopy Assignment (.inca) or an InDesign (.indd) file. To place an image using InCopy, follow these basic steps:
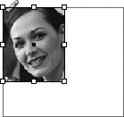
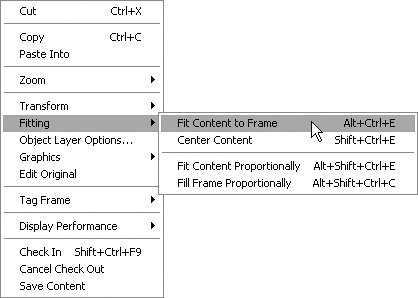
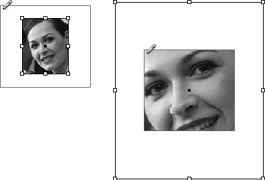
Choosing File Formats to PlaceCommon print-friendly file formats include Photoshop (.psd), Illustrator (.ai), PDF, TIFF, and EPS. When you place images in a print publication you'll almost always want to ensure the color is defined as CMYK or grayscale, not RGB. Before you place any images that don't follow these guidelines, make sure to discuss the options with your design department. Tip When you place a native Photoshop or Illustrator PDF file you have the option of customizing the object layer options, which control which graphic layers are visible in the layout. See the InDesign Help files to understand how a designer can use this new feature. Tip You can control the quality of image previews in InCopy with the Display Performance settings. Refer to the section "Adjusting Display Performance" in Chapter 1 for more details. You can select a frame before you place an image, but it's not necessary. Alternatively, you can choose File > Place to select an image and then hover the loaded cursor Unless you have previous experience doing page layout with InDesign, there are a few things that might surprise you about how images are handled. For example, if you place an image that has different dimensions than the graphic frame you're placing into, InCopy doesn't automatically adjust the size of the image for you. This can result in what looks like two boxes (Figure 6.2). Figure 6.2. A graphic frame and the image in the frame each have their own bounding boxes. Graphic frames in InCopy work like containers for images. As far as InCopy and InDesign are concerned, a graphic frame works like a container and has dimensions, selection handles, and a bounding box. Images, with their own dimensions, selection handles, and bounding boxes, can be placed inside graphic frames. Understanding the distinction between a graphic frame and its content is important to working effectively with images in InCopy. The next section explores this concept in more detail. Fitting Images in FramesWhen you place an image using InCopy, its size and proportions may not match the size and proportions of the graphic frame into which it is placed. In these situations, you have several ways to control how to fit the image into the frame so it focuses the reader's attention on the important part of the image and complements the related text. Select an image (not the graphic frame) with the Position tool Figure 6.3. The Fitting commands are available in the Object menu or a contextual menu. The four frame fitting options are:
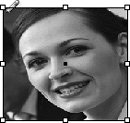
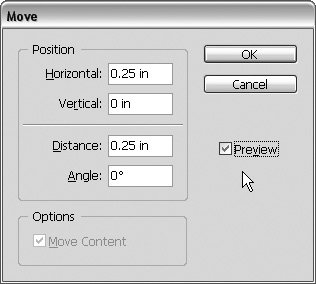
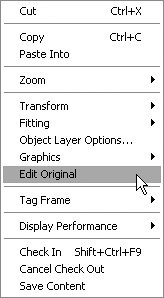
Figure 6.7. Choose Fill Frame Proportionally to retain the image proportions and completely fill the graphic frame. If you've ever looked at the frame fitting options in Adobe InDesign, you might remember that InDesign has one more option that's not available in InCopy: Fit Frame to Content. This option isn't available in InCopy because InCopy only lets you edit content, not page geometry. Allowing you to resize graphic frames using InCopy would break all the rules of the InDesign/InCopy workflow, so that feature's off limits. Moving Images in FramesAfter an image has been placed in a frame, you might want to move the image in the frame to get the best crop. For example, if you use the Object > Fitting > Fill Frame Proportionally command, and part of the image is cropped by the graphic frame, you can control what portion of the image is cropped by moving the image in the frame. Select the Position tool Figure 6.8. Click and hold for a second before moving an image for a dimmed preview of the cropped part of the image. Tip Hold the Shift key when you move an image to constrain the movement to 45-degree increments. Moving an image inside a graphic frame is usually an easy task that can done with the Position tool as you estimate the position with your eyes. However, if you need to move an image with a high level of precision, there's a menu command to help you. Select the image with the Position tool and choose Object > Transform > Move to open the Move dialog box (Figure 6.9). Here you can move the selected image by precise horizontal and vertical values or move the image a specific distance at a certain angle. We don't think you'll use this feature very often, but at least you know it's possible. Figure 6.9. Choose Object > Transform > Move for more precise adjustments. Transforming ImagesIn addition to moving an image within its frame, you can also scale, rotate, and shear images. To scale a selected image, click and drag any of its corners or edges. Make sure to hold the Shift key as you scale the image so the proportions are preserved and the image is not distorted. If you'd rather scale the image mathematically, choose Object > Transform > Scale, enter values in the dialog box, and click OK (Figure 6.10). Figure 6.10. Scale images with the Position tool or the Object > Transform > Scale command. You rotate and shear images with the corresponding commands in the Object > Transform submenu, but significant changes such as these should be discussed with your design department. Image transformations such as rotating and shearing are usually done by a designer, so make sure everybody working on the publication agrees on the same boundaries. Undoing Image TransformationsIf you've made adjustments to an image that you want to undo, you can always choose Edit > Undo (Command/Control-Z) to undo each previous step. However, if you've made a lot of changes to an image that you want to undo but don't want to undo any text edits, it's probably easier to cancel the check out for just the graphic. Select the image you want to revert with the Position tool Editing Original ImagesIf you're fortunate enough to have Adobe Photoshop or Adobe Illustrator installed on your machine, you can edit assigned graphics in addition to placing, moving, and transform them. To edit the original image in the application that created the file, Control/right-click the image and choose Edit Original (Figure 6.11) or hold down Option/Alt and double-click the image in InCopy's Layout view. This launches Photoshop or Illustrator, whichever application created the image, so that you can make edits to the original graphic. When you're done editing the image, save the file and switch back to InCopy, which automatically updates the layout with the latest version of the image. Figure 6.11. Use the contextual menu or Option/Alt-double-click an image to edit the original in Photoshop or Illustrator. A Word of CautionJust because you can doesn't mean you should. Consult with your graphic design department and agree on a workflow before you tread into uncharted waters by yourself. Many publications insist that editors and proofreaders shouldn't edit graphics any more than designers and photo retouchers should write. Whatever you decide, make sure you all agree on the same strategy for working with images. Read Chapter 8 for a thorough discussion of workflow options. |


EAN: 2147483647
Pages: 122