Creating a New Document
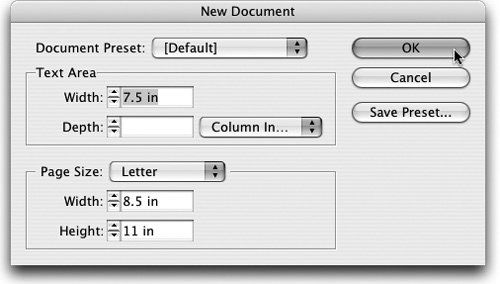
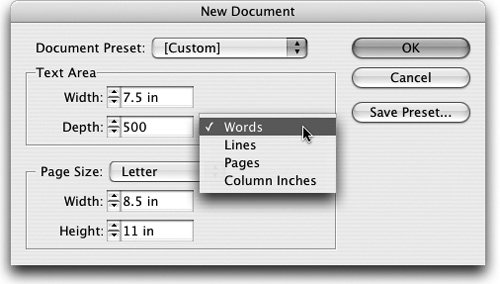
| Tip We realize there are several different workflows available for InCopy users. Depending on your workflow, you may need to begin by checking out an existing text block from an InDesign document, rather than beginning by creating a new document. (For more on workflows, see Part Two, "Understanding the Workflow.") Now you're ready to write. Like most word-processing tools, InCopy can create a brand-new blank document so that you can begin to put words to paper, as it were. But because InCopy is tailored toward a workflow environment, realizing that your words will eventually be laid out on the printed page in a larger context, even the New Document dialog offers some options you may not be used to. Choosing File > New brings up the New Document dialog (Figure 2.2). The first field in this dialog is the Text Area setting. Why a text area? You're not laying out a whole page in InCopy. In fact, you're not laying out pages in InCopy at all. That's the designer's job. You're here to write, so InCopy is simply asking you how much space you have for your words. This setting is designed for writers who need to write to fit. The feature, new to InCopy CS2, is called Standalone Copyfit. Figure 2.2. The New Document dialog now offers ways to determine copyfit information if you want. In some cases you'll know the settings that belong in these fields. In some cases you won't. Don't worry if you don't. InCopy is quite forgiving on this score. It's not going to stop you from writing simply because you've gone over your word allotment (or your line count, or what have you). It's just going to let you know how you're measuring up against that allotment of space. Truth is, most of this information is just for you, the writer, to be able to see how your work interacts with the geometry of your layout: line breaks, line counts, page breaks, and copyfitting. The default setting for text area in this dialog is 7.5 inches wide (Figure 2.3). But if you do need to change these settings, no worries, just head over to File > Document Setup and change it. Figure 2.3. The default text area setting is 7.5 inches wide, the same as a typical letter-sized piece of paper. Imagine that you're assigned a sidebar to a longer story. Your cigar-chomping editor has bellowed that he needs 500 words in it. He also told you that your sidebar will be 4 inches wide. In that case, set the Text Area width to 4 inches. Notice that the Depth Options pull-down menu lets you define the depth of your copy. You can define it in terms of words, lines, pages, or column inches. Of course, a 500-word sidebar with a 4-inch width has significantly more lines than one with a 7.5-inch width. Regardless of how you define the width, as long as you define the depth to 500 words, InCopy lets you know when you've hit your editor's 500-word limit. It also tells you in the Copyfit Info toolbar how far under or over it you are. That's part of the beauty of writing in InCopy as opposed to a standalone word-processing program. If he only told you your word count, don't worry about the Text Area width setting. When the InCopy document lands in the InDesign document, the designer will make it the correct width. Feel free to write your 500-word sidebar without worrying about width. If you know the number of lines, pages, or column inches for your copy and want to define it that way, change the pull-down option in the Document Setup dialog. There is also an option for page size here. That way if you're assigned a number of pages and know the metrics of the pages you're writing, InCopy can still keep accurate count of copyfit information. When you're done filling out the dialog, click OK and you'll be ready to start working on your new document. Tip The keyboard shortcut Command-Option-N/Control-Alt-N bypasses the New Document dialog and creates a new document based on the settings last entered in the New Document dialog. |
EAN: 2147483647
Pages: 122