Smart Tags and Smart Tasks
| Smart tags and smart tasks (the terms can essentially be used interchangeably) are menu-or IntelliSense-driven features for automating common control configuration and coding tasks within the IDE. Designers and editors both implement smart tags in a variety of different scenarios. In the following sections, we will examine a few of the ways that smart tags make your life easier, starting first with the HTML Designer. HTML DesignerAs controls are placed onto the HTML designer, a pop-up list of common tasks appears. These tasks, collectively referred to as smart tasks, allow you to "set the dials" for a given control to quickly configure it for the task at hand. When you drag new controls onto the designer surface, a pop-up list of common tasks automatically appears. You can use the common tasks list to quickly configure a control's properties, as well as walk through common operations you might perform with it. For example, when you add a GridView control to a web page, a common task list appears that allows you to quickly enable sorting, paging, or editing for the GridView. When you add a TextBox control to a web page, a common task list appears that enables you to quickly associate a validation control with the control. The Windows Forms designer also plays host to smart tags. Windows Forms DesignerWith the Windows Forms designer, the functionality of smart tags remains consistent; they do, however, take a slightly different form. A form control that supports this functionality will show a smart tag glyph somewhere within its bounds (typically to the top right of the control). This glyph, when clicked, will open a small drop-down of tasks. Figure 7.10 contains a snapshot of the smart tag in action for a tab control. Figure 7.10. TabControl smart tag.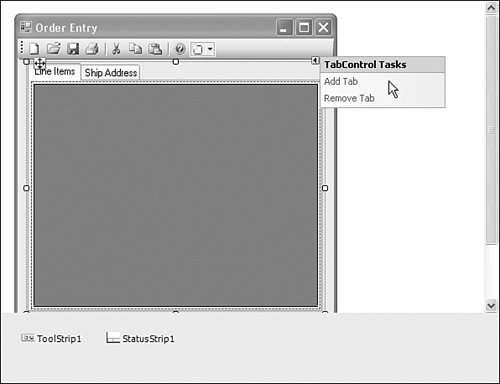 Code EditorSmart tags can also appear within code. One example can be found on interfaces. Normally, implementing an interface is a fairly code-intensive task. You have to individually create a member to map to each member defined on the interface. The smart tag in this case allows you to automatically create those members using two different naming modes:
See Figure 7.11 to view this smart tag in action. Figure 7.11. "Implement Interface" smart tag.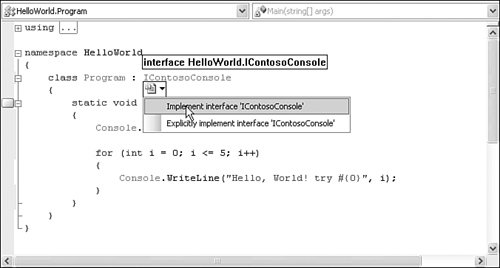 |
EAN: 2147483647
Pages: 195