Section 14.1. About iPhoto Discs
14.1. About iPhoto DiscsiPhoto CDs are discs (either CDs or DVDs) that you can create in iPhoto to archive your entire Photo Libraryor any selected portion of itwith just a few mouse clicks. The beauty of iPhoto's Burn command is that it exports much more than just the photos themselves to a disc. It also copies the thumbnails, titles, keywords, comments, ratings, and all the other important data about your Photo Library. Once you've burned all of this valuable information to disc, you can do all sorts of useful things:
Note: One thing an iPhoto CD is not good for is sharing your photos with somebody who doesn't have iPhoto! Section 14.1.1.1 has the details, but the bottom line is this: An iPhoto CD from iPhoto is designed exclusively for transferring pictures into another copy of iPhoto. (iPhoto 5 and 6 can read iPhoto 2 and 4 discs, but not vice versa.) 14.1.1. Burning an iPhoto CD or DVDAll you need to create an iPhoto CD is a Mac with a CD or DVD burner .
Tip: You can safely bail out of the CD- creating process at any time by clicking the Cancel button when the Progress dialog box first appears.But don't click the Stop button once the Burning dialog box appears. At that point, your CD or DVD drive is already busy etching data onto the disc itself. Clicking Stop brings the burning to a screeching halt, leaving you with a partially burned, nonfunctioning disc. 14.1.1.1. What you getThe finished iPhoto disc contains not just your photos, but a clone of your iPhoto Library folder as well. In other words, this disc includes all the thumbnails, keywords, comments, ratings, photo album informationeven the unedited original versions of your photos that iPhoto keeps secretly tucked away. If you want to view the contents of your finished CD in iPhoto, pop the disc back into the drive. If iPhoto isn't running, your Mac opens it automatically. Moments later, the icon for the CD appears in the Source list of the iPhoto window, as shown in Figure 14-2. If you click the disc's icon, the photos it contains appear in the photo-viewing area, just as if they were stored in your Photo Library. You can't make changes to them, of coursethat's the thing about CDs and DVDs. But you can copy them into your own albums, and make changes to the copies. Figure 14-2. Pop an iPhoto CD into your Mac and it appears right along with your albums in iPhoto. Click on the disc icon itself or one of the disc's album icons (as shown here) to display the photos it contains. In essence, iPhoto is giving you access to two different libraries at oncethe active Photo Library on your Mac's hard drive and a second library on the CD.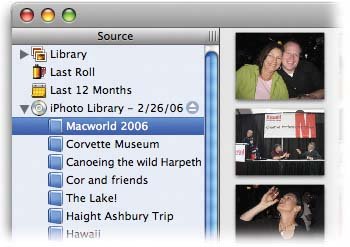 14.1.2. When Not to BurnThe Burn command is convenient for creating quick backups , archiving portions of your Photo Library, or transferring photos to another Mac. But it's definitely not the best way to share your photos with Windows users, or even other Mac fans running Mac OS 9. Think about it: Burning an iPhoto CD automatically organizes your photos into a series of numerically named subfolders inside an iPhoto Library folder, surrounded by scads of special data files like . attr files, Library.cache , and Dir.data . All of this makes perfect sense to iPhoto, but is mostly meaningless to anyoneor, rather, any computerthat doesn't have iPhoto. A Windows user , for example, would have to dig through folder after folder on your iPhoto CD to find and open your photos. So if the destination of your CD or DVD isn't another iPhoto nut, don't use the Burn command. Instead, export the photos using the File Export or Web Page options described in Chapter 9. The pictures won't have any ratings, comments, keywords, and so on, but they'll be organized in a way that's much easier for non-iPhoto folk to navigate. |
 Burn
Burn 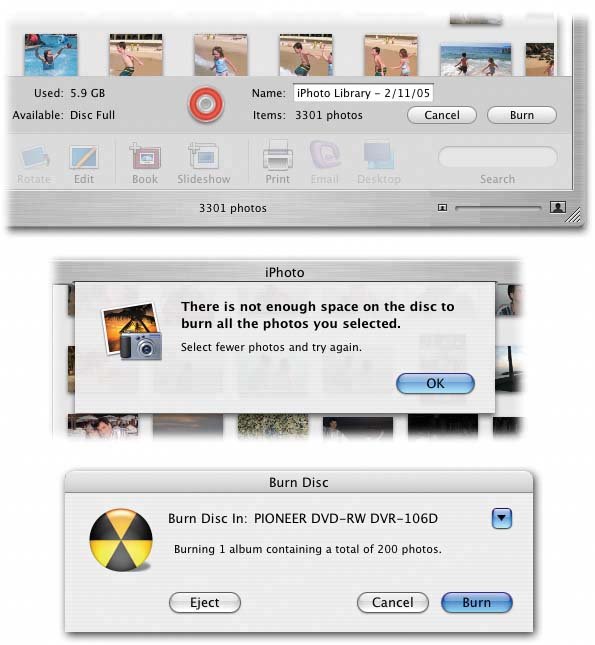
EAN: 2147483647
Pages: 183