| Now that you understand the basics of layers and sublayers and the position of objects on the Layers tab, let's look at the opacity and blend mode. Opacity comes from the word opaque, which describes a solid object that you cannot see through. If an image has 100 percent opacity, it appears solid, and you cannot see anything behind it. Opacity does not change the shape or size of an object; it changes only the level of transparency. An object with an opacity of 0 percent is completely transparent; you can completely see whatever is behind the object. If you set the opacity of an object to 50 percent, the object becomes 50 percent transparent relative to the object behind it. Modifying Opacity in the Dashboard Instead of showing solid photo objects moving across the screen, let's adjust the opacity so that we can see some of the map below. You can adjust the opacity for an object or layer in the Dashboard. 1. | Press the spacebar to begin playback.
| 2. | On the Layers tab, select the Top sublayer within the Photographs layer.
| 3. | Press D to open the Dashboard window, if it's not already open.
The Dashboard window opens, with an Opacity slider at the top.
NOTE The Opacity and Blur sliders at the bottom of the Dashboard modify the object's Drop Shadow parameters. 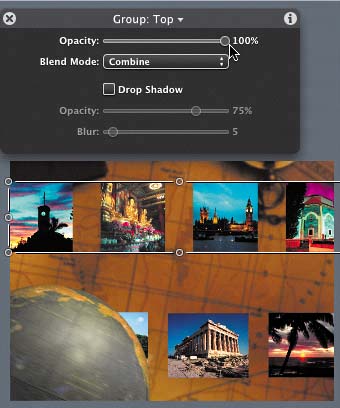
| 4. | Move the Dashboard window so it's easy to see both the Dashboard and the images in the Canvas.
| 5. | Drag the Opacity slider in the Dashboard to the left until the value reads 50%.
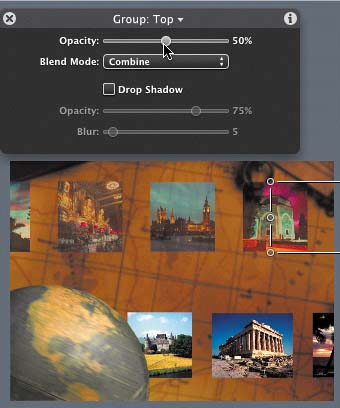
The Top sublayer of photographs appears transparent in the Canvas, and you can see the background through the layer.
| 6. | Drag the sublayer's Opacity slider in the Dashboard back to 100%.
|
Adding Blend Modes in the Dashboard Lowering the opacity is okay for many jobs, but this project needs to show off the photographs, not fade them out and make them look dim and lifeless. Changing the opacity is one way to combine multiple objects or layers. Another approach is to blend the objects together using blend modes. Blend modes use mathematical calculations to combine information from two layers. Fortunately, Motion does all of the calculating for you. All you need to do is experiment to find the blend mode that works best for you. You need to remember four points when you work with blend modes: You can use blend modes only between layers, not from object to object within the same layer. Always add the blend mode to the highest layerin this case, to the Top sublayer. If you add a blend mode to a layer at the bottom of the composite, such as the Background layer in this project, the layer will be blending with black instead of with other layers within the project. You can apply only one blend mode to a layer. Blend modes are processor intensive.
TIP Because blend modes can be very processor intensive, it's a good idea to build your entire project first and then, at the end of your project, apply blend modes. In other words, bake the cake; then ice the cake.
Let's experiment with some of the blend modes to combine the rows of photographs with the background. 1. | In the Dashboard, click the Blend Mode pop-up menu.
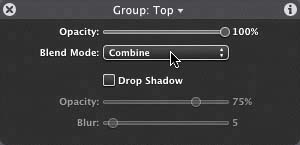
NOTE If the Dashboard says anything other than Group: Top, select the Top sublayer on the Layers tab to view the sublayer in the Dashboard. The Blend Mode pop-up menu opens, displaying the Blend Mode choices.
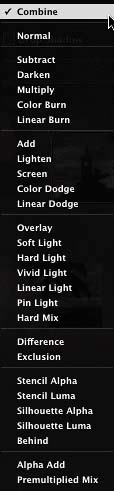
| 2. | Choose Subtract from the Blend Modes pop-up menu.
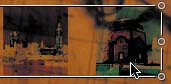
The Subtract mode makes the photographs look like photo negatives.
| 3. | Choose Silhouette Luma near the bottom of the Blend Modes pop-up menu.
This option makes the photographs look like black silhouettes against the background.

These are both very cool looks, but they're not right for this project.
| 4. | Choose Hard Light from the Blend Modes pop-up menu.
This option makes the photographs look like slides.
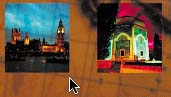
Hard Light is perfect! Not only do the photos maintain their brilliance and image quality, but you can also see the map moving behind them. We have a winner.
NOTE Your playback will likely be slower as you add blend modes to multiple layers. You will still be able to see the project play back; it will just play more slowly in the Canvas. The final project will always export at full speed. | 5. | On the Layers tab, select the Bottom sublayer and change the blend mode to Hard Light.
| 6. | Press Cmd-S to save your project.
|
MORE INFO For more detailed information about all of the blend modes, consult the Motion user manual that came with the application.
|