Now that you've imported the layered project, let's take advantage of Motion's keyframe-recording feature and animate the images. This exercise will help you practice some of the skills that you learned in the previous lessons. First, we need to change the look of the project's background. The client wants a parchment look instead of the light blue and white background layers currently in the project. Since this is a layered Photoshop file, we can simply turn off any layers that we don't want to include in the final project. Let's turn off the blue layer (Layer 5), and we'll also change the content of the background. Then we'll click the Record button to record keyframes and animate the images.
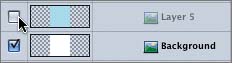
1. | On the Layers tab, select the box next to the light blue object to remove the check mark and turn off the layer.
Next, let's turn to the Background layer. Let's find a nice parchment-paper texture to use as a background instead of the plain white background in the project.
|
2. | Press Cmd-2 to open the Library; then select the Content folder.
|
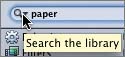
3. | Type paper in the refine search field and press Return to find all of the Motion content that includes paper in the filename.
|
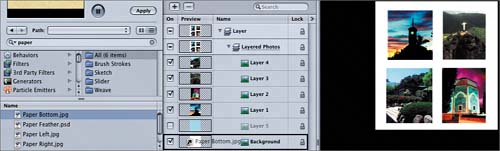
4. | Select the Paper Bottom.jpg file in the File Browser to see it in the Preview area. This will work nicely as a textured background behind the still images.
|
5. | Drag the Paper Bottom.jpg file from the File Browser to the Background object on the Layers tab.
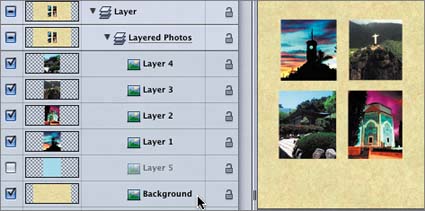
 Paper Bottom.jpg replaces the Background object. The images look nice against the new background. However, at the moment the images and background appear to be very flat, as if the pictures are printed on the parchment background. Wouldn't they look great with a little dimension and separation from the background? Paper Bottom.jpg replaces the Background object. The images look nice against the new background. However, at the moment the images and background appear to be very flat, as if the pictures are printed on the parchment background. Wouldn't they look great with a little dimension and separation from the background?
Let's add a drop shadow to all four images at one time.
|
6. | In the Layer list, select Layer 4, which contains the last image; then Shift-click Layer 1 to select all four contiguous objects.
|
7. | Press D to open the Dashboard.
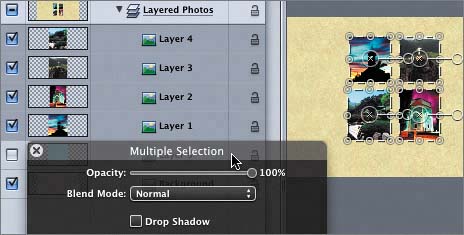
The Dashboard title bar says Multiple Selection to indicate that mul tiple objects have been selected and that modifications will apply to all selected objects.
|
8. | Click the Drop Shadow check box in the Dashboard to apply a drop shadow to all four selected objects.
|
9. | Press Cmd-Shift-A to deselect all objects.
Now it's time to animate the layers. The goal is to have all four photos fly in from different corners of the frame and end up in their current position near the center of the frame. The most efficient way to accomplish this is to click the Record button and first record the images' current positions with keyframes, and then return to the first frame and move the images to their starting positions out of the frame.
|
10. | Press Cmd-4 to close the Layers tab.
|
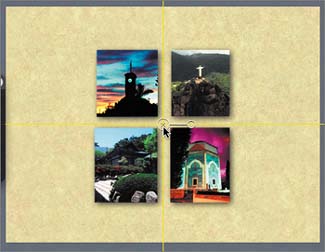
11. | Click the images on the Canvas to select the entire Layered Photos sublayer.
|
12. | Drag the sublayer on the Canvas until it is centered in the frame. Use the Dynamic Guides for alignment.
 |
13. | Move the playhead to 5;00, and then click the Record button to turn on keyframe recording.
Now we're going to combine several techniques. To select multiple contiguous items, you hold down the Shift key. To select an object within a sublayer in the Canvas, you press the Command key. To select multiple objects within a sublayer in the Canvas, you hold both Shift and Command. Let's try it.
|
14. | Cmd-click one of the four images; then Shift-Cmd-click the remaining three images to select all four objects on the sublayer.
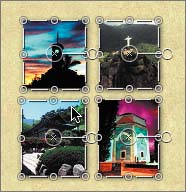
Although the Record button is active, it will record keyframes only if something changes. The objects are already in their final positions. To record the keyframes, wiggle the objects slightly out of position and then back into position. A red keyframe will appear in the center of each object when the position keyframes have been recorded.
|
15. | Wiggle the objects around their positions slightly to record the keyframes. Use the Dynamic Guides to make sure that the final images are centered in the frame.
|
16. | Press Home to move the playhead to the start of the project.
|
17. | Press Cmd-(hyphen) to zoom out one level, if needed, to see all of the empty space around the frame. Click the empty space to deselect all of the objects.
|
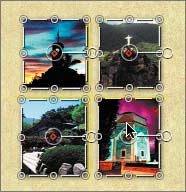
18. | Cmd-drag each object, one at a time, until it is outside of the adjacent corner of the frame. Use the illustration here as a guide for placing the images.
NOTE The illustration of the finished image positions shows all four objects selected; however, you will select and move only one object at a time. I selected all four objects after I moved them to show where to place them. 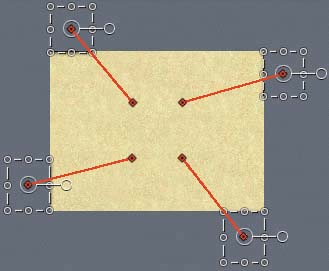
|
19. | Turn off the Record button.
|
20. | Press Cmd-S to save your progress. Then watch the animated images in the Canvas.
|
21. | Close the project.
|
In just a few minutes, you've modified and animated the layers of a Photo shop project. Wouldn't it be nice if you could save this as a template to use for other projects?