Creating Your "Long Ago" Text All of the Star Wars movies begin with the now universally recognizable, "Long ago, in a galaxy far, far away..." The beauty of this opening text is how it sets an almost fairytale-like tone in just seven simple words (with "far" repeated), reminiscent of the equally well-known "happily ever after." You can use this exact phrase, unmodified, because we live in a galaxy far, far away from somewhere. And "long ago" is such a relative term. So, the phrase works well with virtually any video clip that you want to use it with. You can also easily modify the phrase to suit the movie you're putting together, as we do here with, "A short time ago, on vacation far, far away..." Create the Opening Text  Click the Add Text button on the Monitor window. Click the Add Text button on the Monitor window.
  Right-click on the default Add Text box and select Cut from the contextual menu. Right-click on the default Add Text box and select Cut from the contextual menu.
  Click the Text key in the Titler, if it isn't already selected. Click the Text key in the Titler, if it isn't already selected.

 Starting in the upper left corner of the screen, drag a box across the entire screen, down to the lower right corner, as shown in the illustration. Be sure to stay within the safe margins for titles. Starting in the upper left corner of the screen, drag a box across the entire screen, down to the lower right corner, as shown in the illustration. Be sure to stay within the safe margins for titles.
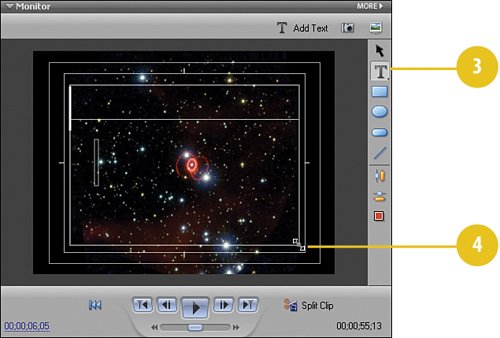
Did You Know? You can play it safe with margins. Your computer screen can show text and graphics right to the edge of your screen. Therefore, displaying movies online in a media player won't be a problem. But playing it on a television screen is another story. A television screen will clip the image a bit at the edges, especially text. Whenever you create text and titles, be sure to use safe text margins. To display the safe text margins, click the MORE button on the Monitor panel and select Safe Title Margins. Optionally, you can display the Safe Action Margins as well.
|
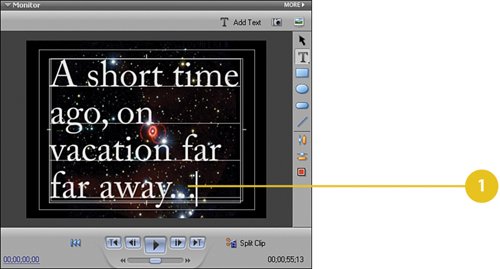
Type and Style the Text - Type the following text: A short time ago, on vacation far far away... (including the ellipses).
 - Press CTRL-A on your keyboard to select all the text you just typed.
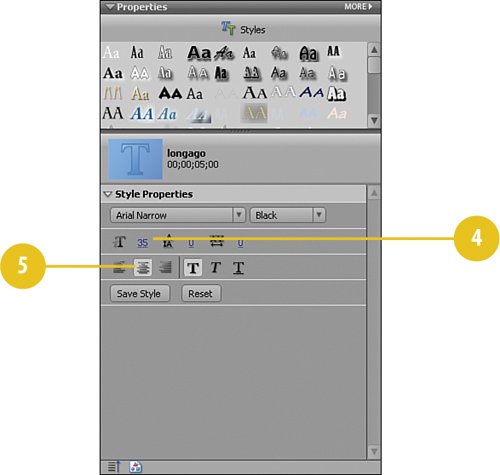
- Right-click and from the contextual menu that displays, select Font, Arial Narrow, Bold.
 - Change the size from the default 100 to 35.
Tip The text all needs to fit on one line. If you are creating different text than the text we're using here and it doesn't quite fit on one line, just reduce the font size a bit more.  Set the justification to centered by clicking the Center Text button. Set the justification to centered by clicking the Center Text button.
 -
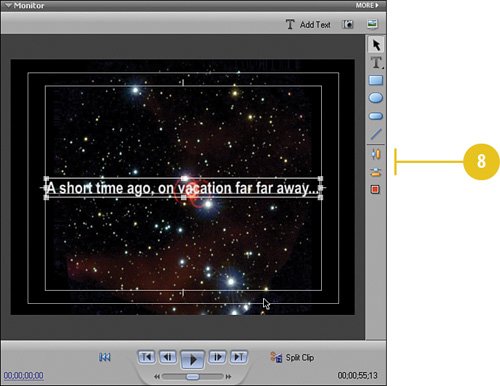
 Resize the text box by clicking the Selection Tool button: Resize the text box by clicking the Selection Tool button:

 Grab the bottom handing of the box and make the box evenly surround the text by dragging it up, as shown in the illustration. Grab the bottom handing of the box and make the box evenly surround the text by dragging it up, as shown in the illustration.
  Reposition the text so that it sits in the center of the screen by clicking the two "centering" buttons: Reposition the text so that it sits in the center of the screen by clicking the two "centering" buttons:
  Premiere Elements should have automatically placed the new title on the Timeline. If not, drag and drop the title you just created from the Media panel to the Video 2 track, on the Timeline so that the head (front) of the clip is at the very beginning of the track. Premiere Elements should have automatically placed the new title on the Timeline. If not, drag and drop the title you just created from the Media panel to the Video 2 track, on the Timeline so that the head (front) of the clip is at the very beginning of the track.
Did You Know? All of your fonts are here, and out there, too... All of the fonts that you have installed on your Windows system, including TrueType and OpenType fonts, will be available for you to select from and use in your projects here in the Premiere Elements Titler. In addition, there are thousands of free fonts available on the Web that can add a unique look to your titles. One excellent source is Blambot (www.blambot.com), a site for comic book artists and fans. There are plenty of other font sites out there, too. Just search on "fonts," or "free fonts" using your favorite Internet search engine.
|
Did You Know? The Style Properties panel enables you to control all font properties. On the Style Properties panel of the Titler, you'll not only find a full list of all fonts, you'll also find the justification buttons (left, right, and center) as well as the style buttons (bold, italic, and underline). It's here, too, that you set the font size, kerning (the space between letters), and the leading (the space between lines of type in a paragraph).
|
Create Your Own Style: Save Your Favorite Font Settings As a New Style As you adjust font properties, you may find you hit on a result that you really like. You don't have to recreate these settings over and over again each time you create a title. Instead, you can save it as your own personal style. Just click the Save Style button. Your new style will be included with all of the built-in styles at the top of the Titler Properties panel. Premiere Elements will save it at the end of that list, so scroll down if you don't see it. It will even be saved with a representation of what the style looks like. If you like your new style so much you want to use it all the time, right-click on it and select Set Style As Default from the contextual menu. Until you change it, Premiere Elements will use that style every time you click the Add Text button. Better still, the style will be available across projects. |
|