Adjusting the Location of the Transporter Beam


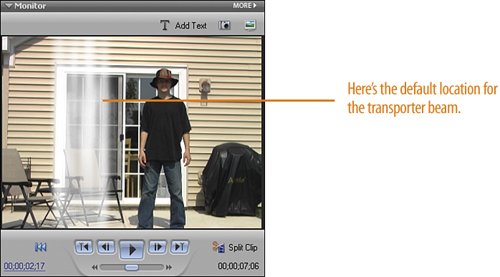
By default, the transporter beam runs down from top to bottom along the left side of the screen. Our transporter man is standing slightly off center, just to the right of center. In order for this illusion to work, we need the transporter beam to exactly overlay on top of the actor. To do so, we'll simply drag the transporterbeam.avi clip across the screen until it lines up correctly. When you use the transporter beam in future projects, use the same technique to relocate it as needed.

Relocate the beam

Scrub the CTI across the length of the transporterbeam.avi clip until you can see the beam fairly well in the Monitor panel, as shown in the illustration.

Click on the transporterbeam.avi clip in the Timeline to select it.

In the Properties panel for the transporterbeam.avi clip, click the Motion effect to select it.

Tip

The name of the Motion effect should reverse (highlight in black) as shown in the illustration, if you've selected it correctly. In addition, handles should appear around the clip in the Monitor panel.

Click on the transporterbeam.avi clip in the Monitor panel and drag the clip across the screen until the transporter beam overlays directly on top of the actor, as shown in the illustration.

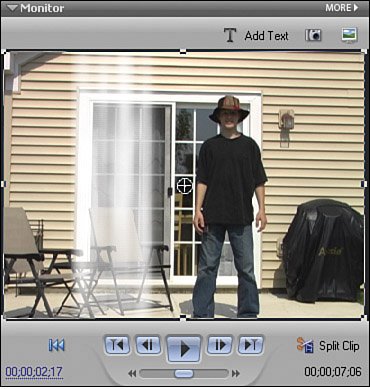
Here's the transporterbeam.avi clip, selected (notice the cross in the middle of the screen), ready to be moved.

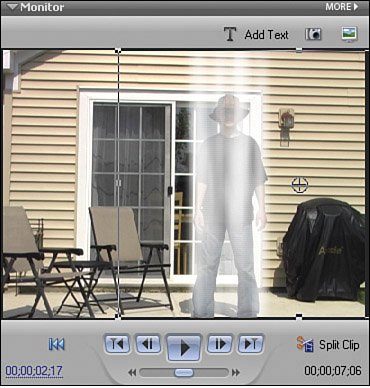
Here's the same clip, having been moved across the screen and placed so that the transporter beam is now directly over the actor.


Hollywood Special Effects with Adobe Premiere Elements 3
ISBN: 0789736128
EAN: 2147483647
Year: 2006
Pages: 274
Authors: Carl Plumer

flylib.com © 2008-2017.
If you may any questions please contact us: flylib@qtcs.net