| One of the great strengths of Dreamweaver MX is its capability to offer a robust, professional coding environment. In this section of the chapter, you'll learn how you can use the code view to debug and enhance your development experience with Dreamweaver. Figure 4.3 displays how you can view both the source code of the document as well as the visual layout. If you don't know HTML, Dreamweaver can act as a great learning tool. Figure 4.3. Dreamweaver's code and design view offers a unique look at both the visual layout of the page as well as the source code.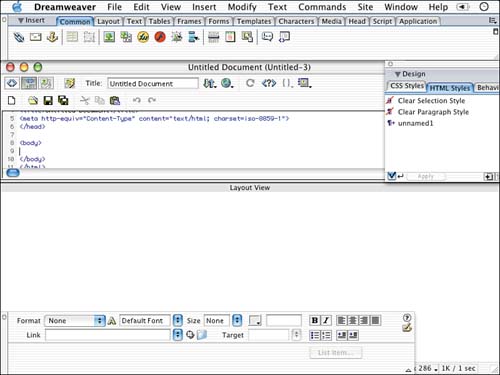
RoundTrip HTML Unlike other competing HTML editors, Dreamweaver writes exceptionally clean HTML code. Dreamweaver does not add any proprietary tags that mean something only to Dreamweaver. Every HTML tag Dreamweaver writes is in line with W3C guidelines. If that weren't enough, Dreamweaver also offers a wonderful feature called RoundTrip HTML. What is so great about this feature is you can work seamlessly between the HTML code and the design environments, and updates will be made accordingly and on-the-fly. For example, if you were to change the background color in the HTML code, after you return to the design environment, Dreamweaver would automatically update the background color to reflect the color value you added in manually. The same is true in the opposite situation. If you make an adjustment to something in the layout view, the code automatically updates to reflect the changes. This is why it's easy to learn HTML and learn what some of the different tags are by watching what changes are made to the code as you lay out the page visually in the design view. Code View The code view has several preferences that define its appearance. These options can help create a more productive coding environment. To access the options, choose View, Code View Options to see the list of features. Word Wrap This wraps all the code within the confines of the code window, making horizontal scrolling unnecessary. Line Numbers Line numbers display a number for every line of code. This can help a great deal when you're trying to debug code. For example, when you are testing a page, if it returns an error, it will reference a line number where it encountered problems. Highlight Invalid HTML This option switches the highlighting of invalid tags in the code view when the design view is refreshed. Syntax Coloring This offers options in terms of what color certain code will appear. Again, this mostly helps with debugging issues. In the Preferences dialog box, under the Code Color category, you can choose different code color types for the different document formats. Whether you're writing HTML, ColdFusion, ASP.NET, JavaScript, or the like, different default color schemes are available. You change any aspect of these color schemes as well as make certain tags and code appear in a specified color. Auto Indent This helps with writing code and keeping a clean, legible format, which helps later on in debugging, because the code is easier to read. If you want to remove an indent, just press the delete key (Mac) or Backspace key (Win). You can set how many characters to indent in the Preferences dialog box. Quick Tag Editor Another great thing about Dreamweaver is the Quick Tag Editor. This option enables you to move to the exact location of the code and edit the appropriate tag, as shown in Figure 4.4. You can access the Quick Tag Editor in several ways. Choose Modify, Quick Tag Editor. This brings up the Quick Tag editor; what you have selected in the design view determines what tag appears in the Quick Tag Editor. Use a keyboard shortcut to access the Quick Tag Editor: Command+T (Mac) or Ctrl+T (Win). Select the Quick Tag icon in the Properties Inspector; it is displayed as a small piece of paper with a pencil on top of it. Figure 4.4. The Quick Tag Editor.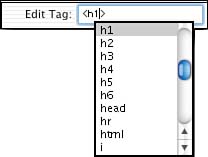
HTML Reference Dreamweaver has an entire HTML reference built in to the program. This can be very useful when hand coding or debugging. The Reference panel, by default, is grouped with the Tag Inspector and the Snippets panel, as shown in Figure 4.5. You can look up any HTML tag that is considered appropriate by the HTML 3.2 or HTML 4 recommendation. The Reference panel also contains additional references on other mark-up and scripting languages. Complete references by O'Reilly, Wrox, and Macromedia provide detailed information on ColdFusion tags, JavaScript, Cascading Style Sheets, Accessibility standards, and Sitespring tags. Figure 4.5. The Reference panel by default is grouped with the Tag Inspector and the Snippets panel.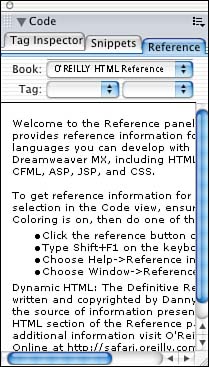
Tag Inspector The Tag Inspector is best used to edit code in a property sheet. It offers an interface and experience similar to that of an Integrated Development Environment (IDE). Any tag that you have selected in the code view will automatically offer options for the attributes of that particular tag. Refer to Figure 4.6 to see the anatomy of the Tag Inspector. Figure 4.6. The Tag Inspector.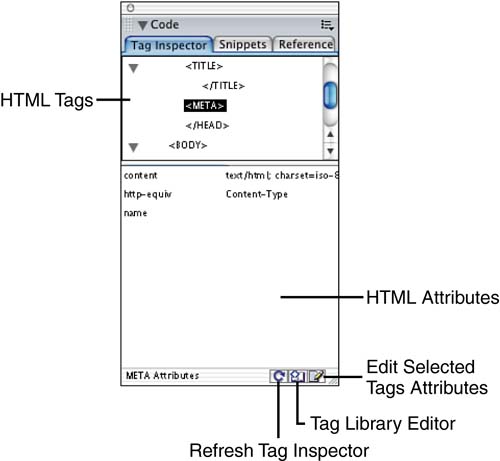
Editing Tag Attributes with the Tag Inspector This exercise offers a clear example as to how to use the Tag Inspector to change attributes of tags inside your HTML code. -
Open a new document by choosing File, New. This launches the New Document dialog box. In the dialog box choose HTML for the type of document and click OK. This creates a new, untitled document. -
After the new document is open, click the code view button inside the toolbar of the document. This switches the view to display the HTML code. -
Place a blinking cursor inside the opening body tag. Next, open the Tag Inspector panel, if it's not already visible, by choosing Window, Tag Inspector. F9 is the keyboard shortcut. -
Notice that the Tag Inspector provides options for all the possible attributes for the body tag, as shown in Figure 4.7. Figure 4.7. The Tag Inspector offers options to modify the selected tag's attributes.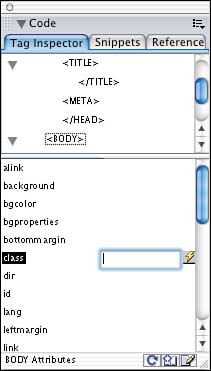
-
Click to the right of the bgcolor attribute and notice that you can type in a hexadecimal value, or you can choose a color from the swatch. -
This view sometimes provides a cluttered feeling, especially on monitors displaying smaller resolutions. If you click the Edit Tag button, found in the bottom-right corner of the panel, it launches the Tag Editor dialog box, as shown in Figure 4.8. This dialog box offers an organized, legible way to edit any tag's attributes. Figure 4.8. The Tag editor dialog box offers a clean, easy way to edit attributes of the selected tag.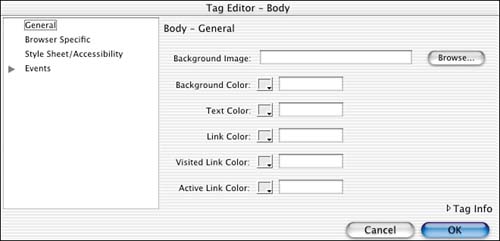
-
Modify any attribute in the dialog box and click OK. If you switch to the design view you'll see that all the changes have taken place. You can watch a QuickTime movie on how to use the Tag Inspector on the companion Web site at http://www.dreamweavermxunleashed.com. |
|

