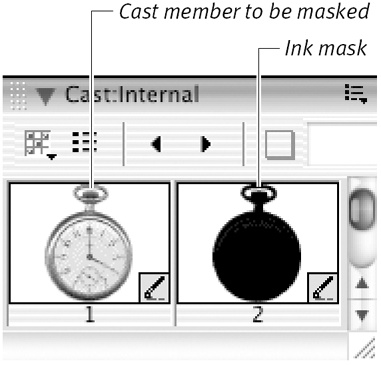
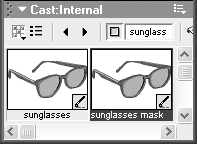
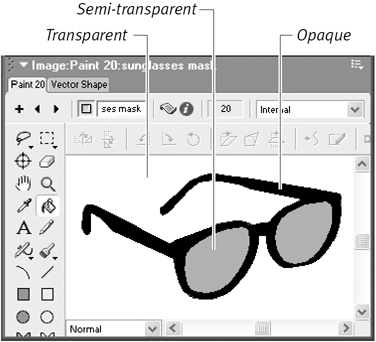
| Another ink effect, called Mask ink, can also be used to composite a sprite. Mask ink is unusual in that it requires a second cast memberan ink mask as a reference. An ink mask is essentially a map that shows Director which parts of a sprite to make transparent and which to leave opaque . Director always looks for the ink mask in the same place: in the Cast window, directly following the cast member that the sprite refers to ( Figure 8.16 ). Figure 8.16. An ink mask must always be placed in the Cast window immediately following the cast member it's associated with.  You can create an ink mask in Director's Paint window, or you can import it from an external paint program. If you create your cast members in Photoshop or another image-editing program that supports masks, you can create the ink mask at the same time you create the original cast member. (For one way to do this, see the sidebar, "A Quick Detour into Photoshop," later in this chapter.) Using the Mask ink effect has a couple of advantages over using the Background Transparent or Matte ink effects. First, through the use of an ink mask, any part of a sprite can be made transparent, regardless of the color of its pixels. And second, the Mask ink effect allows for levels of semi-transparency, which the Background Transparent and Matte ink effects do not. The main drawback of using the Mask ink effect is that creating an ink mask requires some time and effort. Also, each ink mask you use increases the number of cast members and therefore adds to the size of your movie file. To create and use an ink mask: -
In the Cast window, select the cast member for which you want to create an ink mask. -
Choose Edit > Duplicate. Director creates a duplicate cast member and selects it in the Cast window. This cast member will be the ink mask, so you may want to give it a name that identifies it as a mask ( Figure 8.17 ). Figure 8.17. Create a duplicate cast member that will become an ink mask.  -
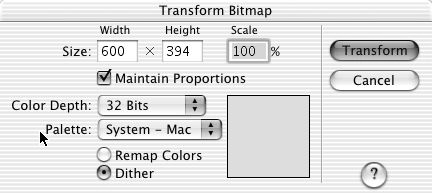
With the duplicate cast member still selected, choose Modify > Transform Bitmap. The Transform Bitmap dialog box opens ( Figure 8.18 ). Figure 8.18. The Transform Bitmap dialog box, showing appropriate settings for an 8-bit ink mask.  -
Make a selection from the Color Depth pop-up menu: Choose 8 bits if you want to create a mask that has varying levels of transparency. or Choose 1 bit if you want to create a mask with only fully opaque and fully transparent areas. (A 1-bit mask adds barely anything to the movie's file size.) -
If you selected 8 bits as your color depth, choose Grayscale from the Palette pop-up menu. -
Click the Remap Colors radio button. -
Click Transform. A dialog box asks you to confirm that you want to transform the cast member. -
Click OK. -
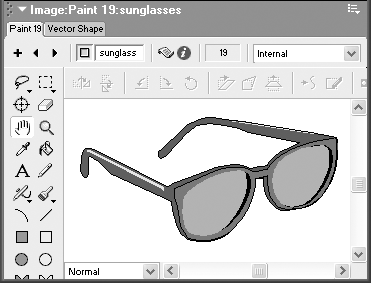
Double-click the transformed cast member to open it in the Paint window ( Figure 8.19 ). Figure 8.19. Open the cast member in the Paint window.  -
In the Paint Tool palette, click the Paint Bucket, Paint Brush, or any other paint tool. -
"Color in" the cast member as follows : Use white to indicate areas where you want the sprite to be fully transparent. Use black to indicate areas where you want the sprite to be fully opaque. Use varying levels of gray to indicate semi-transparent areas, with lighter grays indicating greater transparency and darker grays indicating greater opacity ( Figure 8.20 ). Figure 8.20. The same cast member, repainted to serve as an ink mask.  -
In the Cast window, make sure that the duplicate cast member immediately follows the original version of the cast member. -
If you haven't done so already, drag the original cast member to the Stage or Score to create a sprite. (The ink mask does not get placed on the Stage or in the Score.) -
Select the sprite. -
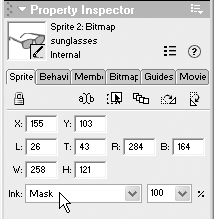
In the Property Inspector, select the Sprite tab. -
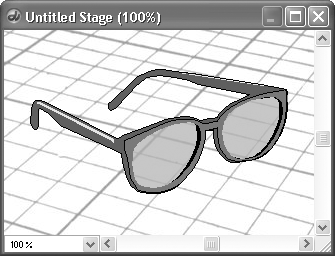
From the Ink menu, choose Mask ( Figure 8.21 ). Figure 8.21. Choose Mask from the Ink menu.  Portions of the sprite become transparent or semi-transparent as specified in the ink mask ( Figure 8.22 ). Figure 8.22. The masked sprite on the Stage contains both opaque and transparent areas, resulting in a more realistic image.  To use an imported ink mask: -
Create an image in an external program, such as Photoshop. At the same time you create the image, follow the instructions in your image-editing program to create a mask for the image. (For one way to do this, see the "Quick Detour into Photoshop" sidebar later in this chapter.) -
In your image-editing program, save the image and the mask as separate files. The mask should be saved as a 1-bit file (if it contains no gray areas) or an 8-bit grayscale file. To save on file size, you may also want to save the image as an 8-bit file rather than a 32-bit file. -
Import the image and the mask into Director. -
Double-click the mask in the Cast window to open it in the Paint window. -
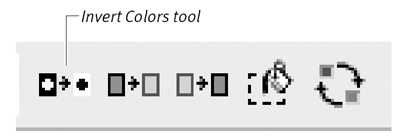
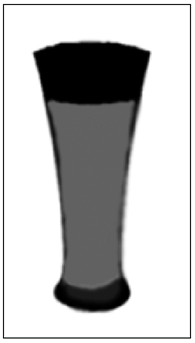
Look at the mask to make sure the colors are displayed correctly for Director. Depending on how the mask was made and where it was imported from, it may show opaque areas in white and transparent areas in black ( Figure 8.23 ). This is the reverse of the way ink masks work in Director. Figure 8.23. This mask, imported from Photoshop, has values opposite from those that Director expects. This glass full of beer, for example, has transparent areas appear as black.  If the colors in the mask are indeed reversed , do the following: Each color in the mask changes to its opposite ( Figure 8.25 ). Figure 8.25. The revised mask, suitable for use as a Director ink mask.  -
Follow steps 10 through 13 of the previous task, "To create and use an ink mask." |
