| The Automatic Model Rotation behavior, described in the previous task, is an unusual 3D behavior in that it operates independently: The 3D object rotates on its own, regardless of what else happens on the Stage. By contrast, most 3D behaviors are meant to be interactive that is, to respond to the user 's mouse and keyboard input. For example, the person viewing the movie might use his or her mouse to rotate a 3D object, or press a key to play back the 3D object's animation. This sort of interactivity is achieved by combining two different behaviors from the Library palette: an action and a trigger. An action is a change that happens on the Stage, most often a movement of either a model or the camera. A trigger is the user input that causes the action to happen. An action is connected to its trigger by placing them in a named relationship, called a group . There are three kinds of actions. Independent actions , such as Automatic Model Rotation, don't require a trigger. (There are very few of these.) Local actions , such as Drag Model, require a trigger to be attached to the same 3D object that the action is attached to. Public actions , such as Reset Camera, also require a trigger, but the trigger can be attached to any object within the 3D sprite. To add interactivity to a 3D sprite: -
Choose Window > Library Palette to open the Library palette. -
Choose 3D > Actions from the Library List pop-up menu. The list of action behaviors appears. -
Choose an action behavior and drag it from the Library palette. The pop-up description for each behavior tells you what it does, which category of actions it falls into (independent, local, or public), and whether it requires a trigger ( Figure 18.45 ). Figure 18.45. Pop-up descriptions give you additional information about a specific behavior. Here, the pop-up description for the Drag Model to Rotate behavior indicates that it requires a triggerthat is, it requires mouse or keyboard input from the user.  -
On the Stage or in the Score, drop the behavior on the 3D sprite to which you want to apply the action. The Parameters dialog box appears ( Figure 18.46 ). Figure 18.46. Parameters for the Drag Model to Rotate behavior. (The settings on the Sensitivity slider, like many settings in 3D behaviors, are arbitrary numbers , so you have to experiment to get the results you want.)  -
Fill in the parameters as desired. -
For all actions (except independent actions), the last parameter is "Which group does this behavior belong to?" Fill in a descriptive group name that you'll be able to recognize later ( Figure 18.47 ). Figure 18.47. Type in a group name that you'll recognize later.  -
Click OK to close the dialog box. -
In the Library palette, Choose 3D > Triggers from the Library List pop-up menu. The list of trigger behaviors appears ( Figure 18.48 ). Figure 18.48. Choose from the list of trigger behaviors. 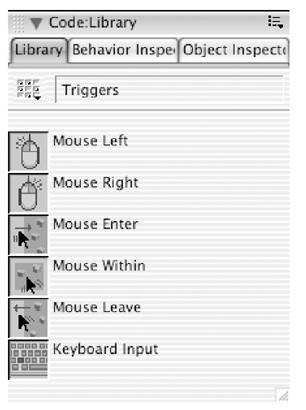 -
Choose a trigger behavior and drag it from the Library palette. The pop-up description for each behavior tells you what it does ( Figure 18.49 ). Figure 18.49. The pop-up description for the Mouse Left behavior.  -
On the Stage or in the Score, drop the behavior on the 3D sprite to which you previously applied an action. The Parameters dialog box appears ( Figure 18.50 ). Figure 18.50. Parameters for the Mouse Left behavior.  -
Fill in the parameters as desired. If you use the Mouse Left or Mouse Right behavior, you're given the opportunity to specify a modifier key that must be held down while the mouse button is pressed. The optionswhich are available on a pop-up menuare Shift, Control, or Shift+Control Other common modifier keys, such as Alt (Windows), Option (Mac), and Command (Mac), can't be used. If you don't want to use a modifier key, choose the "No modifier key" option. ( Figure 18.51 ). Figure 18.51. Only a few modifier keys can be used with the Mouse Left and Mouse Right behaviors. If you prefer, you can choose not to use a modifier key.  You're also given the opportunity to specify a secondary modifier key. This must be a standard alphanumeric key ( Figure 18.52 ). Other kinds of keys, such as Tab or Backspace, won't work here. If you don't want to use a secondary modifier key, leave this field blank. Figure 18.52. If you want to use a secondary modifier key, it must be a standard alphanumeric character.  If you use the Keyboard Input behavior, you're asked to specify the key that must be pressed to trigger that action ( Figure 18.53 ). Your options are Left Arrow, Right Arrow, Up Arrow, Down Arrow, or the alphanumeric key of your choice. If you want one of the arrow keys, choose it from the pop-up menu ( Figure 18.54 ). Otherwise, choose "The custom key I've entered below" from the menu, and enter an alphanumeric key in the field below the menu ( Figure 18.55 ). Figure 18.53. Parameters for the Keyboard Input behavior.  Figure 18.54. You can choose an arrow key from the pop-up menu.  Figure 18.55. Any alphanumeric key can be used with the Keyboard Input behavior. (For example, you might want the user to press B to move the camera back or F to move it forward.)  -
For the last parameter, associate the trigger with an action by making a selection from the "Select a Group and its Action" pop-up menu. Look for the group name you assigned in step 6, and specify exactly what you want the sprite to do when the trigger is activated ( Figure 18.56 ). Figure 18.56. Choose the specific action that you want to trigger.  -
Click OK to close the dialog box. -
If you wish, repeat steps 8 through 13 to apply additional triggers to the same action. (For example, you may want a particular action to be triggered by either a mouse click or a key press.) -
Play the movie. -
Test the interaction by doing whatever is necessary to activate the trigger, such as dragging the mouse or pressing a key ( Figure 18.57 ). Figure 18.57. The Mouse Left trigger, combined with the Drag Model to Rotate action, allows you to rotate the 3D object with your mouse.   Tip Tip -
Remember that Mac users have only one mouse button. If you associate the Mouse Right trigger with an action, it will work when Windows users press the right mouse button, but it won't work on the Macintosh at all. Be sure to repeat steps 8 through 13 to add an additional trigger (such as Mouse Left with the Control key as a modifier) that will work for Mac users.
|