Using Word s Advanced Proofreaders
Using Word's Advanced ProofreadersWord offers these proofreading features for your writing:
Another important reason to learn the proofreading tools is that the other Office products use similar features. Therefore, after you learn how to use Word's proofreading tools, you also know how to use the tools for an Excel worksheet or an Access database. Using the Spell-CheckerBy default, Word automatically checks your spelling and your grammar as you type your document. You can turn off this option (or turn it back on if it's off) by selecting Tools, Options, Spelling and Grammar. Click the options labeled Check Spelling as You Type and Check Grammar as You Type. Any time you see red wavy underlines or green wavy underlines as you type, Word is letting you know about a possible spelling problem (the red line) or grammar problem (the green line). Occasionally, you will be typing text inside Word (and the other Office products) and a blue dotted line appears beneath the word. The blue line indicates a smart tag , which often is a proper name (such as a person's first name or a city) or date. You will learn more about smart tags in Part V, "Organizing with Outlook 2003." The smart tags indicate actions that you might want to perform on the tagged word or phrase, such as add a person to your Outlook contact list. Depending on the options you (or someone else) have set, your version of Word might not check both spelling and grammar as you type. Therefore, if you don't see any wavy lines, you should check your document's spelling and grammar after you have typed the document so that you don't miss anything. In addition, you might not see wavy lines if Word's AutoCorrect feature automatically replaced all your misspellings with corrected entries.
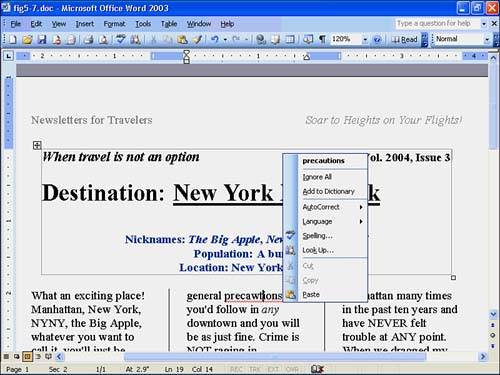
When you see a red wavy line, you can correct the problem in these ways:
The Spelling dialog box appears when you click the pop-up menu's Spelling option. In addition, the dialog box appears when you select Spelling and Grammar from the Tools menu. Table 4.1 lists the options in the Spelling dialog box.
Table 4.1. Spelling Dialog Box Options
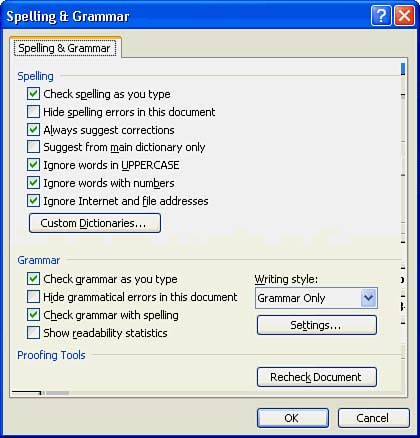
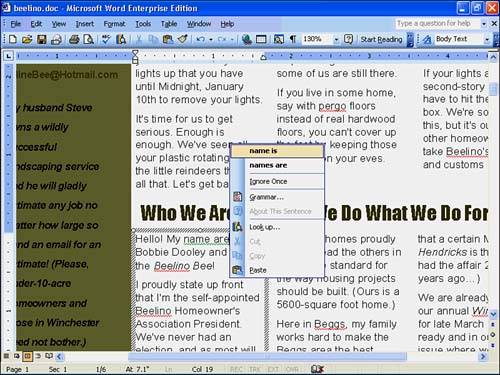
Figure 4.4. Change the Spelling & Grammar options in this dialog box. Using the Grammar CheckerWhen you see a green wavy line beneath a word, Word is warning you about a possible grammar problem. Figure 4.5 shows the pop-up menu Word displays when you right-click a green wavy-lined word. Figure 4.5. Word displays a pop-up menu when you right-click a word with a green wavy underline. If you don't want Word to flag possible grammatical problems as you edit your document, select Tools, Options, Spelling & Grammar and uncheck the option labeled Check Grammar as You Type. Word will not mark grammar problems as you enter text. However, after you finish your document, select Tools, Spelling and Grammar (F7 is the shortcut key) to check the grammar for your entire document. You might want to keep Office Assistant turned on if you check grammar all at once. Microsoft added a lot of plain-spoken, grammar-correcting advice to the Office Assistant's repertoire of helpful topics.
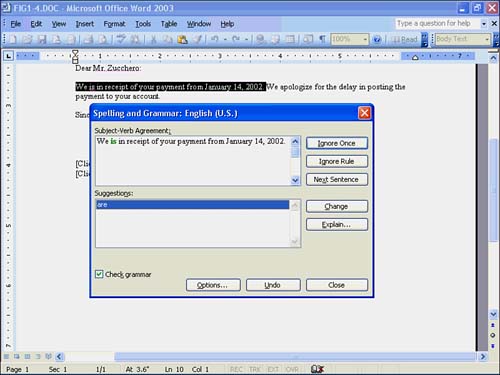
As with the spelling pop-up menu, you can replace a grammar problem with the suggested word or words or ignore the suspected problem (just because Word indicates a problem does not necessarily mean that one exists), or you can start the full grammar-checking system to correct that problem as well as the rest of the document. When you check a document's grammar from the Tools, Spelling and Grammar option (to check the entire document) or by selecting the full grammar check from the pop-up menu, Word displays the same Spelling & Grammar dialog box you see when you check for spelling only. As Figure 4.6 shows, however, the Office Assistant can chime in with its advice as well. Figure 4.6. Select your grammar-correction choice when Word finds a problem. Using Automatic HyphenationAs long as you turn on automatic hyphenation from the Tools, Language, Hyphenation menu option, Word can hyphenate your text as you type, or you can manually hyphenate your entire document. Word supports three kinds of hyphens:
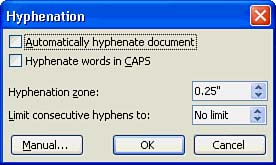
You need to indicate optional and nonbreaking hyphens only when you type special words that Word would not typically recognize, such as company names and special terms. The area that Word checks for possible hyphenation, toward the end of a line, is called the hyphenation zone . You can adjust the size of the hyphenation zone so that Word inserts a hyphen closer to or further from the right edge of the line. Select Tools, Language, Hyphenation to display the Hyphenation dialog box, as shown in Figure 4.7. The Hyphenation Zone field enables you to determine the amount of space between the end of a line's last word and the right margin. A higher value reduces the number of hyphens that Word adds. If you want to keep the hyphenation to a minimum, consider limiting the number of consecutive lines that Word can hyphenate at one time by specifying a value in the Limit consecutive hyphens to text box. Figure 4.7. Specify automatic hyphenation to let Word do the work. To hyphenate your document manually after you have created it, select Tools, Language, Hyphenation and click Manual. Word prompts for your approval at each hyphen location. If you want to stop Word from hyphenating particular paragraphs, select those paragraphs, and then select Format, Paragraph, click the Line and Page Breaks tab, and check the Don't Hyphenate option.
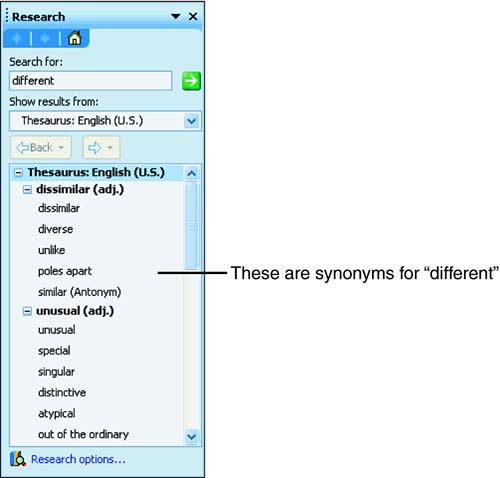
Using the ThesaurusWhen you just can't seem to think of a particular word, type a synonym , which is a different word whose meaning is similar to the meaning you want. Then, solicit Word's thesaurus for a suggestion. To see a list of synonyms, first click anywhere in the word and then choose Tools, Language, Thesaurus. Alternatively, press Shift+F7. Either way, Word displays the Thesaurus task pane, as shown in Figure 4.8. Figure 4.8. Find synonyms fast using the task pane. From the Thesaurus task pane, you can select a replacement word. Word automatically inserts the synonym when you click the down arrow next to the task pane's synonym. Alternatively, use the replacement word list to look up additional synonyms. If you cannot find a good synonym for dissolve but one of the replacement words for dissolve is liquefy, for example, look up synonyms for liquefy. Do so by clicking liquefy in the task pane. Through this link of related words, you might find the synonym for which you are looking. |

EAN: 2147483647
Pages: 272
- Chapter VI Web Site Quality and Usability in E-Commerce
- Chapter IX Extrinsic Plus Intrinsic Human Factors Influencing the Web Usage
- Chapter X Converting Browsers to Buyers: Key Considerations in Designing Business-to-Consumer Web Sites
- Chapter XII Web Design and E-Commerce
- Chapter XVI Turning Web Surfers into Loyal Customers: Cognitive Lock-In Through Interface Design and Web Site Usability