Personalizing Outlook
| From Outlook's Tools, Options menu, you can see how to make Outlook work even harder for you. Choose Tools, Options to display the Options dialog box shown in Figure 15.5. The Options dialog box will have differing numbers of tabs, depending on your installation mode. Figure 15.5 shows seven tabs that normally appear in C/W (Corporate/Workgroup) mode. Depending on your installation, you might see more or fewer tabs. For example, if you have Exchange Services installed, you'll have an eighth tab, Delegates. If you don't have Internet E-mail installed, that tab will be missing. Figure 15.5. The Options box is used to personalize Outlook to meet your needs ”shown here in Corporate/Workgroup mode with Internet E-mail installed. Initially, you might find that most of the settings are acceptable. In this section, only a few of the options will be covered. Others are seldom used. Personalizing Email OptionsThe E-mail options control the basic behavior of the Inbox and how you work with messages. Choose Tools, Options, Preferences tab, and click E-mail Options (see Figure 15.6). It is divided into two parts : Message Handling and On Replies and Forwards. The very first option controls what Outlook does after you move or delete an open message. The choices are
Figure 15.6. E-mail Options lets you control how messages are handled (shown in Corporate/Workgroup mode). After using Outlook for a while, you will get a feel for which of these behaviors is most useful to you. Other Message Handling options include:
You've already had a glimpse at the Advanced E-mail Options dialog box, shown in Figure 15.7. You might never need to change them, but they can be useful. Figure 15.7. The Advanced E-mail Options dialog box allows you to further refine Outlook's mail handling behavior (C/W mode). Tracking lets you know when messages are delivered (but not necessarily when they get read). By default, messages aren't tracked. Click the Tracking Options button to display the Tracking Options dialog box. Looking at the lower half of the E-mail Options dialog box, you can control the appearance and content of forwarded mail and replies. Under When Replying or When Forwarding, click the drop-down arrow to see the array of choices. You can also prefix each line of an original message with a mark of your choice, as well as mark your own comments with your initials or some other indicator. Automatically Add People to ContactsIf you use Outlook in Internet Only mode, you will have an additional option at the bottom of the E-mail Options dialog box ”Automatically Put People I Reply to In. Selecting this option automatically adds people to whom you send mail to your Contacts folder. Choosing Calendar OptionsThe Calendar options allow you to establish the days and times that you work. Choose Tools, Options, Preferences tab. Note that you can set the default time for appointment reminders. If you typically find yourself resetting the reminder time to an hour or some other time, change the setting here to save yourself work later. Click the Calendar Options button to display the dialog box shown in Figure 15.8. Figure 15.8. The Calendar Options dialog box allows you to set your personal schedule. Selecting Task OptionsChoose Tools, Options, Preferences tab, and click Task Options to display the dialog box shown in Figure 15.9. Drop-down menus allow you to choose the colors for Overdue and Completed tasks. Choose the desired colors and click OK to return to the main dialog box. Back in the main Options dialog box, Reminder Time lets you specify the time that you will be reminded about tasks due each day. Figure 15.9. The Task Options dialog box allows you to set the display colors for overdue and completed tasks. Controlling Contacts DisplayThe Contact Options button is used to control the way contact names are displayed and the order in which contacts are filed or sorted. The Contact Options dialog box, shown in Figure 15.10, provides pull-down controls for choosing display and sorting options. Figure 15.10. Contact Options lets you choose how names are displayed and filed. Controlling the JournalProperly used, the Journal can automatically keep track of Outlook and Office "events" ”email messages, meeting activities, task activities, along with time spent working on Office documents. The Journal Options dialog box is used to control which "events" Outlook keeps track of. Setting the Options for NotesThe final option on the Preferences tab of the Options dialog box is controlling the Notes feature ”choose Tool, Options, Preferences tab, Note Options. Outlook's Notes are like electronic yellow sticky notes you can write as ideas occur to you. As shown in Figure 15.11, Notes Options lets you control color , size, and font. Figure 15.11. Control of the Notes feature is fairly limited. You can set the color, size, and font used. Mail Delivery (Internet Only Mode)If you use Outlook in Internet Only mode, the Mail Delivery tab shows up in the Options tab instead of Mail Services. Shown in Figure 15.12, this dialog box is divided into three sections:
Figure 15.12. The Mail Delivery tab is used in Internet Only mode.
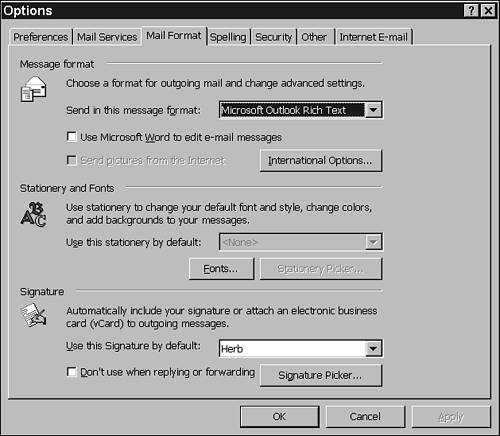
Note the Reconfigure Mail Support button at the bottom of the Mail Delivery options dialog box. This button lets you switch between Internet Only and Corporate/Workgroup modes. If you're set up in C/W mode, this button is located in the Mail Services tab. Mail FormatThe Mail Format Options dialog box, shown in Figure 15.13, is divided into three sections:
Figure 15.13. Mail Format Options lets you choose how email is formatted for sending and for display. Setting the Options for SpellingSpelling options can be set to reflect your personal preferences. One option that is generally turned off that you will want to turn on is the command to always check spelling before sending a message. Establishing Other OptionsThe Other tab is divided into three parts, as shown in Figure 15.14.
Figure 15.14. The Other tab of the Options dialog box allows you to control when the Deleted Items folder is emptied, the frequency of AutoArchive, and the look of the Preview pane (figure shown in Corporate/Workgroup mode). |


EAN: 2147483647
Pages: 474