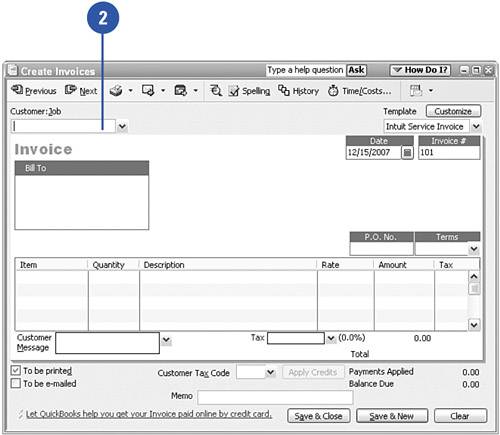
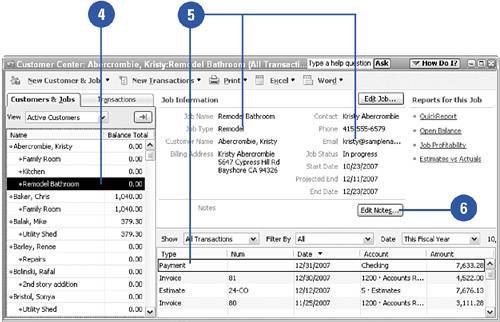
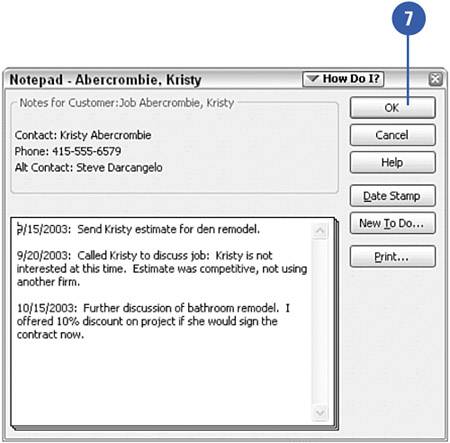
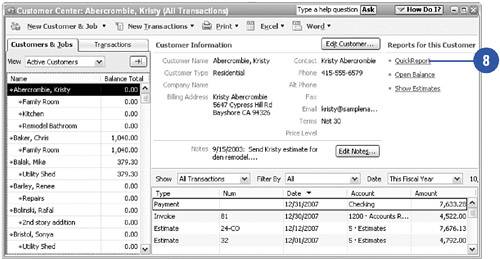
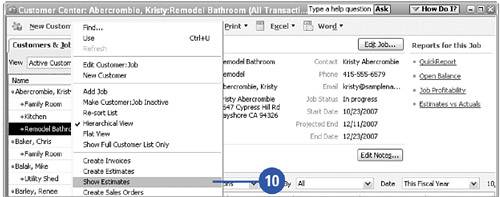
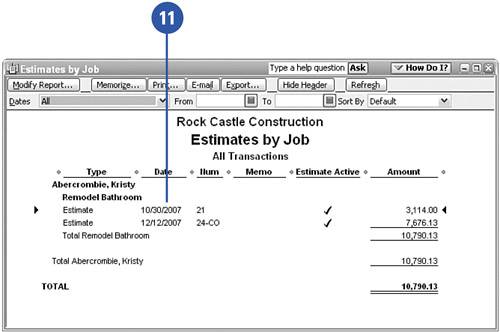
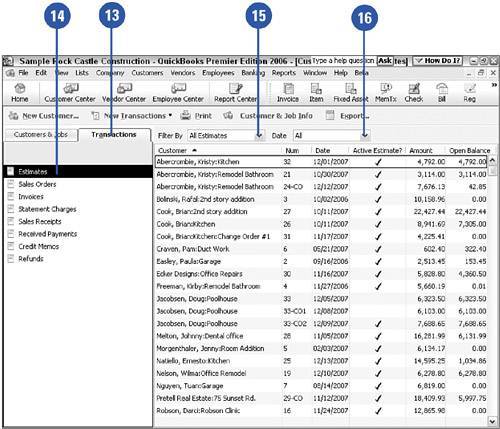
Displaying Detailed Customer Information
| When entering into a transaction with a customer, you might want to see detailed information about that customer, such as the amount the customer owes you, jobs in progress, informational notes, and pending estimates. This information is readily available and can be accessed while you fill out a customer's form.
|