78 Add End Credits
| < Day Day Up > |
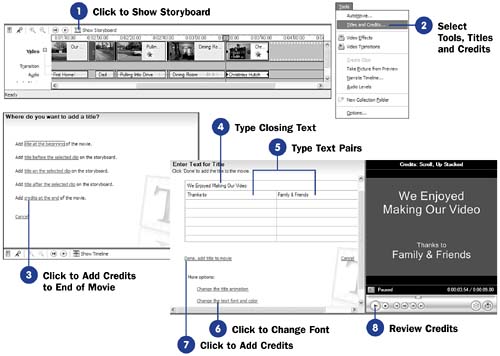
| Before You Begin See Also Credits are titles that conclude your movie. The credits scroll from the bottom of the screen to the top in a rolling format until all credits have displayed. The ending credits appear differently depending on whether you view the storyboard or timeline:
|


| < Day Day Up > |
EAN: 2147483647
Pages: 169