#60. Checking the Syntax of Source Code Whether you take advantage of GoLive's visual layout tools or feel comfortable editing in source code mode, mistakes can still occur in the code. These unfortunate accidents can result in visitors to your site not being able to view a page, having the page render in a weird way, or causing page functionality to break. Just as it's crucial to preflight your InDesign document before handing it over to a printer, it's as important to check for syntax errors throughout your site before going live with it. But don't worry; you're not on your own with all this. GoLive can locate these issues, inform you of what's going wrong, and help you to quickly fix these errors. Converting to XHTML XHTML is currently considered the standard document type. If you have an existing site that was created using an older HTML document type and want to update it, GoLive has got you covered. Simply choose Special > Convert > To XHTML to have GoLive automatically convert your entire site or selected pages to XHTML (see #90). |
To check the syntax of an open page, do the following: 1. | Choose Edit > Check Syntax or click the Check Syntax button  if you happen to be in the Source Code Editor or Split Source Code mode. if you happen to be in the Source Code Editor or Split Source Code mode.
| 2. | In the Check Syntax dialog that appears (Figure 60a), decide which document type or types to comply with. Leaving !DOCTYPE assigned selected is usually a safe bet, especially if you've created your site in GoLive CS2, which now by default creates pages as XHTML Transitional. This document type is what many consider the standard these days. Click OK to start the syntax check.
Figure 60a. You can select the document type (or types) the Syntax Checker should comply with from this dialog. 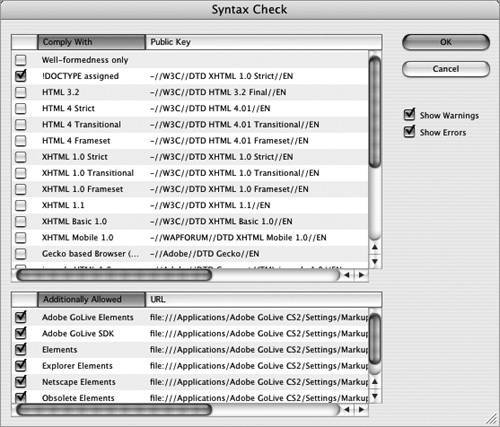
| 3. | The Check Syntax Results window will appear if the Syntax Checker finds any issues on your page. From this window you can see the number of issues found and where they're located (element, line number, and column). Although you can see the errors and fix them in any editor, I suggest switching to the Outline Editor (see #57) for viewing and fixing problems in a unified view.
| 4. | In the Outline Editor you can scroll through the page and see all issues highlighted in orange with a bright yellow box containing the explanation of the error beside it (Figure 60b). You can also select an issue in the Check Syntax Results window, if you still have it up, and go directly to its location on the page.
Figure 60b. The Outline Editor is ideal for displaying syntax errors and correcting them. 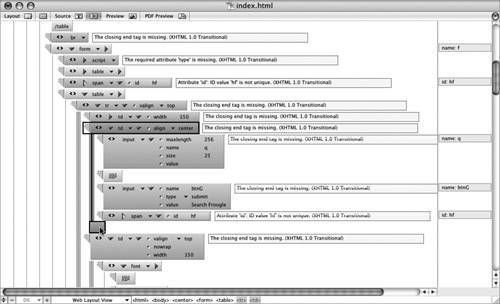
| 5. | Once you've attempted to fix all the issues on the page, go to the View palette (usually grouped with the Inspector palette) and click the Highlight tab. Click the Rescan button to rebuild the highlighted results to make sure you haven't missed any errors.
|
To check the syntax of an entire site, choose Edit > Check Syntax with no pages open or selected in the Site window. If you want to check the syntax of certain pages in your site, select them in the Site window and then choose the Check Syntax command. |