Section 43. Using the Story Editor


#43. Using the Story Editor

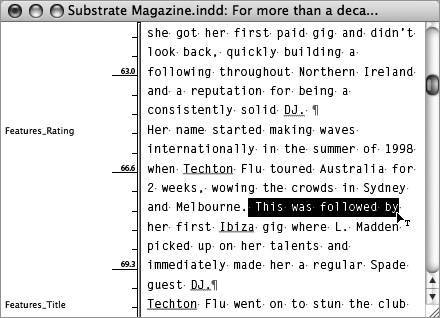
The Story Editor got its start in PageMaker, where users quickly appreciated its usefulness. It allows you to focus on editing text in a word-processor-like view without being distracted by formatting and layout. InDesign's Story Editor improves upon the one in PageMaker, making it feel more like a word processor. You can view hidden characters, perform find/change actions, and check spelling (Figure 43a).

Figure 43a. The Story Editor window allows you to focus on the text in your document without being distracted by the layout.


Open Multiple Instances of a Story Editor

Save yourself some time in those intense text-editing sessions when you're jumping back and forth between locations in a long story. You can open multiple instances of the same window and scroll to different locations in them. To create a new instance of a window, make sure the Story Editor window is active, and then choose Window > Arrange > New Window. This technique is useful for similar situations in Layout mode.


To open a story in Story Editor, click an insertion point in a frame or select a text frame (or several of them) and choose Edit > Edit in Story Editor. To switch back to Layout, choose Edit > Edit in Layout or close the window. You can toggle between these views by using the easy to remember keyboard shortcut: Command+Y (Mac) or Control+Y (Windows).

Once you're in a Story Editor window, you can concentrate on adding new text or editing existing text. But don't mistake the simplicity of this view as being limited. There are plenty of tasks you can do without leaving the Story Editor.

Here are some of the possible functions you can perform in a Story Editor window:

  • View and apply style sheets: Any styles applied appear in the left style name column. Apply paragraph and character styles as you would in Layout mode.

  • Check spelling: You can check spelling in the story as you would in Layout mode. Turn on dynamic spelling (Edit > Spelling > Dynamic Spelling) to have InDesign check spelling as you type. Red squiggly underlines indicate misspellings as in Microsoft Word.

  • Drag and drop text: InDesign CS2 now supports drag-and-drop text. Select your text and then hover over the selection until the new drag-drop text cursor appears . Drag the selection to a new location and drop it.

  • View and edit overset text: Text not visible in its frame is known as overset text. A red line runs alongside any overset text that occurs in your story. The Story Editor makes it possible to see and edit the overset text unlike in Layout mode where you need to expand the text frame before editing.

  • View and edit a story in its entirety: Possibly the least obvious feature of the Story Editor is that it allows you to view a story in one complete window regardless of whether the story text is on multiple pages in the document layout.

Story Editor Preferences

Be sure to check out the Story Editor Display preferences available in InDesign's Preferences dialog. From there you can decide on font, colors (both text and background), cursor, and anti-aliasing options used in the Story Editor.


Adobe Creative Suite 2 How-Tos(c) 100 Essential Techniques
Adobe Creative Suite 2 How-Tos: 100 Essential Techniques
ISBN: 0321356748
EAN: 2147483647
Year: 2005
Pages: 143

flylib.com © 2008-2017.
If you may any questions please contact us: flylib@qtcs.net