Use Cascading Style Sheets for Layout and Design
|
The W3C has been working for some time to solve the problems created by HTML’s limitations. One key step was introducing Cascading Style Sheets (CSS). CSS provide a means of controlling a page’s design apart from HTML markup. This enables the Web page author to separate content (HTML) from presentation (CSS). The W3C’s wish is that you use HTML as it was intended, to define your document’s structure; and use CSS to specify its presentation. For that reason, the W3C is phasing out (deprecating) many of the elements that were developed as extensions to HTML. So, what can you do with CSS? A lot!
If an element or attribute is deprecated, the World Wide Web Consortium (W3C) discourages its use because there is a preferred alternative, generally CSS. Even so, most browsers still support the deprecated elements and attributes, and probably will do so for many years to come.
Cascading Style Sheets are easy to learn. However, some have pointed out that they are difficult to master—just as is anything related to design. A good place to start with CSS is by learning to use inline styles. In Chapter 10 you’ll learn some better ways to apply styles, but the following examples will enable you to gain some basic experience with CSS and hopefully overcome any intimidation factor.
Add Inline Styles with the style Attribute
Cascading Style Sheets is somewhat of a misnomer for what you are using here. The term “style sheet” implies something separate from the page, and you will learn later why the term “cascading” is used. What you will work with here is called an inline style. It works about the same way as what you have learned already with HTML. In Chapter 1 you learned the three most important terms in HTML: elements, attributes, and values. An attribute goes inside an element and describes what you want to modify. A value is attached to the attribute and gives the details of how you are going to modify the element. Thus, to apply an inline style to any element, you simply use the style attribute to modify that element’s style.
For example, suppose you want to set the text color of a particular paragraph to red instead of black. All you need to do is make a slight addition to the opening paragraph tag, like this:
<p style="color: red">
Try this in any of the pages you have created thus far. It will work with virtually any element. For example, if you put this attribute inside the <body> element, it will set the font color to red throughout the entire document. However, if you just put it in one paragraph element, only that paragraph will be affected.
In the preceding example, you used the style attribute in combination with the color property. You also added a value (red) to the property. Property is a term you will become very familiar with as you learn to work with CSS. It tells a browser what specific characteristic of an element you are modifying. For example, some properties you might use to adjust a font are font-family, font-size, text-indent, font-style, color, and so forth. Later, you will see that you have a much larger selection of properties to work with in CSS, and you can do many more things with them.
One reason that newcomers to HTML find CSS confusing is that they introduce a whole new array of terms to learn. After all, you've spent a fair amount of time learning the meaning of elements, attributes, and values. Now you encounter terms like selectors, properties, and values. Don't let the new terms confuse you. Just remember that a selector is like an element. In fact, a selector is used to “select” an element for styling. Likewise, a property is like an attribute; it describes what characteristic of a selector is going to be modified. Finally, value corresponds to value. A value describes the style that will be applied in the page. Returning to our hair color analogy from Chapter 1, if you were going to use CSS to apply a hair color style you would do it this way:
hair {color: red} If you are applying the style inline, as in this chapter, you would write it like this:
<hair style="color: red">
For more on Cascading Style Sheets, refer to Chapter 10.
Using inline styles is similar to using any other attribute inside an element. However, there are a few important differences in syntax that you need to remember:
-
Property-value combinations must be enclosed in the quotation marks that follow the style attribute:
<p style="All properties and values go between the quotes.">
-
Properties and values must be separated by a colon:
<p style="property: value">
-
Multiple property-value combinations must be separated by semicolons:
<p style="property: value; property: value; property: value">
| Caution | In CSS you must put a hyphen (-) between related words. For example, if you use a font that has more than one word in its name, you must hyphenate it. Times New Roman should be Times-New-Roman. If you leave out the hyphens, browsers will not recognize the font name. The same holds true with property names that have more than one word, such as font-size. |
Control Fonts with CSS
Formerly, you would have used the <font> element to adjust the color, size, style, and position of your text. However, with CSS you have a much greater degree of flexibility. For example, the <font> element only allowed you to use seven different font sizes. With CSS, you can not only specify virtually any font size you want, but you can choose from quite a few different measurements, such as points, picas, percentages, ems, and more. Consider the following font controls you have with style sheets.
Adjust Font Size with the font-size Property
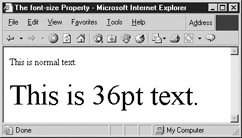
You can set the size of your fonts by using the font-size property. Insert the style attribute into the opening <p> tag and add the font-size property, along with a description of the size you want to display. For example, to instruct the browser to display text with a 36 point font, you would write your opening tag like this:
<p style="font-size: 36pt">This is 36pt text.</p>
As the following illustration shows, your text will display in the size you have specified.
| Shortcut | To set the font size for an entire page, insert the style attribute into the opening <body> tag. |
Select Fonts with the font-family Property
To select different fonts for your page, use the font-family property along with the name of the font you wish to display on the page, as in the following code:
<p style="font-family: Times-New-Roman">Times font</p>
You can specify any font you wish, but if you choose an exotic or unusual font, keep in mind that not all visitors to your Web site will have that particular font installed on their computers. If that happens, the browser will choose a substitute font—and you may not be pleased with the results. An alternative is to use one of the five generic fonts that are specified for CSS. These are serif (as in Times New Roman), sans-serif (as in Arial), monospace (as in Courier), cursive, and fantasy. You can use these generic fonts by themselves, and the browser will display the font closest in appearance to the generic. You can also use generic fonts in combination with specific fonts. To do this, you simply list your font choices in order of preference, separated by commas, as in the following code listing:
<p style="font-family: Arial, sans-serif">Arial font</p>
If you list multiple font choices this way, the browser will try to load the first choice. Then, if it doesn’t find that font it will move on to the next, and so on. However, if you choose the cursive or fantasy generics, beware. The results vary widely between browsers and computer systems. Try creating an html page and typing in the following code. Save it as generic-fonts.htm and then display it on your browser and see how it compares to the illustration that follows:
<html> <head> <title>The Generic Fonts</title> </head> <body style="font-size: 16pt"> <p style="font-family: serif">Serif.</p> <p style="font-family: sans-serif">Sans-serif.</p> <p style="font-family: monospace">Monospace.</p> <p style="font-family: cursive">Cursive.</p> <p style="font-family: fantasy">Fantasy.</p> </body> </html>
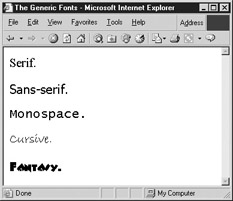
| Note | The text in this example and those that follow has been set to display at 16 points. |
Create Italics with the font-style Property
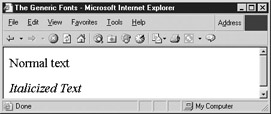
How do you cause text to display in italics? In the past you would have used the presentational element <i> </i>. With CSS, you do it by using the font-style property. By adding this property to a text element, as in the following code and illustration, you will generate italicized text:
<p>Normal text</p> <p style="font-style: italic">Italicized Text</p>
Specify Font Colors with the color Property
Earlier in this chapter you saw how to use the color property to specify font colors with the color property. There are many different ways to specify color, and these will be covered in Chapter 4. However, you may wish to experiment with color by using the 16 Windows colors. Browsers recognize these colors by the following names: black, silver, gray, white, maroon, red, purple, fuchsia, green, lime, olive, yellow, navy, blue, teal, and aqua. Try typing the following code, then saving it as font-colors.htm and displaying it in your browser to see a sampling of these basic colors, and to get some practice working with the color property as well.
| Tip | On the last color (white), you will also need to use the background-color property, set to black or another dark color. Otherwise, your white text will disappear against the page’s white background. To learn more about the background-color property, check out Chapter 4. |
<html> <head> <title>The color Property</title> </head> <body style="font-size: 16pt"> <p>Black</p> <p style="color: silver">Silver</p> <p style="color: gray">Gray</p> <p style="color: maroon">Maroon</p> <p style="color: red">Red</p> <p style="color: purple">Purple</p> <p style="color: fuchsia">Fuchsia</p> <p style="color: green">Green</p> <p style="color: lime">Lime</p> <p style="color: olive">Olive</p> <p style="color: yellow">Yellow</p> <p style="color: navy">Navy</p> <p style="color: blue">Blue</p> <p style="color: teal">Teal</p> <p style="color: aqua">Aqua</p> <p style="color: white; background-color: black">White</p> </body> </html>
Create Bold Text with the font-weight Property
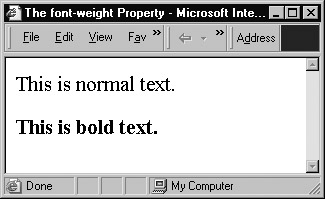
One other property you might want to learn early on is the font-weight property. This property enables you to create boldface text with CSS, instead of with the deprecated bold <b> element. In fact, as you’ll learn in Chapter 10, this property can actually give you more control than simply toggling boldness on and off. On a system that has fonts capable of supporting it fully, the font- weight property enables you to control the degree of boldness. However, to keep things simple, just experiment by using this property to turn boldness on, as in the following code and illustration:
<html> <head> <title>The font-weight Property</title> </head> <body style="font-size: 16pt"> <p>This is normal text.</p> <p style="font-weight: bold">This is bold text.</p> </body> </html>
Project 5: Add Style to a Page
To demonstrate the versatility of CSS, take the document you created in Project 4 and use CSS to add style. To simplify the design, remove the <br /> and <blockquote> tags from the page before you add the style information. That way, you’ll be working with three identical paragraphs.
-
Insert the style attribute within the opening <h1> tag and each opening <p> tag. This tells the browser that you are using an inline style:
<p style=" ">
-
Now, change the color of your heading to red by using the color property:
<h1 style="color: red">
-
Make your heading display in italics by adding the font-style property:
<h1 style="color: red; font-style: italic">
-
Set the font in each of the paragraphs with the font-family property:
<p style="font-family: ">
-
Now specify the font style you want to display:
<p style="font-family: arial">
-
Tell the browser to display a 12pt font. Be sure to separate the new property-value combination from the first one by a semicolon:
<p style="font-family: arial; font-size: 12pt;">
-
Now set the font-weight to bold:
<p style="font-family: arial; font-size: 12pt; font-weight: bold; ">
-
Set the font color to navy:
<p style="font-family: arial; font-size: 12pt; font-weight: bold; color: navy;">
-
Save your newly-styled page and display it in your browser. It should look something like Figure 3-2. Quite a difference!
Figure 3-2: Text page with style added
You may have noticed that this process becomes quite tedious, particularly if you are adding a lot of different styles. Take heart. In Chapter 10 you will learn how to create style sheets that will control styles throughout your document without having to be inserted in each individual element. This was only a sampling of what you can do with CSS. As you work your way through this book, you will learn how to use CSS to create Web pages that are attractive and of high quality.
Indent Text with CSS
When you want to indent text in a word processor, you just press the TAB key or SPACE bar. In HTML, it’s not that simple. For example, if you try to indent text in a paragraph by merely adding spaces after the opening <p> tag, you’ll find that those spaces disappear when the page displays. That’s because Web browsers are designed to ignore extra white space. However, CSS provide a simple solution with the text-indent property. To add an indent to a paragraph, you would add the following inline style to its opening tag, as in the following:
<p style="text-indent: 5%">
If you add this style instruction to one of the paragraphs that you have already created, you’ll discover that it indents the text a distance that is equal to 5% of the size of the browser window. In Chapter 10 you’ll learn other ways to specify measurements, but percentages are handy because they automatically adjust up or down with the size of the window. You may be wondering how Web authors added indents or extra spaces before style sheets came along. The examples that follow are examples of “workarounds,” that is, solving design problems by using HTML markup in ways other than it was intended for. Thus, these workarounds are discouraged.
The Entity Creates Indents (Discouraged)
The nonbreaking space entity will instruct a browser to add spaces wherever you want them. However, most commonly it is used to create an indent at the beginning of a paragraph. To use it, you type the characters where you want the spaces inserted. If you want to have a five-space indent at the beginning of a paragraph, type five nonbreaking space entities at the beginning of the line you want to indent. (For more on entities and how to use them, see Chapter 2.)
The Definition Description Element <dd> Indents Text (Discouraged)
Another way to indent is to borrow from the list elements covered in Chapter 2. You’ll remember that the dictionary list included a dictionary term <dt></dt> element and a dictionary definition element <dd></dd>. The definition description element automatically indents. So, by enclosing the top line of your text in this element, you can force an indent without typing all those entities.
The <blockquote> Element Indents a Large Block (Discouraged)
If you want to increase the left margin, the old way of doing it was with the <blockquote> element. By nesting one blockquote inside another, as in the following code, it is possible to move the left margin in a considerable distance:
<blockquote><blockquote>Big margin</blockquote></blockquote>
Although this may seem an easy way to move in the left margin, you will find the margin-left and margin-right properties give you greater control than you have with <blockquote>. Try increasing the margins of the paragraphs in Project 5 by adding the following style instruction:
<p style="margin-left: 5%; margin-right: 5%">
With these properties, you can control both margins, something not possible with <blockquote>.
Position and Align Text with CSS
What do you do if you want to center your text or right-justify a block of text? By using the text-align property, you can position your text easily. Simply add the style attribute in the element which you wish to align, like this:
<p style="text-align: center">This center-aligns text.</p> <p style="text-align: right">This right-aligns text.</p> <p style="text-align: justify">This justifies text.</p> <p style="text-align: left">This left-aligns text.</p>
Because left alignment is the default (automatic) setting, you don’t normally need to use the text-align: left setting very often. Usually, you would use this when you need to override another alignment setting. In the days before CSS, the align attribute and <center> element accomplished these tasks.
The align Attribute Positions Elements (Deprecated)
The align attribute positions text (or images) at the left, center, or right of a page. For example, to center-align a single paragraph, add the align attribute to the <p> tag at the beginning of the paragraph. The tag will look like this:
<p align="center">Center-aligned Text</p>
The <center> Element Centers Objects and Text (Deprecated)
By enclosing content (text or images) inside the <center> element, you can center-align large blocks of material, even an entire page if you want to. This element is another example of presentation-related markup that the W3C is phasing out.
<center>This content is centered.</center>
By now you may be wondering what the W3C hopes to accomplish by deprecating these elements. To understand the answer to that question, you must spend a little time investigating the language that is the future of the Web: XML.
|
EAN: 2147483647
Pages: 126
- Step 2.1 Use the OpenSSH Tool Suite to Replace Clear-Text Programs
- Step 3.1 Use PuTTY as a Graphical Replacement for telnet and rlogin
- Step 3.2 Use PuTTY / plink as a Command Line Replacement for telnet / rlogin
- Step 3.3 Use WinSCP as a Graphical Replacement for FTP and RCP
- Step 4.3 How to Generate a Key Pair Using OpenSSH