Code Techniques
Looking to generate thumbnails on the fly? Or wondering where you can steal Microsoft code to build your own online forums, in minutes? This section has all the answers ”and a whole bundle of other neat ASP.NET code techniques.
Three Steps to Changing Your Page Title in Code
If I asked you to change the title of your Web form in code, you d be forgiven for looking for a title or text property somewhere. The problem is, that mysterious property doesn t exist: Microsoft forgot to put it in. If you want to change your page title programmatically, you have to do it yourself. Here s how.
Firstly, switch to the HTML view on your Web form. Near the top of your page, you ll see the title tag, looking something like < title > WebForm1 < /title > . Replace this with < title runat ="server" id="PageTitle" > < /title > . Here, you re creating a title tag that runs on the server and has an ID, meaning you can manipulate it in code.
Next , switch back to Design mode and open up the code window behind your form. At the top of your page, under the Inherits line, add the following line of code to declare the server title tag you ve just added:
Protected PageTitle As System.Web.UI.HtmlControls.HtmlGenericControl
Our third and final step involves changing the page text. Behind the Load event of your page, or in response to some similar event, set the InnerText property of the PageTitle tag to your new page title. Here s my sample code:
PageTitle.InnerText = "Welcome! - Last Updated 20/05/2004"
And that s it: one line of code and your page title has changed. Hey presto!
How to Automatically Fill Out Email Fields
Most ASP.NET developers know ”or can guess ”that the Hyperlink control allows you to link through to other Web sites just by changing the NavigateUrl property. Many will also be aware that, changing the NavigateUrl property to something like mailto:<karl@karlmoore.com> , you ll open the default mail client, ready to send a message to <karl@karlmoore.com>.
However, you can add a number of tags to this mailto: command to insert default values into email fields. For instance, adding a subject query string parameter so the NavigateUrl property looks like mailto:<karl@karlmoore.com?subject=Thanks> will open the mail client when clicked on, with a message to <karl@karlmoore.com> and a subject of Thanks .
Other tags you can use include body for inserting text in the body of a message, cc for specifying courtesy copy recipients, and bcc for blind courtesy copies.
So, one example of a clever mailto: tag could be as follows :
mailto:karl@karlmoore.com?subject=Thanks&body=I learned a lot about hyperlinks&cc=karl.moore@whitecliff.net; mark.williams@whitecliff.net
This should be all on one line and will open the default mail client, ready for sending a mail message to <karl@karlmoore.com>. The default subject will be Thanks , the body will be I learned a lot about hyperlinks , and both <karl.moore@whitecliff.net> and <mark.williams@whitecliff.net> will be CC ed. (See Figure 3-5.)
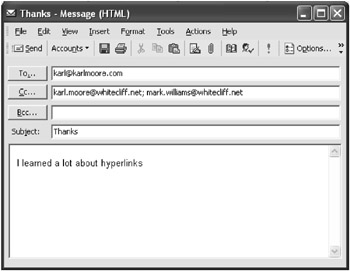
Figure 3-5: The result of our specially formatted mailto: link
Note that this trick isn t specific to the Hyperlink control nor ASP.NET: it will work with any hyperlink or similar feature. Nevertheless, it s an interesting snippet of knowledge that s worthy of shelving somewhere in your developer s library.
Sending Mail in ASP.NET
Download supporting files at www.apress.com .
The files for this tip are in the Ch3 ” Send Mail folder.
Sending mail from a Web page is perhaps one of the most commonly requested code snippets. And, to make your life easier, here s a function that encapsulates all the functionality for you. Simply call it, passing in the appropriate arguments, and you re sorted:
Public Function SendMail(ByVal [To] As String, _ ByVal From As String, ByVal Subject As String, _ ByVal Body As String, ByVal IsHTML As Boolean, _ Optional ByVal SmtpServer As String = "domain.com") As Boolean ' Sends a mail message using the specified details ' - returns a False if delivery fails Try Dim objMsg As New System.Web.Mail.MailMessage() SendMail = True With objMsg .To = [To] .From = From .Subject = Subject .Body = Body ' .BodyFormat specifies whether the Body is ' in plain text or HTML format .BodyFormat = IIf(IsHTML = True, _ System.Web.Mail.MailFormat.Html, _ System.Web.Mail.MailFormat.Text) End With System.Web.Mail.SmtpMail.SmtpServer = SmtpServer System.Web.Mail.SmtpMail.Send(objMsg) Catch SendMail = False End Try End Function
Our code here simply composes a new MailMessage object and attempts to send it through the specified server, returning a True if successful. We re using a default SMTP server of domain.com, which should be altered to your own local mail server.
And here s how you might call this function:
blnMailSent = SendMail("karl@karlmoore.com", "talk2us@whitecliff.net", _ "This is my subject", "This is my body, False, "whitecliff.net") Of course this doesn t handle more-complicated mail situations, such as checking email, sending through nonlocal authenticated mail servers, or administering POP3 accounts. For such functionality, you ll want to check out a third-party control such as devMail.net from www.devmail.net.
The Trick to Creating User -Friendly URLs
If you ve spent time surfing some of the new ASP.NET sites, you may have noticed the more advanced ones have started incorporating user-friendly URLs .
For example, rather than providing http://www.yoursite.com/profile.aspx?username=john to link to a personal profile page (where the id is in the query string), some sites are providing URLs such as http://www.yoursite.com/john.aspx. These work in exactly the same way as the URL with an embedded query string, yet look much nicer.
But how is this possible? Well, it all works via a little nifty use of the Application_BeginRequest method, inside your Global.asax file, which fires off whenever any request is made to your Web application. Inside this method, we look at the path requested by the user, then figure out the page our surfer really wants (typically, the page actually incorporating a query string). We then transparently feed this real page back down to the user.
For example, imagine a request comes through to view webservices .aspx . Our code behind the Application_BeginRequest event kicks in and extracts any relevant information from the path, such as the webservices portion. Then our code figures out what page the user really wants to see ”perhaps viewarticle.aspx?title=webservices ”and rewrites the path to deliver that page back to the user. Note that your visitor is still on the webservices.aspx page; to them, the URL does not change. It remains user-friendly.
You could implement this method of creating aesthetically-pleasing URLs in a number of different ways; however, this extraction of the main part of the path (i.e., webservices ) to use in a query string (i.e., viewarticle.aspx?title=webservices ) is the most common.
Here s a little template code to add to the Application_BeginRequest method of your Global.asax file:
' Get paths and data positions Dim strPath As String = Request.FilePath Dim intStart As Integer = strPath.LastIndexOf("/") + 1 Dim intEnd As Integer = strPath.LastIndexOf(".aspx") Dim intLength As Integer = intEnd - intStart ' Extract main part of filename (ie, bit between "/" and ".aspx" Dim strPageName As String = strPath.Substring(intStart, intLength) ' Rewrite path to send data back from other page Context.RewritePath("viewarticle.aspx?title=" & strPageName) Be warned that this code does not make any exceptions. All pages for this application will have their paths rewritten. You may wish to add a little code to parse the path and check the user is in the /articles/ folder or some such before redirecting .
Implemented correctly, this is one fantastic little trick. Good luck!
Adding Real-Time HTML to Your Page
Have you ever visited a Web site that displays a message such as Attempting to connect to host , then a few seconds later displays a confirmation such as Done ”all on the same page? It almost streams the information down to your page, live . Wonder how that s done?
It works like this: the page begins sending its text down to the client, then pauses before the result HTML (that is, Done) is sent to the user. Your code runs and does its processing, perhaps doing a little database work. When ready, the result is sent down to the user. It s real-time HTML processing, and it works using a property called BufferOutput .
The most common method of using this is when writing code directly behind the ASPX page, where the code is inserted in < % code marks % > , rather than using the more typical Visual Basic code behind techniques taught in this book.
In this ASPX page situation, simply set the Response.BufferOutput property to False as your page loads, then, just before the portion where you want to return your result, write code to do your work, then spurt out the response with a Response.Write . It s nothing special, but it ll send all the HTML down to your user until your code is encountered . It ll then run your code and display any results you output.
The BufferOutput property being set to False is the real trick here. This tells the page that it doesn t have to wait for the contents of the entire page to be generated before sending to the client ”rather, it can go with the flow and send it as it becomes available.
When it comes to the regular code behind pages more familiar with VB .NET developers, it s all a little more complicated. However, here s a simple sample that ll demonstrate the technique. Just create a new application and add the following code to your page Load event, then run it and see what happens:
Response.BufferOutput = False Response.Write("Processing your query...") Dim x As Integer For x = 1 To 100000000 ' Waste time! your genuine code would replace this loop Next Response.Write(" FINISHED!") Here s a little tip: when running this for the first time, the ASP.NET on-demand compiler kicks in, and you probably won t notice what happened . Simply hit refresh and watch again.
The Secret to Uploading Files with Ease
Download supporting files at www.apress.com .
The files for this tip are in the Ch3 ” Uploading Files folder.
In the golden olden days of ASP, managing a file upload was pretty difficult. Most developers reverted to digging deep in their wallets to purchase a third-party add-on to help them achieve the desired result. No longer.
Thanks to the new ASP.NET features, you can now upload files with practically a few lines of code. And the following four easy-to-follow steps show you exactly how to do it.
-
Add a File Field control to your form. You ll find this under the HTML tab on the toolbox. You ll have seen this control when uploading attachments through Hotmail, or when sending files to a Web site.
-
Right-click on the File Field control and check the Run as Server Control option. This allows you to manipulate the control in code, sort of like a less-functional ASP.NET server control.
-
Change the ID of your File Field control to something more understandable, such as fileUpload .
-
Enter the HTML view of your Web form and find the opening < form > tag. You ll need to edit this to add the parameter encType="multipart/form-data" . Your < form > tag may look something like this when you re finished:
<form id="Form1" method="post" encType="multipart/form-data" runat="server">
And that s it. (See Figure 3-6.) You ve set up your form to receive file uploads. But after the user has selected a file and submitted your form, how do you manipulate the sent file? The easiest technique is to run a simple line of code, like this:
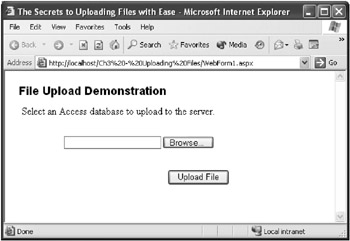
Figure 3-6: Click on the button and pick a file!
NameOfFileFieldElement.PostedFile.SaveAs(Server.MapPath("uploadedfile.txt")) Pretty simple, really. You might also want to check that the user has uploaded a valid file first, before saving (unless you re really into errors). The following function does this for you, checking for null uploads and zero byte files:
Public Function FileFieldSelected(ByVal FileField As _ System.Web.UI.HtmlControls.HtmlInputFile) As Boolean ' Returns a True if the passed ' FileField has had a user post a file If FileField.PostedFile Is Nothing Then Return False If FileField.PostedFile.ContentLength = 0 Then Return False Return True End Function
| TOP TIP | If you get an access denied error when trying to save files directly to your Web application folder, go check your permissions. Ensure that your virtual directory in IIS has read and write permissions. (Change this through IIS.) You may also want to ensure that your ASPNET, guest, or impersonated accounts have appropriate permissions, both for computer access and for the actual folder itself. (To change this, right-click on the folder, select Sharing and Security, and then select the Security tab.) |
The problem is that both you and I know that 95% of people reading this don t really want to go ahead and store files directly on the server file system. Rather, you want to save information into your database, into that SQL Server image field.
Every publication I ve seen so far manages to conveniently skip this topic. But not this one .
Storing Uploaded Files in Your Database
Download supporting files at www.apress.com .
The files for this tip are in the Ch3 ” Storing Files in Database folder.
First, a few tips on storing files inside your SQL Server database.
For convenience, you ll really need to store at least three bits of information about your file to get it out in the same shape as you put it in. I d suggest data (a field that will hold your actual file as a byte array, data type image), type (a field to hold details of the type of file it is, data type varchar), and length (a field to hold the length in bytes of your file, data type int).
I d also recommend downloadName , a field to hold the name that the file had when it was uploaded, data type varchar . This helps suggest a name should the file be downloaded again via the Web.
The problem you have is translating the information from the File Field control into an acceptable format for your database. For a start, you need to get your file into a byte array to store it in an image field. You also need to extract the file type, length, and the download name. Once you have this, set your fields to these values using regular ADO.NET code.
So, how do you get this information? It s simple: just use the following ready-to-run code snippets, passing in your File Field control as an argument. Each function will return just the information you want to feed straight into your database, from a byte array for the image field to a string for the file type.
Public Function GetByteArrayFromFileField(_ ByVal FileField As System.Web.UI.HtmlControls.HtmlInputFile) _ As Byte() ' Returns a byte array from the passed ' file field controls file Dim intFileLength As Integer, bytData() As Byte Dim objStream As System.IO.Stream If FileFieldSelected(FileField) Then intFileLength = FileField.PostedFile.ContentLength ReDim bytData(intFileLength) objStream = FileField.PostedFile.InputStream objStream.Read(bytData, 0, intFileLength) Return bytData End If End Function Public Function FileFieldType(ByVal FileField As _ System.Web.UI.HtmlControls.HtmlInputFile) As String ' Returns the type of the posted file If Not FileField.PostedFile Is Nothing Then _ Return FileField.PostedFile.ContentType End Function Public Function FileFieldLength(ByVal FileField As _ System.Web.UI.HtmlControls.HtmlInputFile) As Integer ' Returns the length of the posted file If Not FileField.PostedFile Is Nothing Then _ Return FileField.PostedFile.ContentLength End Function Public Function FileFieldFilename(ByVal FileField As _ System.Web.UI.HtmlControls.HtmlInputFile) As String ' Returns the core filename of the posted file If Not FileField.PostedFile Is Nothing Then _ Return Replace(FileField.PostedFile.FileName, _ StrReverse(Mid(StrReverse(FileField.PostedFile.FileName), _ InStr(1, StrReverse(FileField.PostedFile.FileName), "\"))), "") End Function
Sorted! One question remains, however. Once you ve got a file inside a database, how do you serve it back up to a user? First, get the data back out of SQL Server using regular ADO.NET code. After that? Well, here s a handy function that ll do all the hard work for you. Simply pass the data from your table fields and hey presto:
Public Sub DeliverFile(ByVal Page As System.Web.UI.Page, _ ByVal Data() As Byte, ByVal Type As String, _ ByVal Length As Integer, _ Optional ByVal DownloadFileName As String = "") ' Delivers a file, such as an image or PDF file, ' back through the Response object ' Sample usage from within an ASP.NET page: ' - DeliverFile(Me, bytFile(), strType, intLength, "MyImage.bmp") With Page.Response .Clear() .ContentType = Type If DownloadFileName <> "" Then Page.Response.AddHeader("content-disposition", _ "filename=" & DownloadFileName) End If .OutputStream.Write(Data, 0, Length) .End() End With End Sub Simply pass your byte array, file type, and length, and it ll send it straight down to your surfer. If it s an image, it ll be displayed in the browser window. If it s a regular file, you ll be prompted for download.
If it s made available for download, this function also allows you to specify a suggested download file name, a technique that many ASP.NET developers spend weeks trying to figure out. Easy!
Working with Uploaded Images
Download supporting files at www.apress.com .
The files for this tip are in the Ch3 ” Working with Images folder.
Whether you re building the simplest of photo album Web sites or a fully fledged content management system, the ability to work with uploaded images is a vital one, and with ASP.NET, it s a real doddle.
The following code snippet shows you how, by example. It takes a data stream from the File Field control and converts it into an image object, adding simple error handling should the uploaded file not actually be an image. The code then uses this image object to extract a few core details about the file, from its dimensions to file type:
' Get data into image format Dim objStream As System.IO.Stream = _ MyFileField.PostedFile.InputStream Dim objImage As System.Drawing.Image Try ' Get the image stream objImage = System.Drawing.Image.FromStream(objStream) Catch ' This is not an image, exit the method (presuming code is in one!) Exit Sub End Try ' Filename Dim strOriginalFilename As String = MyFileField.PostedFile.FileName ' Type of image Dim strImageType If objImage.RawFormat.Equals(objImage.RawFormat.Gif) Then strImageType = "This is a GIF image" ElseIf objImage.RawFormat.Equals(objImage.RawFormat.Bmp) Then strImageType = "This is a Bitmap image" ElseIf objImage.RawFormat.Equals(objImage.RawFormat.Jpeg) Then strImageType = "This is a JPEG image" ElseIf objImage.RawFormat.Equals(objImage.RawFormat.Icon) Then strImageType = "This is an icon file" ElseIf objImage.RawFormat.Equals(objImage.RawFormat.Tiff) Then strImageType = "This is a TIFF file" Else strImageType = "Other" End If ' Dimensions Dim strDimensions As String strDimensions = "Width in pixels: " & objImage.Width & _ ", Height in pixels: " & objImage.Height ' Send raw output to browser Response.Clear() Response.Write(strOriginalFilename & "<p>" & strImageType & _ "<p>" & strDimensions) Response.End()
Creating Images Dynamically
Download supporting files at www.apress.com .
The files for this tip are in the Ch3 ” Dynamically Create Images folder.
Ask any ASP developer who has ever tried to dynamically create his own images and he ll tell you it s a nightmare. In fact, it s more than a nightmare. It s practically hell. The only true solution? Reverting to an expensive, dodgy, third-party control to do the work for you.
With ASP.NET, however, you can develop your own dynamic images with ease. Simply create an image object and use the new GDI+ features to add objects to that image, such as text, rectangles, and ellipses. After that, you can simply stream straight back down to the client.
But covering the graphics features in depth would require at least another two books, and, unfortunately , we don t have that much room. So, I m going to share a sample that demonstrates creating a small Empty Karl s Basket button, alongside a little blue-and-yellow bullet point. (See Figure 3-7.) It s the sort of personalized graphic you ll find on sites such as Amazon.com.
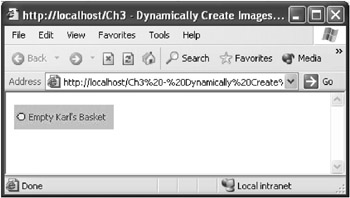
Figure 3-7: The result of our code: hey, it s my shopping basket. Apparently. Web Sites in Seconds!
Just add the following code to the page Load event of a Web form. That Web form will then feed back this image as its output. In other words, your Web browser will recognize the page as a graphic. This means that, if you wanted to reference the image in an Image control, say, you d specify the source (the ImageUrl ) as being YourWebFormName.aspx.
Here s the code:
' Create image - you could even load an image ' from a file and edit it in code Dim objBitmap As Bitmap = New Bitmap(120, 30) Dim objGraphics As Graphics = Graphics.FromImage(objBitmap) ' Fill background objGraphics.FillRectangle(New SolidBrush(Color.LightBlue), _ 0, 0, 120, 30) ' Create blue-yellow bullet point objGraphics.FillEllipse(New SolidBrush(Color.Blue), 3, 9, 10, 10) objGraphics.FillEllipse(New SolidBrush(Color.Yellow), 4, 10, 8, 8) ' Draw text next to bullet point objGraphics.DrawString("Empty Karl's Basket", _ New Font("Tahoma", 8), New SolidBrush(Color.Green), 16, 8) ' Send down to client Response.Clear Response.ContentType = "image/jpeg" objBitmap.Save(Response.OutputStream, _ System.Drawing.Imaging.ImageFormat.Jpeg) ' Tidy up objGraphics.Dispose() objBitmap.Dispose() At its very least, this code demonstrates passing images back down to the browser via a Web page. Now all you need to do is brush up on your GDI+ skills, and the world of dynamic image generation is your oyster. For more information and a series of tutorials, use the help index to look up images, GDI+ ”or check out some of the graphic methods you can utilize in the Drawing with Windows Forms tip in Chapter 7.
Code for Generating Thumbnails on the Fly
Download supporting files at www.apress.com .
The files for this tip are in the Ch3 ” Thumbnails folder.
If you ve ever attempted to create image thumbnails for your site, you ll know it s a tiresome task. You either do it manually, or use an inflexible system such as the FrontPage thumbnail feature.
However, as you ve seen in previous tips, ASP.NET gives us tremendous control over how our images work. As such, we should be able to generate thumbnails on the fly and this snippet will enable you to do just that.
Create a new Web form (thumbnail.aspx) and add the following code behind the page Load event:
' Initialize objects Dim objImage, objThumbnail As System.Drawing.Image Dim strServerPath, strFilename As String Dim shtWidth, shtHeight As Short ' Get image folder path on server - use "\" string if root strServerPath = Server.MapPath("WebAppImageFolder\") ' Retrieve name of file to resize from query string strFilename = strServerPath & Request.QueryString("filename") ' Retrieve file, or error.gif if not available Try objImage = objImage.FromFile(strFilename) Catch objImage = objImage.FromFile(strServerPath & "error.gif") End Try ' Retrieve width from query string If Request.QueryString("width") = Nothing Then shtWidth = objImage.Width ElseIf Request.QueryString("width") < 1 Then shtWidth = 100 Else shtWidth = Request.QueryString("width") End If ' Work out a proportionate height from width shtHeight = objImage.Height / (objImage.Width / shtWidth) ' Create thumbnail objThumbnail = objImage.GetThumbnailImage(shtWidth, _ shtHeight, Nothing, System.IntPtr.Zero) ' Send down to client Response.ContentType = "image/jpeg" objThumbnail.Save(Response.OutputStream, Imaging.ImageFormat.Jpeg) ' Tidy up objImage.Dispose() objThumbnail.Dispose() If you follow this code through, you should see what happens. The filename is retrieved from the query string and the image loaded into memory. The new width is then taken and a proportionate height calculated (an important usability feat that few demonstration code snippets take into account). Then, a newly sized thumbnail is generated and sent straight back down to the client.
After compiling, you d call this page by typing something like the following URL into your browser: http://localhost/WebAppFolderName/thumbnail.aspx?filename=myfile.gifwidth=100. (See Figure 3-8.) You d use this URL as the image source for, say, an Image control.
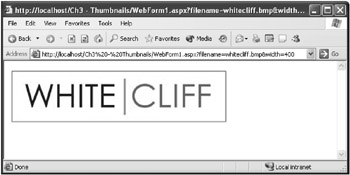
Figure 3-8: The White Cliff logo, resized to perfection
Don t forget: after you ve generated the thumbnail, you can still dynamically edit your image. Using the last tip, for example, you could add a little copyright notice next to each thumbnail. Powerful stuff, this imaging lark.
Five Steps to ASP.NET Authentication
Download supporting files at www.apress.com .
The files for this tip are in the Ch3 ” Authentication folder.
If you ve created a Web application in Visual Studio .NET, you should be aware that ”by default ” anyone can access your pages. However, there is a way to keep nosy, unwanted types out. It s called authentication .
ASP.NET includes support for three core types of authentication: Windows, which allows only certain Windows accounts to access a page; Passport, which uses the Microsoft Passport universal login system to verify a user (a pay service); and Forms, the most popular method of authentication, which we ll be covering here.
When a user attempts to access a page that uses Forms authentication, they get redirected to a login screen. From here, your surfer can provide a username and password. You then validate the credentials and grant or deny access to your pages accordingly .
Want to set up ASP.NET Forms authentication? Just follow my five quick and easy steps.
-
Open the Web.config file in your Solution. This stores a number of settings for your Web application. Edit the < authentication > elements so that it reads something like the following. (Alter usernames and passwords as appropriate, and watch both your casing and spacing.) This provides your application with a list of valid users.
<authentication mode="Forms"> <forms> <credentials passwordFormat="Clear"> <user name="test1" password="password" /> <user name="test2" password="password" /> </credentials> </forms> </authentication>
-
Still in the Web.config file, remove the < allow users="*" / > line from within the < authorization > element. This line grants access to anyone, and we ve just erased it.
-
Still within the < authorization > element, add the following line to deny access to all unknown users (that is, those not authenticated):
<deny users="?" />
-
Create a page called login.aspx. By default, all unauthenticated users will be redirected to this page. Add TextBox controls (txtUsername and txtPassword) for your browser to supply credentials. Also, add a CheckBox control (chkPersist) to be used if the user wants his or her machine to automatically log them in next time.
-
Behind a login button on your login.aspx page, add code similar to the following to authenticate your user:
If System.Web.Security.FormsAuthentication.Authenticate(_ txtUsername.Text, txtPassword.Text) = True Then System.Web.Security.FormsAuthentication.RedirectFromLoginPage(_ txtUsername.Text, chkPersist.Checked) Else Response.Write("Invalid credentials go back and try again!") End If
And that s it! Now, whenever a user visits a page in your application ”and they re unauthenticated ”they ll be redirected to login.aspx. From there, they ll be able to provide credentials. The .Authenticate method attempts to match these with a valid username and password combination in Web.config. If the credentials are invalid, a generic error message is displayed. If everything is fine, the .RedirectFromLoginPage method runs, taking the username and whether the login persists (that is, is remembered by the computer between sessions) as arguments, then sends the user back to the initially requested page. (See Figure 3-9.)
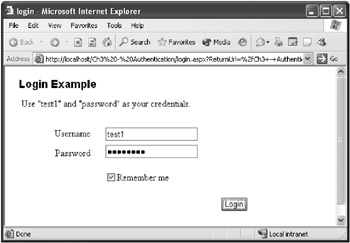
Figure 3-9: Authentication kicking in, as I try to access a restricted page
After this, whenever you need to refer back to the username, simply check out the User.Identity.Name property. And, when the user requests to explicitly log out, run code similar to the following:
System.Web.Security.FormsAuthentication.SignOut() Response.Redirect("login.aspx")
| TOP TIP | If you don t want to use login.aspx as your login form, you can change the page by adding a loginUrl attribute to the < forms > element of your Web.config file. For example, the following tag makes myloginpage.aspx the default login page: <forms loginUrl="myloginpage.aspx" /> |
Forms Authentication, Without Web.config
The sort of Forms authentication discussed in the last tip is, however, relatively limited. Unless you have just a few core user groups, which can be easily stored in Web.config, it s not awfully useful. And the passwords are stored in plain text XML, which means that anyone in your development team could retrieve them (unless you encrypt to MD5 format and change the passwordFormat attribute).
So, how can you authenticate users using information from a database, say?
It s easy: simply omit the .Authentication method in the procedure. In its place, add your own code, perhaps querying a table using ADO.NET code and validate the provided information. If it s acceptable, run the .RedirectFromLoginPage method. Everything else will work as normal.
Note that, if you want to remove the sample users from your Web.config file, replace the whole < authentication > < form > < /authentication > section with just < authentication mode="Forms" / > .
Authenticating Just Part of Your Site
Sometimes you don t want to authenticate all of your Web application. In some situations, you may just want to keep a couple of pages, such as a basket checkout form, available to only those authorized users.
Yes, you could try doing it manually by remembering some sort of session variable and/or by using cookies. But a much neater solution is to use a little-known trick that allows you to still use ASP.NET Forms authentication, but only with an exclusive number of pages on your site.
Here s how:
-
Alter your Web.config file so it uses Forms authentication. You can do this by following the first step in the Five Steps to ASP.NET Authentication tip, if you ll be using Web.config to store the users. Or simply change the <authentication> element to < authentication mode="Forms" / > , if you re going to authenticate using your own database, et cetera. In this tip however, we re not going to deny regular, unauthenticated visitors .
-
Still in your Web.config file, just underneath the < configuration > element, add the following code, replacing checkout.aspx with the page you want to protect. This will ensure that ASP.NET denies access to any unauthenticated users attempting to view this page. You can add as many < location > blocks as you wish and can include filenames and folders in the path.
<location path="checkout.aspx"> <system.web> <authorization> <deny users="?" /> </authorization> </system.web> </location>
-
Go ahead and create your login.aspx page as you did in the last tip.
And that s it! You ve created a Web application that uses Forms authentication but grants access to all users by default. You ve then added a clause in Web.config that states all those users who are attempting to view checkout.aspx must be authorized first ”and are therefore redirected to login.aspx when they access the page.
Note that these changes to the Web.config file are the only real difference to the authentication process. The other methods of logging out, retrieving the username, and so on all work in exactly the same way as with full authentication.
The Best Place to Store Your Settings
Download supporting files at www.apress.com .
The files for this tip are in the Ch3 ” Settings folder.
Many Web developers end up storing important pieces of data ”database connection strings, passwords, default settings ”as troublesome constants. The problem with this is that they re difficult to edit: the slightest of changes means a complete recompile.
However, with ASP.NET, there is an easier way. It s likely you re well aware of the Web.config file, which stores settings for your applications, such as the session state timeout and authentication mode. It can also hold your own settings.
How? It s easy. Simply add your own personal settings to the Web.config file, like this:
<configuration> ... <appSettings> <add key="serverName" value="diomedes" /> </appSettings> ... <system.web> ... </system.web> </configuration>
Here, I ve added a key called serverName containing a value of diomedes . You can list as many values here as you like: just keep adding < add > elements. And how do you read the value in your code? Simply reference the AppSettings collection of the System.Configuration.ConfigurationSettings class, as so:
x = System.Configuration.ConfigurationSettings.AppSettings("serverName") And don t forget: Web.config is just an XML file and easily editable without a recompile. You could even use a third-party control, such as the Web.config editor from Hunterstone to simplify all your administration (get your free copy of v1.3 from www.hunterstone.com/downloads.aspx). Easy!
Steal Fantastic Forum Code from Microsoft and Save Yourself Hours
I ve always found bulletin boards to be the easiest method of generating visitor loyalty at a site. The trouble is, the very best ones always take an absolute age to build. But who mentioned doing it yourself?
Back in July 2001, ASP author Scott Mitchell decided to create his own bulletin board as a pet .NET project. Within months, Microsoft had stepped onto the scene and adopted it as its very own online ASP.NET forum, which you can find online at www.asp.net. (See Figure 3-10.)
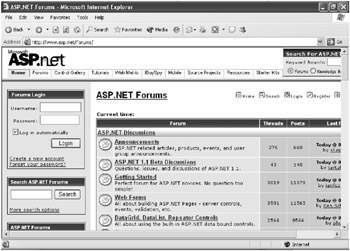
Figure 3-10: Have all this forum functionality, in seconds! Web Sites in Seconds!
Well, after months of new features and major tweaking, our favorite software giant has quietly unveiled the full source code for download at www.asp.net/Forums/Download ”and for free, too!
At the time of writing, the code release was still in a very well-developed beta mode, but there are big plans to release the absolute final version over the coming months.
It s only a quick tip, but it could save you hours.
Integrating with PayPal s Instant Payment Notification
Download supporting files at www.apress.com .
The files for this tip are in the Ch3 ” PayPal folder.
As the PayPal payment service continues to grow in popularity, so does the number of developers wanting to integrate it into their sites. Thankfully, it s relatively simple, merely involving a number of cross-server calls to ensure that the payment has completed successfully.
To help get you up and running, however, BlueVisionSoftware.com has produced a handy little instant payment notification (IPN) tutorial available online at www.bluevisionsoftware.com/WebSite/TipsAndTricksDetails.aspx?Name=PayPal.
It s written in C#, but it s easily understandable. (If you re confused , see Chapter 9!) We ve also included the tutorial in the download that comes with this book, and it s available at www.apress.com. Check it out!
EAN: 2147483647
Pages: 76