Hack 65. Create an Invert Effect Using Movie Maker
| < Day Day Up > |
|
Windows Movie Maker includes an invert effect that isn't really available for use. Here's how you can get it out of the depths of Movie Maker and into your project. In some instances, you might want to invert your video. Inversion causes your image to reverse its colors, kind of like a photo negative. Whether to create a unique effect, or as a means to accomplish a more complex effect, inversion can be quite useful. The Microsoft engineers realized this fact and created a Negative effect for use in Movie Maker to accomplish inversion. However, it is not available "out of the box."
6.6.1. Creating the EffectMovie Maker allows you to create your own effects. Using a text editor, such as WordPad, you can create effects using XML. To create the invert effect, open a new document and type the following: <TransitionsAndEffects Version="1.0"> <Effects> <EffectDLL gu> <Effect name icon comment="Negative"> <Param name="InternalName" value="Standard" /> <Param name="Invert" value="-1.0" /> </Effect> </EffectDLL> </Effects> </TransitionsAndEffects>
Save the file as invert.xml (as a Text Document file) to C:\Program Files\ Movie Maker\Shared\AddOnTFX, as shown in Figure 6-17. If the AddOnTFX directory doesn't exist, create it. When Movie Maker starts, it looks inside this directory for additional effects and transitions to use. Figure 6-17. Saving the invert.xml document in the AddOnTFX folder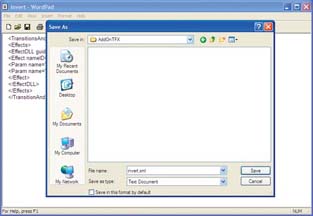 6.6.2. Loading and Using the EffectAfter saving the file, launch Movie Maker. If it is already running, you will need to quit and restart it (the application, not the computer). Once Movie Maker is running, choose Tools If the effect is available, you will be able to select it and apply it to your footage. To do so, simply drag-and-drop it onto the clip to which you would like to apply the effect. Yup, it's just like any other effect in your palette. Figure 6-19 shows an image with the Negative effect applied. 6.6.3. Hacking the HackIf writing code is your thing, there is a world of creative effects and transitions waiting to be unleashed. Some companies exist solely based on creating effects and transitions for Movie Maker, and many people make a living writing them as well. If you would like to explore the wonderful world of creating your own effects, head over to the Microsoft Developers Network Library for Movie Maker Effects and Transitions at http://msdn.microsoft.com/library/default. asp?url=/library/en-us/dnwmt/html/moviemakersfx.asp. Figure 6-18. The Negative effect, available to use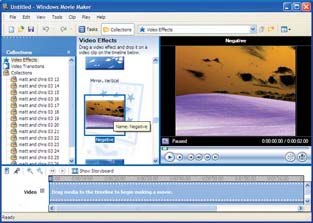 Figure 6-19. Making video look like a film negative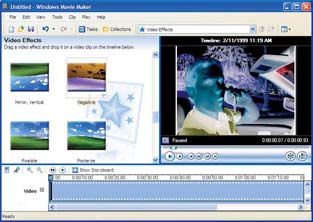 |


 Video Effects, or click on the Video Effects item, to make sure the Negative effect is available. Figure 6-18 shows the Negative effect as it should appear in the Video Effects pane of Movie Maker.
| < Day Day Up > |
EAN: 2147483647
Pages: 158
- ERP System Acquisition: A Process Model and Results From an Austrian Survey
- The Second Wave ERP Market: An Australian Viewpoint
- The Effects of an Enterprise Resource Planning System (ERP) Implementation on Job Characteristics – A Study using the Hackman and Oldham Job Characteristics Model
- Relevance and Micro-Relevance for the Professional as Determinants of IT-Diffusion and IT-Use in Healthcare
- Development of Interactive Web Sites to Enhance Police/Community Relations