Hack 23. Shoot Clearly Through a Window
| < Day Day Up > |
|
When shooting through a window, images are often blurred or overexposed. But they don't need to be. Sunlight provides great natural light. But when you point your camera toward a window during the day, you'll notice the view outside is blurry and possibly even blown out. By covering the windows you are shooting toward with a neutral density (ND) gel, you can capture sharp images outside the window while keeping your subject in focus.
When covering a window, you should place the gel inside the window. In addition to keeping the gel free of debris, you will easily be able to make quick adjustments, should the need arise. Figure 2-15 shows a neutral density gel in a standard 21" x 24" sheet. Figure 2-15. A standard size sheet of neutral density gel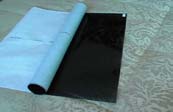 Depending on the physical aspects of the window, you might be able to clip the gel to hold it in place [Hack #25]. If you can't clip your gel, you can resort to taping your gel in place. You should consider using a special adhesive tape made by Permacel, commonly called gaffer tape or camera tape (depending on the width). What makes gaffer tape special is that it doesn't leave a sticky residue when it's removed. This is especially important when you're shooting in a location that you're "borrowing," because you probably want cause the least amount of damage possible. After placing your gel, you can go ahead and shoot your scene with a clear view of the outside world. Figure 2-16 shows a window half-covered with an ND gel to demonstrate the difference realized by using a gel. Figure 2-16. Shooting through a window using a neutral density gel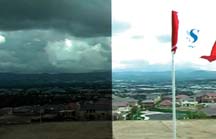 Although your viewers will never notice the gel or the difference it has made (because they have nothing to compare it to), you will have made a difference in their experience of your scene. |

| < Day Day Up > |
EAN: 2147483647
Pages: 158