Recipe 10.12. Displaying Images While Controlling Stretching and Sizing
ProblemYou want to display a picture in a PictureBox on a form, but you aren't sure which size mode setting to use. Figure 10-13. Thumbnails are easy to create at any chosen size and quality setting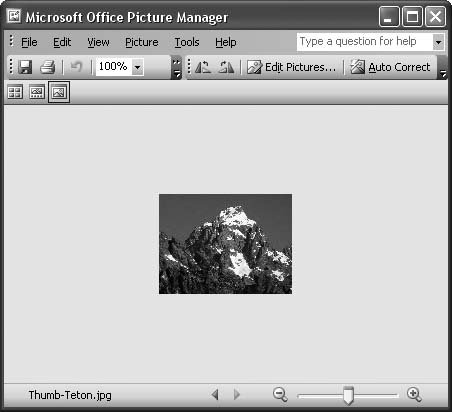 SolutionSample code folder: Chapter 10\StretchImage The sample code in this recipe lets you interactively experiment with the display of a picture on a form to determine which size mode setting will work best for your needs. DiscussionThe PictureBox control is ideal for displaying JPEG and other picture files. However, one of the property settings of the PictureBox changes the way images are displayed in a significant way, and having a clear means of visualizing how it affects the displayed images can help you plan your applications better. The code presented here provides an easy way to see exactly how the SizeMode property works. Create a new Windows Forms application. Add a PictureBox control to the form, and set its Dock property to Fill. This causes the PictureBox to automatically stretch to fill the client area of the form on which it resides. (The image displayed in the PictureBox won't necessarily stretch to fill the same areathat depends on the SizeMode setting of the PictureBox.) Next, add the following code to the form's code template. The code toggles through the SizeMode settings each time you click on the PictureBox, letting you easily see and experiment with the various settings: Private Sub PictureBox1_Click(ByVal sender As System.Object, _ ByVal e As System.EventArgs) Handles PictureBox1.Click ' ----- Toggle to the next size mode. Static displayState As PictureBoxSizeMode = 0 ' ----- Move to the next state. If ([Enum].IsDefined(GetType(PictureBoxSizeMode), _ CInt(displayState) + 1) = True) Then displayState += 1 Else ' ----- Wrap to the first choice. displayState = 0 End If ' ----- Update the display. PictureBox1.SizeMode = displayState Me.Text = "PictureBoxSizeMode." & displayState.ToString( ) End Sub This code toggles through all available values of the PictureBoxSizeMode enumeration, the one used to set the size of a PictureBox control. To select an image when starting the application, add the following code to the form's class: Private Sub Form1_Load(ByVal sender As Object, _ ByVal e As System.EventArgs) Handles Me.Load ' ----- Let the user choose a picture. Dim locateFile As New OpenFileDialog ' ----- Prompt for the initial file. locateFile.Filter = "JPG files (*.jpg)|*.jpg" locateFile.Multiselect = False If (locateFile.ShowDialog( ) = _ Windows.Forms.DialogResult.OK) Then ' ----- Show the selected picture. PictureBox1.Load(locateFile.FileName) Else ' ----- Exit the program. Me.Close( ) End If ' ----- Show the initial state. Me.Text = "PictureBoxSizeMode." & _ PictureBox1.SizeMode.ToString( ) End Sub Figures 10-14 and 10-18 show the display of a picture when SizeMode is set to StretchImage. This setting causes the image to distort horizontally and/or vertically to fit the control, rather than retaining its original proportions. Figure 10-14. The StretchImage setting distorts images to fit within the dimensions of a PictureBox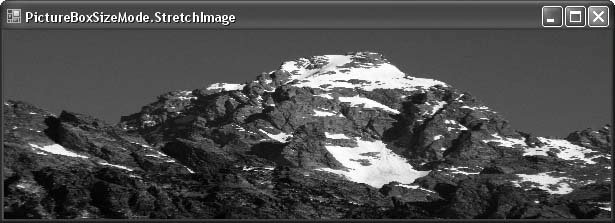 As you can see in Figure 10-15, with the Zoom setting, the picture retains its original proportionality. However, this can cause blank areas to appear either on both sides of or above and below the image. The picture appears smaller than when it's stretched to fit the dimensions of the PictureBox, but at least it's not distorted. Figure 10-15. The Zoom setting reduces an image's width or height to keep it within the PictureBox with no distortion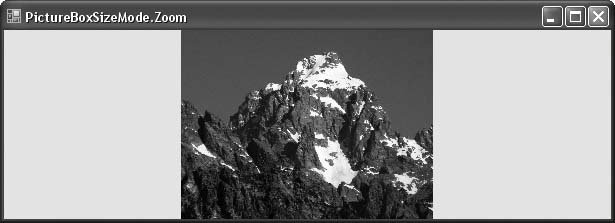 In Figure 10-16, SizeMode is set to AutoSize, which means the PictureBox automatically resizes itself to show the entire picture at its full resolution. Because the PictureBox is limited to the surface of the form, though, only the upper-left corner of the picture is seen here, and only by expanding the form to great lengths will you begin to see the edge of the mountain in the bottom-right corner of the form. In this figure we only see blue sky and a little bit of the mountain. You may also detect a small blurry bird image in the very corner. Figure 10-17 shows the picture when SizeMode is set to CenterImage. The picture is once again shown full-scale, as when the mode was set to AutoSize, but in this case you see the very center of the large picture rather than its upper-left corner. Figure 10-16. The AutoSize setting displays images at full size, even if they don't fit within the area provided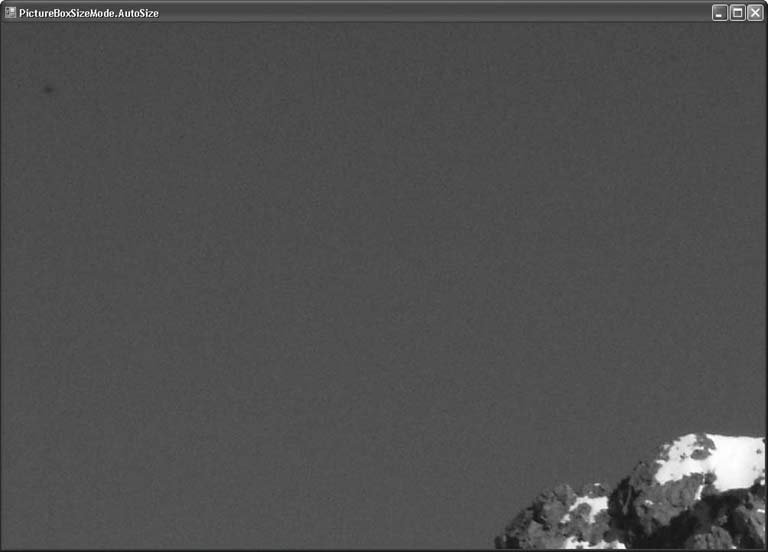 Figure 10-17. CenterImage displays the center of the image in the center of the PictureBox at full size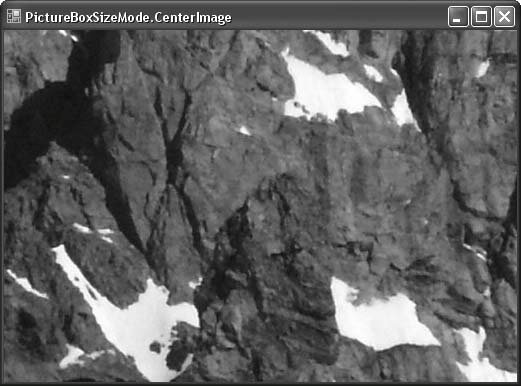 Figure 10-18 show what happens after the demonstration program cycles through the settings. Figure 10-18. The demonstration program cycles through the settings, returning to the original StretchImage setting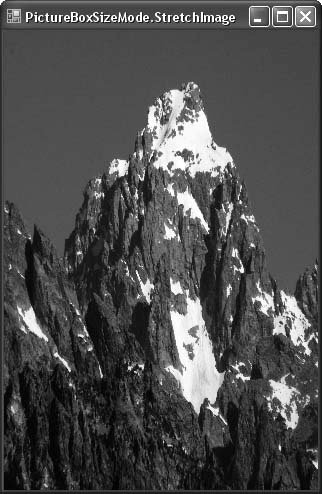 Each setting has its uses, and you should become familiar with the effects of each when displaying pictures or other graphics. |
EAN: 2147483647
Pages: 400