Managing Internet Information Services Web Server
| Previous versions of Internet Information Services were installed by default on Windows NT Server and the Windows 2000 Server family. Furthermore, in earlier versions (that is, IIS 5.0), IIS servers were not locked down by default. Many unnecessary settings were on by default. This opened the door to widespread vulnerability and attacks. Locking down IIS server was tedious and had to be performed manually. Installing any of the Windows Server 2003 family of products, except Windows 2003 Web Server Edition, does not install IIS 6.0 by default. Administrators must explicitly select and install IIS 6.0 on all but the Web Server Edition. Also note that IIS 6.0 is disabled by default when a Windows server is upgraded to Windows Server 2003. When IIS 6.0 is installed, it is configured by default in a locked-down state. After installation, IIS 6.0 accepts requests for static files only until you configure it to serve dynamic content. IIS 6.0 is more reliable, easier to manage, and offers high performance and scalability along with being much more secure. New features and enhancements include server consolidation, lower total cost of ownership (TCO), and less planned and unplanned downtime. The following section shows you how to install and configure IIS 6.0, install and manage ASP.NET, implement Web applications and application pooling, manage the metabase and remote locations, and how to monitor and optimize IIS 6.0. Installing IIS 6.0One of two methods is used to install IIS 6.0 on Windows Server 2003. Use either the Configure Your Server Wizard or the Add/Remove applet in the Control Panel. The following steps will install IIS 6.0 from the Add/Remove applet:
Configuring IIS AuthenticationWindows Server 2003 offers improved authentication and authorization. Although you're familiar with the Windows authentication process, you probably do not thoroughly understand what authorization is all about. Authorization allows or denies a user permission to perform a process or task. Windows Server 2003 now supports .NET Passport as a method to authenticate. Authorization in Windows 2000 IIS 5.0 has been enhanced in IIS 6.0 to include the use of a new authorization framework. Web applications can make use of URL authorization along with Authorization Manager to control user access. Domain administrators can make use of constrained, delegated authorization to delegate control to individual computers and services only. To start IIS 6.0 Manager, click Start, All Programs, Administrative Tools, Internet Information Services (IIS) Manager. IIS opens. User authentication can be set up for your Web resources by configuring property sheets at the Web site, directory, or file level. Table 4.2 offers a summary of Web site authentication methods along with a brief description of each. Table 4.2. Summary of Web Site Authentication Methods
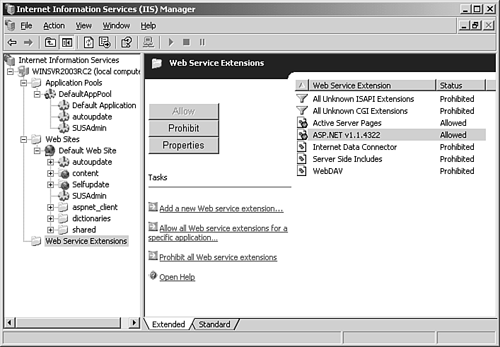
Installing and Adding ASP.NET to Web Server ExtensionsThe .NET Framework and ASP.NET offer high functionality with rapid application development (RAD) and improved request-processor architecture integration with IIS 6.0. By default, ASP.NET is not installed. When you install ASP.NET, it adds the ASP.NET to the Web Server extensions list with the allowed status as shown in Figure 4.9. Figure 4.9. You can verify the status of ASP.NET Web Server Extensions via IIS Manager. The ASP.NET configuration system has great flexibility in defining configuration settings. You can define configuration settings when your applications are first deployed and later add or revise the configuration. Any standard text editor or XML parser can be used to create, edit, and manage configuration information because the configuration information is stored in XML-based text files. An ASP.NET application server can store many configuration files, all named Web.config , in multiple directories. The Web.config file applies configuration settings to its own directory and all child directories below it. To protect the configuration information files, ASP.NET configures IIS to prevent direct browser access. Command Line AdministrationIIS 6.0 includes many new management tools to reduce time and management duties . For example, the XML configuration file can be modified while the server is still up and running. Command-line administration using supported scripts is designed to do most common Web management administration tasks from the command prompt. These scripts use the Windows Management Instrumentation (WMI) service to retrieve and write information to IIS's metabase. The following command-line scripts are included:
Creating and Managing Web ApplicationsTo create an application, you need to designate a directory (called the application root ) as a starting point. You can give it a friendly name that appears in IIS Manager.
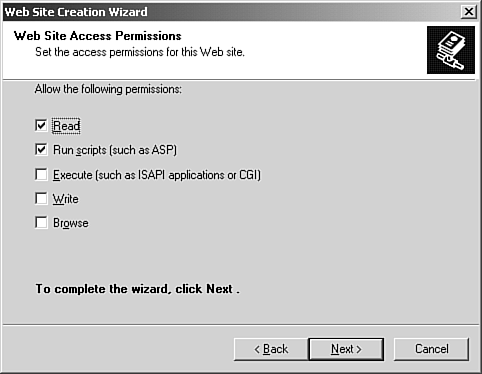
To create a new Web site and the default application, perform the following steps:
Implementing Application PoolingWeb sites and applications use self-contained units called application pools as part of their fault-tolerant process architecture. Application pools are separated by boundaries so that applications run unaffected with other applications. After an application is created, you can isolate it to run in a process separate from the Web server and other applications. You isolate the application in one of the two following modes: worker process isolation mode or IIS 5.0 isolation mode. To isolate an application in worker process mode, perform the following steps:
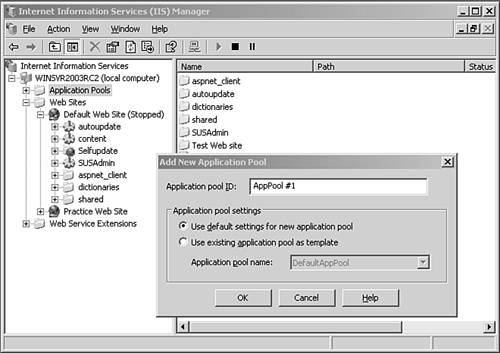
To create application pools, perform the following steps:
To assign an application to an application pool, perform the following steps:
Managing the IIS 6.0 MetabaseThe metabase configuration file, Metabase.xml , stores the IIS configuration settings in a hierarchical structure. When IIS starts, Metabase.xml configuration settings are read and copied into IIS cache memory, referred to as in-memory metabase . Metabase.xml is a plain-text file that is easily read and configured using a text editor like Notepad. After your Web site and application are up and running, you can save the metabase configuration as a backup copy. Each time the metabase changes, IIS automatically creates a backup of the metabase configuration and schema files. To create a manual metabase configuration backup, perform the following steps:
Managing an IIS Server RemotelyIIS 6.0 includes a new Web-based administration console called the Remote Administration tool for remotely managing other IIS servers. Using your Web browser on either your company's intranet or Internet connection, the Remote Administration tool enables you to remotely configure and manage a server from a remote client. You can configure network settings, set disk quotas, manage local user accounts, create and delete Web sites, and restart the remote Web server using the Web interface for Remote Administration tool. You can also use IIS Manager to remotely manage your company's intranet or Terminal Services to connect to your IIS Manager. To install and add the Remote Administration tool, perform the following steps:
To view the Remote Administration tool, expand your local computer, expand the Web Sites folder, right-click on the Administration Web Site folder, and click Browse. To administer an IIS Web server using the Remote Administration tool, open your intranet site using your Web browser and type the following in the address bar: http:// hostname :8099 , where hostname is the name of the IIS computer you want to manage. Monitoring IIS 6.0The WWW Service Administration and Monitoring component pings worker processes periodically to determine whether they're blocked. If a process is completely blocked, the WWW service terminates the process and creates a new worker process to replace it. IIS 6.0 also periodically checks the status of application pools and will automatically restart the Web site and applications in the event of a failure. Web sites that fail to open in a short time period are automatically disabled, offering further stability and protection. Introduced in Windows 2000, the Windows Management Instrumentation (WMI) tool provides access to important data and statistics such as performance counters and system configuration. IIS 6.0 now includes WMI for monitoring performance. Administrators can now manage query support and associations between objects using the WMI tool included with IIS 6.0.
|
EAN: 2147483647
Pages: 132