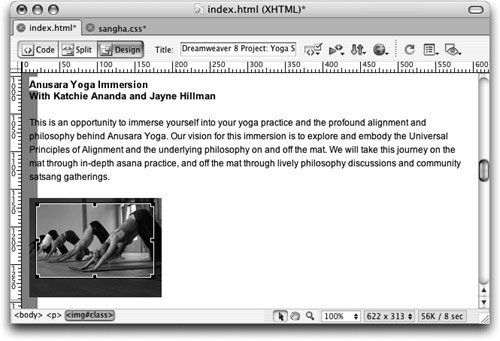
| Several basic image-editing functions are available directly within Dreamweaver, enabling you to alter images without the need for an outside editor. Although you need an external image editor to initially create the graphics for your site or to make major changes, you can now make a variety of modificationsincluding cropping, adjusting the contrast, and sharpeningright in the Dreamweaver Document window using the integrated Fireworks image-editing features. 1. | Select the class.jpg image.
The Image Editing options appear in the Property inspector.
 | | | 2. | Click the Crop tool in the Property inspector.
An alert box informs you that the operation will change the actual image file on your disk. You can click the Don't Show Me This Message Again dialog box to avoid seeing this message again. Click OK to continue.
A selection area appears inside the image, indicated by a solid black line (Macintosh) or a dashed line (Windows). Grab handles are located in the corners and centers of each side of the selection area. The selection area might be difficult to see on dark images. By default, the selection area is slightly smaller than the image and has approximately the same proportions. The area within the selection is clear; the area outside the selection is grayed-out to show that it will be cropped. The cursor, when placed in the center of the selection area, turns into a hand (Macintosh) or a cross-hair with arrows (Windows) so that you can click and drag to move to selection area. You can click the cursor on any of the handles and drag to reduce or enlarge the size of the selection area.
| | | 3. | Adjust the size of the crop area so that it is smaller than the original image and then press Return (Macintosh) or Enter (Windows) to crop the image.
 Tip You can also double-click inside the selection area or click the crop icon in the Property inspector to apply the change. To cancel the crop, click elsewhere in the Document window outside of the image. The image is now cropped to the area that you selected. You might notice that the file size of the image is reduced; how much depends on the amount of the image that you cropped.
The original size of the class.jpg image was approximately 7 KB. The image size is given near the upper-left corner of the Property inspector when the image is selected.
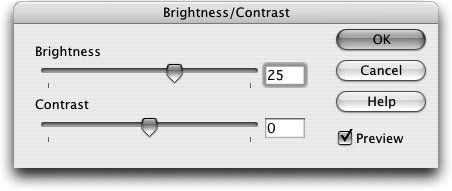
Note If you alter an image using Dreamweaver's Image tools, all instances of that image in your site will change. If this is not what you intend, you might want to make a duplicate of the image and perform your adjustments on the copy. If you make a crop and decide you don't like it, you can revert to the original image by using Dreamweaver's undo command. Choose Edit > Undo Crop or use the keyboard command Cmd+Z (Macintosh) or Ctrl+Z (Windows) to switch back to the original image. | 4. | With the class.jpg image selected, click the Brightness And Contrast tool in the Property inspector. Change the brightness to +25 and click OK.
 The alert informs you that the image file will be changed. Click OK to continue.
The Brightness/Contrast dialog box appears, with one slider for Brightness and one for Contrast. The sliders range from 100 to +100 with the center and default being 0. You can enter any value within the range into the text fields, or you can click and drag the sliders. Moving a slider to the left into the negative numbers decreases the brightness or lowers the contrast; moving a slider to the right into the positive numbers increases the brightness or heightens the contrast.
The Preview box is checked by defaultthis allows you to immediately see the effects of your adjustments in the Dreamweaver Document window.
Note The brightness change you apply in this step is fairly drastic so that can clearly see the effect upon the image. Take care with using this option because it can severely affect the quality of an image if overused. | 5. | With the class.jpg image selected, click the Sharpen tool in the Property inspector. Adjust the slider value to 2 and click OK.
|
The alert informs you that the image file will be changed. Click OK to continue. The Sharpen dialog box uses one slider with a range of 0 to 10 and, like the Brightness and Contrast feature, it has a Preview option turned on by default. You can repeat this function if necessary. Take care when using this option because it can severely affect the quality of an image if overused. Extreme sharpening can cause the image to appear pixilated. Note The additional image-editing options in the Property inspector include Edit, Optimize In Fireworks, and Resample. You must have Fireworks installed to take advantage of the option to optimize files. The Optimize Images dialog box allows you to make a wide variety of changes, including switching the format of images, adjusting the quality (JPEGs), and adjusting the color palette (GIFs). Keep in mind that you can lower the quality of an image and reduce its file size, but you can't increase the quality. To obtain a better image, you need to use original source files. The Launch External Editor opens in whichever editor you defined as Primary in the Preferences, which you set earlier in this lesson. The Resample tool gives you the option of increasing or decreasing the resolution of your images. It is always better to start with a higher resolution file and decrease the resolution to the desired size, rather than increasing a low-resolution file. Even when increasing the resolution, you can't add quality to an image that isn't there to begin with. Web resolution is 72 ppi (pixels per inch).
|