Flylib.com

Books Software


Using the Netscape Resize Layer Fix


Using the Netscape Resize Layer Fix

Netscape 4.x versions have a problem with layers that occurs when the user resizes the browser window: The layer changes its shape when the browser window is resized, which can cause problems with the page. You can fix this problem by inserting the Netscape Resize Layer Fix JavaScript code into your document whenever you use layers. The JavaScript code fixes the Netscape 4.x problem and does not affect other browsers.

Dreamweaver will automatically add the Netscape Resize Fix when you create a layer in a document. When you delete all layers from a document you should run this command and remove the code if the script is still in your document. Because you converted from layers to a table in the previous exercise, you'll remove the script now because it is no longer needed.

1.

In the layers_tables.html document, choose Commands > Add/Remove Netscape Resize Fix.

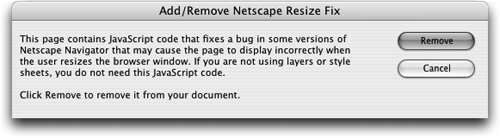
In the Add/Remove Netscape Resize Fix dialog box that opens, you can either add or remove the JavaScript code, depending on whether or not the script is in the document. The code causes the page to reload if the user resizes the browser window. Dreamweaver adds this code to your page automatically. If it is not in a page that uses layers, you can add it easily with this dialog box.

The Netscape Resize Fix Javascript is located in the head of the document, before the <body> tag and can be seen in either Split or Code view. You'll work with the code more in Lesson 16.

2.

Click Remove.

The Netscape Resize Fix JavaScript code is removed from the page.

3.

Save the layers_tables.html document.

You can close this file.


Animating with Timelines

HTML pages are generally motionless unless you add an animated GIF or a Macromedia Flash movie. You can roll over a button that might appear to move slightly as it swaps out with another image, but it remains static on the page. With Dynamic HTML (DHTML), you have the option to add more extensive animations to your Web page directly within Dreamweaver. These animations are controlled with JavaScript within the HTML page, without the need of a plug-in. The limitation on DHTML animations is that users must use a 4.0 or later browser to view the pages; however, these animations are far more restricted than Flash with which you can do far moreFlash files are also generally more compatible and less buggy . It is recommended to use Flash movies instead of timelines whenever possible. The timelines feature was removed from Dreamweaver MX 2004 for these reasons. It has been added back into Dreamweaver 8 to provide Web developers with the ability to easily edit and maintain legacy pages that were created with previous versions of Dreamweaver. The general features and components of timeline animations are outlined here, for background information on working with older pages. If you are creating an animation, however, the best method is to use Flash.


Understanding How Timelines Work

All objects that are included in a timeline animation are contained in layers. The layers are arranged in a timeline, which generates a path of movement and controls timing. A timeline consists of a series of frames, much like frames in a movie. Each frame displays on the Web page at a specific point in time, depending on how many frames per second you specify and how long the animation is. You can control the placement and properties of each layer in a frame. A frame can also trigger a behavior during the animation.

To move an object (such as text or a graphic), the object must be contained in a layer. Objects such as images can be added to the timeline without placing them in a layer, but you will not be able to animate their positions .